⏳ 22 min read · Last updated: September 2026
Disclosure: As an Amazon Associate I earn from qualifying purchases. Links marked for Amazon are affiliate links, at no extra cost to you.
🌱 Hands-on tested: the KETOTEK pH, EC and temperature meter, the Apera PH20 pH tester and the Apera EC20 EC tester. I have used these in my own grows. How I test and choose products.
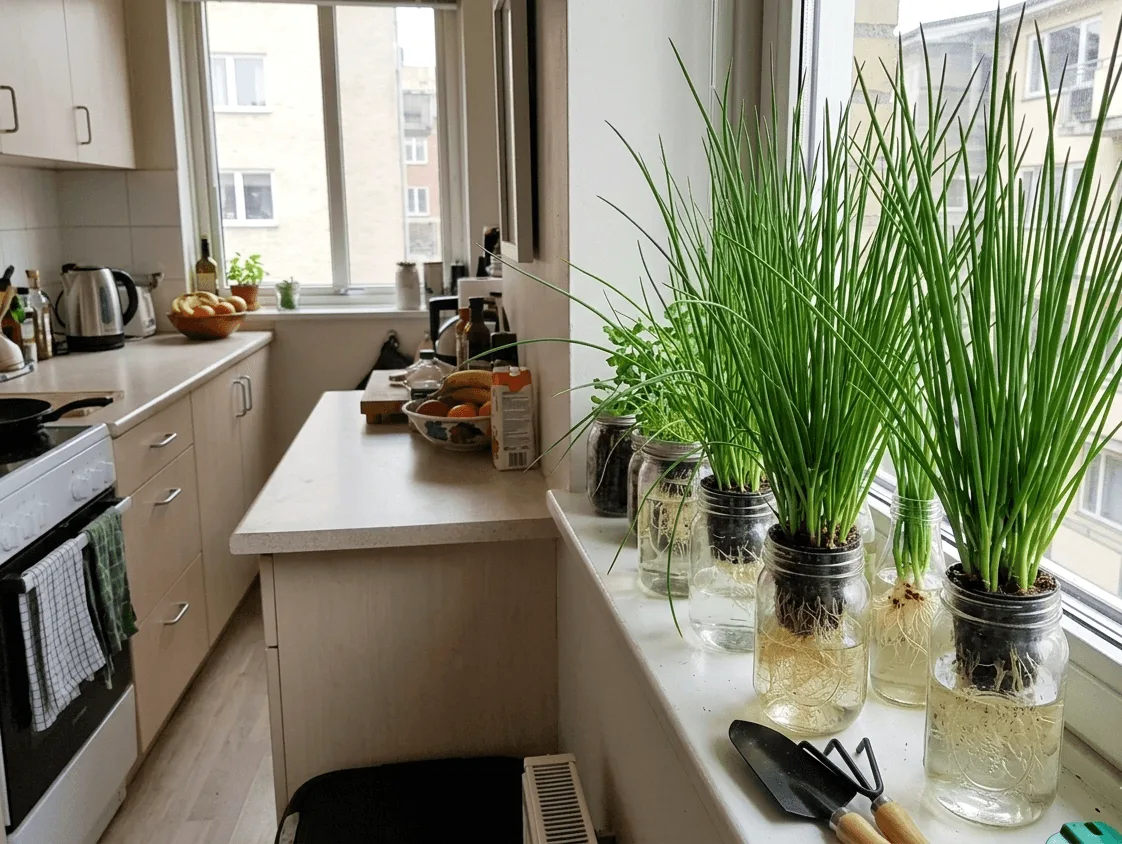
Finding room for hydroponic chives in a small apartment kitchen is easier than it looks, because they grow straight up and take almost no counter space. I used to buy those plastic clamshells of tired herbs from the supermarket, then watch half of them turn to slime in the fridge. Potting them in soil on the windowsill went no better, since they dried out and yellowed within a fortnight.
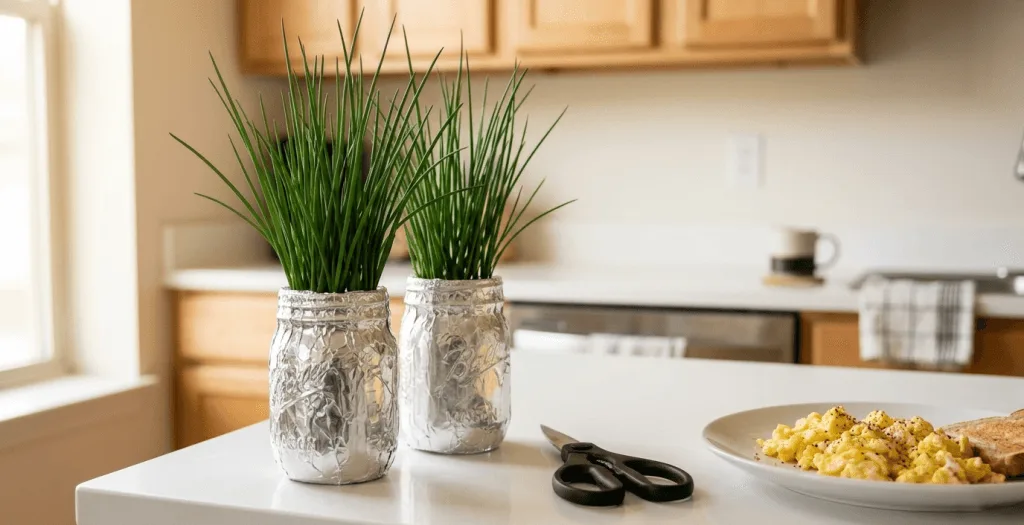
A water-based jar fixed all of it. Now I snip fresh blades for my morning eggs whenever I want, and the same clump has been producing for months. Chives are one of the longest-lived crops on my shelf, which makes them unusually good value for the space they occupy.
I killed a fair few batches getting there. I underfed them for months without realising, burned them under a light hung too close, and flooded the counter more than once. This guide is the version I wish I had started with.
They look like grass, so most guides feed them like lettuce. They are a medium to heavy feeder wanting EC 1.8 to 2.0 once established, which sits close to basil.
Thin pale blades are the single most common complaint with this crop, and underfeeding causes it. Run them at lettuce strength and they simply stall.
📐 Chives At A Glance
Chives are rated Easy but slow. They are close to impossible to kill, though the first harvest takes longer than most beginners expect. Once they get going, a single clump keeps producing for six months or more.
- Feed EC 1.8 to 2.0 when mature, because underfeeding is the usual failure here.
- Hold pH at 6.0 to 6.5, the upper half of the usual range, where every source agrees chives do well.
- Run 14 hours on and 10 off with the panel 6 to 8 inches above the blades.
- Leave 1 to 2 inches standing when you cut, so the basal plate can regrow.
- Expect the first harvest 7 to 9 weeks from seed (about 4 weeks from a transplanted seedling), then every 2 to 3 weeks after.
- Top off daily with plain water, then run a full reservoir change every 2 weeks.
🔎 Quick diagnosis table
| What you see | Most likely cause | Check this first |
|---|---|---|
| 🌾 Thin pale blades | Underfeeding, since chives eat more than expected | Raise EC toward 1.9 |
| 🚫 No regrowth after cutting | Cut flush with the medium | Always leave 1 to 2 inches standing |
| 📉 Stems flopping over limp | Light too far away, or no airflow | Measure the gap to the canopy |
| 🟤 Brown slimy roots | Warm water, therefore low oxygen | Reservoir temperature and aeration |
| 🍂 Crisp brown tips | Nutrient burn, so EC overshot | Test EC against 1.8 to 2.0 |
| 🐌 Nothing happening at week 4 | Normal, because this crop is slow | Wait, since first harvest is 7 to 9 weeks from seed |
🌿 Why Hydroponic Chives Make Sense Indoors
Most beginners start with lettuce, though herbs pay back more per inch of counter. Growing chives in water sidesteps the usual soil problems entirely, since there is no erratic moisture and no fungus gnats arriving in a bag of compost. My guide to the best herbs for small hydroponic systems covers how chives stack up against the alternatives.
Stable conditions are what herbs want, and an indoor setup gives you full control of light, water and food. The plant spends its energy on blades rather than hunting for nutrients through compacted soil. The result is thicker, darker, better-tasting growth.
✂️ The Cut-And-Come-Again Cycle
Chives grow from a central basal plate, pushing new blades up from the bottom rather than branching from the top. That growth habit is what makes the cut-and-come-again method work so well, since removing the top does not remove the growing point.
Snip what you need instead of pulling the plant, and it regenerates from energy stored in the roots. Regrowth shows within 3 to 4 days, with a full cut available again every 2 to 3 weeks. Regular trimming also encourages the basal plate to divide, so one clump becomes several over a few months and yields climb without you planting anything new.
📈 Faster Growth Than Soil Pots
Water delivers nutrients straight to the root surface with nothing in the way. Roots therefore spend less energy expanding to find food, and redirect it upward into blades. You notice thicker stalks and a deeper green sooner than you would in a pot.
In soil, roots push through dense earth to reach moisture, and that physical resistance slows everything down. A hydroponic jar removes the friction and keeps roots in an oxygen-rich solution all day.
📐 Space Efficiency In A Studio Kitchen
Chives grow vertically to 10 to 14 inches while staying narrow, so three or four clumps fit in one slim container with 3 to 4 inches between them. They cast almost no shadow over neighbours, which matters on a crowded shelf.
I keep a row of jars behind the sink, which makes grabbing a garnish mid-cooking effortless. Keeping them indoors also removes frost and seasonal swings from the equation, so the supply runs year-round.
🌱 Starting From Seed Or Grocery Cuttings
You can start chives from tiny black seeds or rescue rooted bases from a supermarket bundle. Seeds carry no risk of importing pests, though they are slow. Cuttings cut weeks off the timeline.
Either route needs the base anchored so the clump stands upright, and rockwool or clay pebbles both handle that job.
🧹 Preparing Rockwool Cubes
Rockwool holds moisture while letting air reach emerging sprouts, which suits slow germinators. Raw cubes carry a high alkalinity straight from the bag, so conditioning is not optional.
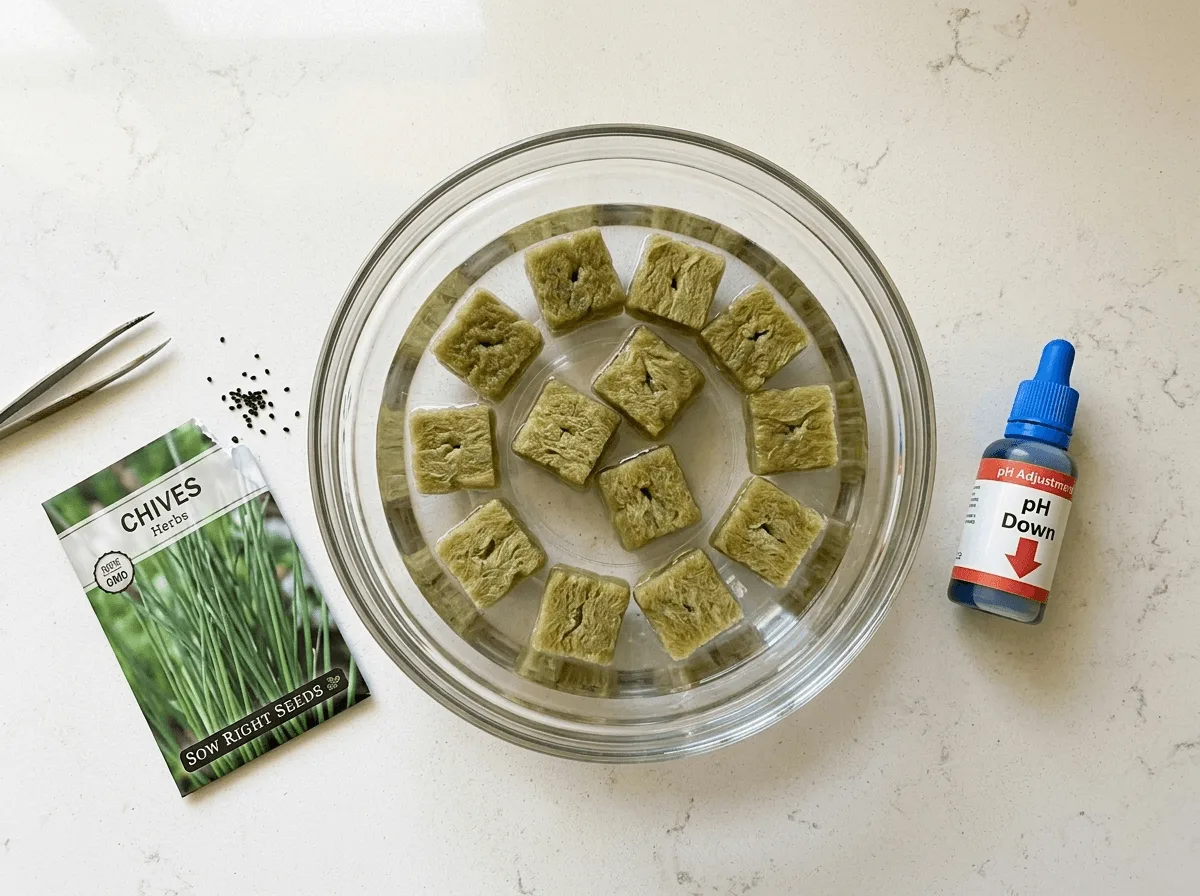
- Fill a bowl with lukewarm tap water.
- Adjust it down to pH 5.5 with your acidifier.
- Drop the dry cubes in and leave them undisturbed for one hour.
- Lift them out and shake gently, though never squeeze.
Squeezing crushes the internal structure, and once that collapses the cube cannot hold air. Seeds then drown in a waterlogged block. My guide on starting hydroponic seeds in rockwool without damping off covers the full process.
🫘 Sowing Without Damping Off
My first batch failed because I buried the seeds deep in a wet cube, assuming they needed covering. They rotted before showing green, which is the fungal problem called damping off.
Set 3 to 5 seeds on the surface instead, pressing them into the top layer with a toothpick so they touch moisture without sinking. Keep the cube in a warm dark spot and mist the top with plain water until shoots appear. Germination runs 7 to 14 days, which is slower than basil and worth knowing before you assume failure.
♻️ Propagating Grocery Store Scraps
Skipping germination saves nearly three weeks. Buy a bundle that still has the white bulbous bases with roots attached, which most larger supermarkets stock near fresh produce.
Trim the green tops to about two inches, then stand the rooted bases in a shallow glass of plain unchlorinated water. Change that water daily to stop bacterial slime forming.
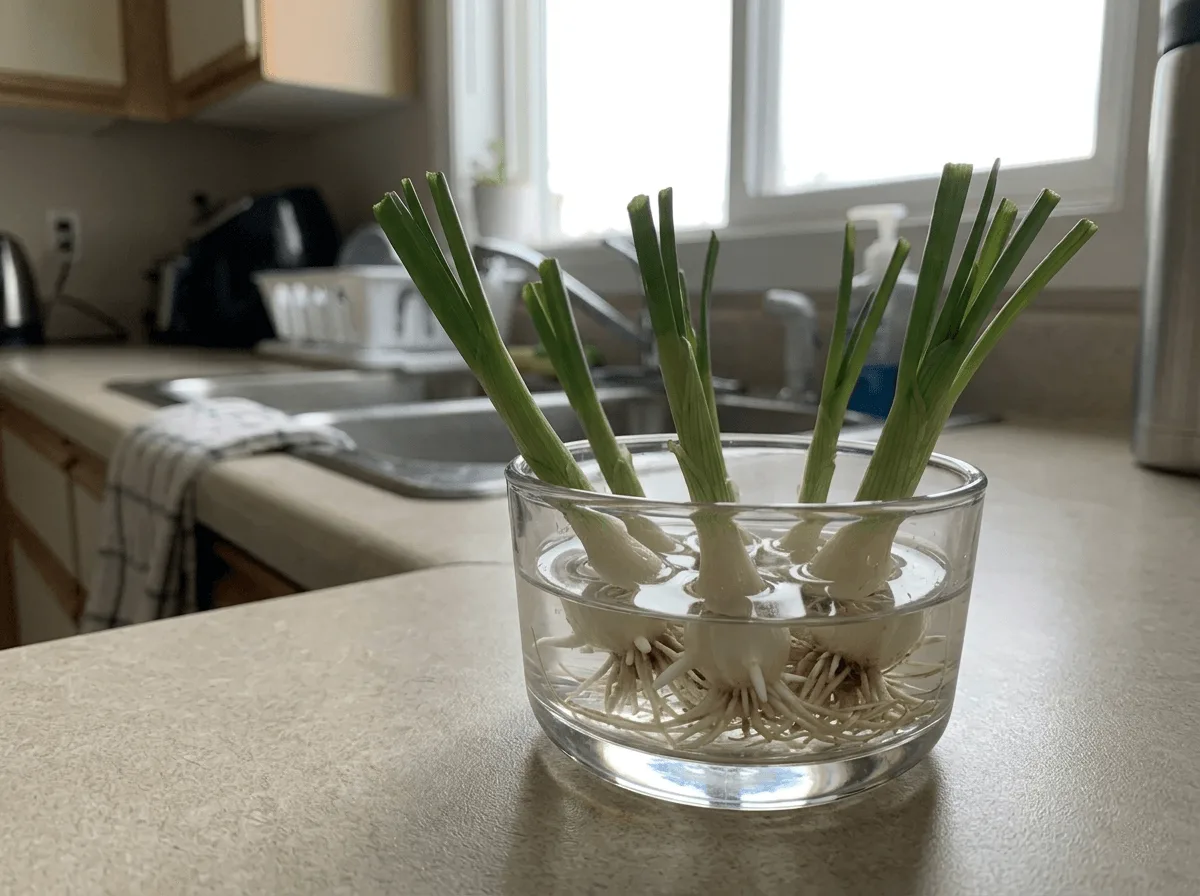
Fresh white roots appear within a week, and at that point the bundle transfers into a net cup packed with clay pebbles. The mechanics match my guide on regrowing green onions in water and moving them into hydroponics.
🏤 Choosing The Right System
Budget, space and noise tolerance decide this more than the crop does, since chives grow well in anything. Every option secures the clump in a net cup, and what changes is how water reaches the roots. A 1-quart container per clump with a 2-inch net cup is the minimum.
- Sunny windowsill available → Kratky jar, because it needs no outlet
- Low-light kitchen → countertop smart garden with its own light
- Want the fastest root development → deep water culture
If the options feel overwhelming, the free shopping list builder assembles exactly what a given setup needs without extras.
🧴 The Kratky Method For Silent Windowsills
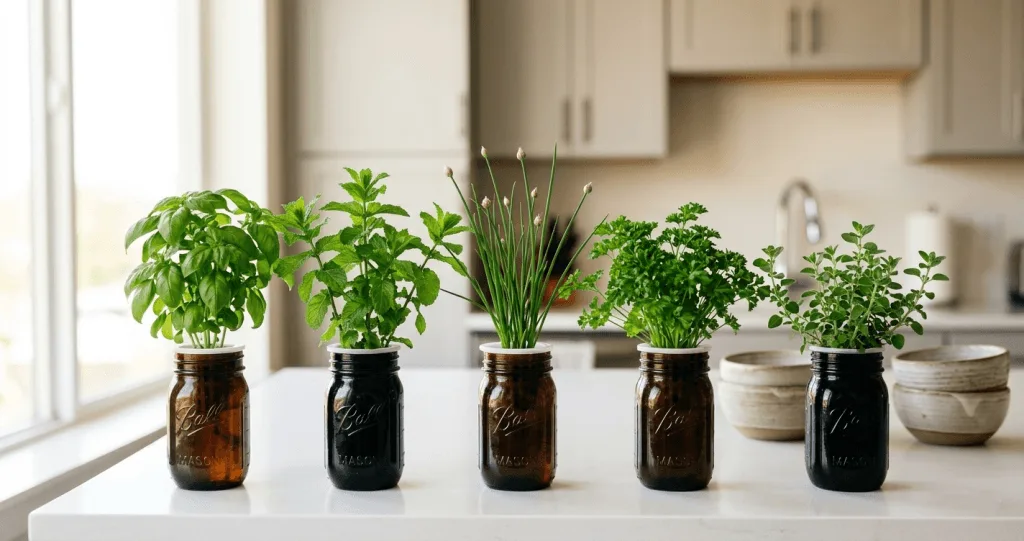
The Kratky method is the quietest way to grow herbs indoors. You fill a light-proof container with nutrient solution and set the clump in a net cup whose base sits in it, then as the plant drinks the level drops and leaves a 1 to 2 inch air gap for the upper roots to breathe.
It needs zero electricity, which suits a crowded counter and survives power cuts untouched. I use old pasta jars painted black, since any light reaching the water blooms algae that competes with the roots for food.
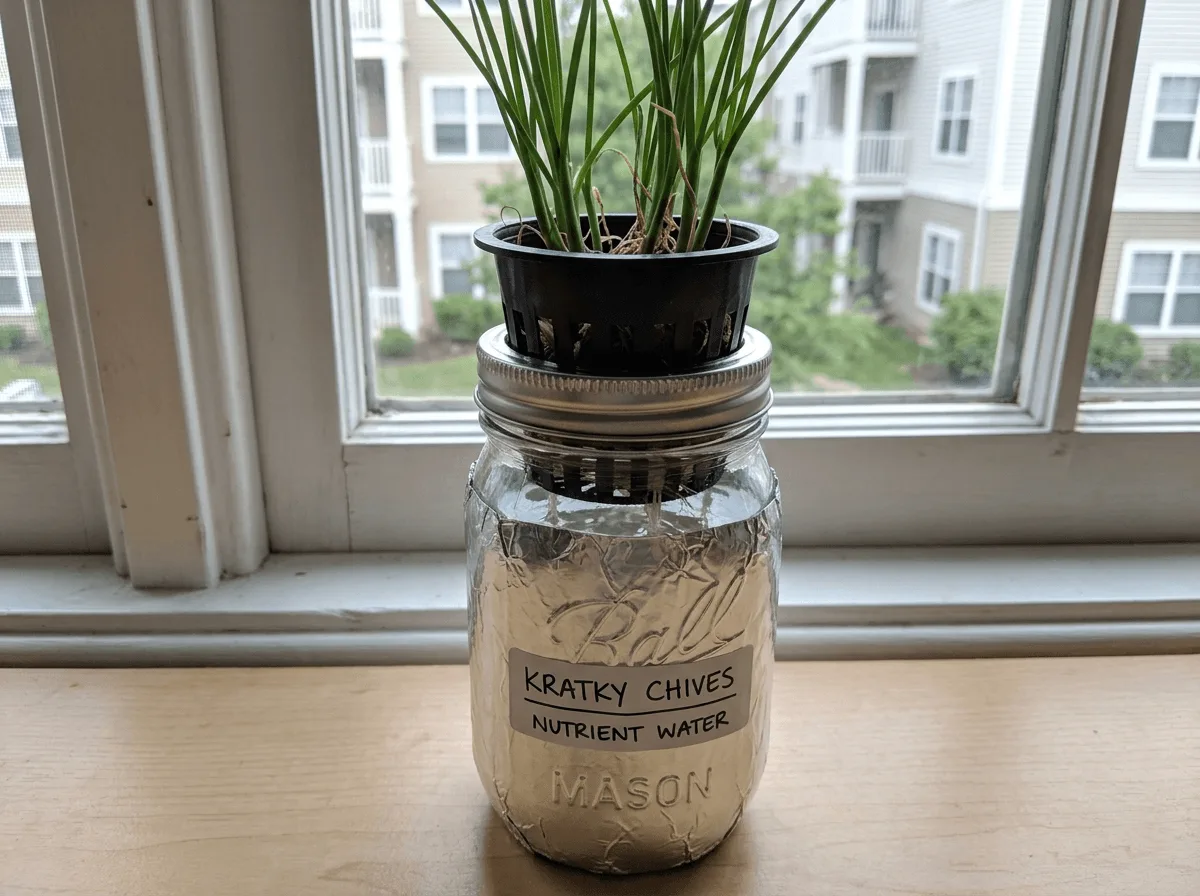
My walkthrough on apartment-friendly Kratky setups built from jars and kitchen supplies covers the build, and the best mason jar net cups and lids covers the hardware.
🌊 Deep Water Culture For Faster Roots
Deep water culture bubbles oxygen through the reservoir with an air pump and stone. That oxygenation drives faster root development, and the constant movement keeps salts mixed evenly rather than settling into stagnant pockets.
The trade-off is a low hum that carries through thin walls. A dense foam or silicone mat under the pump absorbs most of it, since the vibration rather than the motor is usually what you hear. My comparison of deep water culture versus Kratky for tiny apartments covers the choice, quieting a noisy hydroponic pump covers the fixes, and the roundup of best quiet air pumps for apartment DWC lists the models that stay silent.
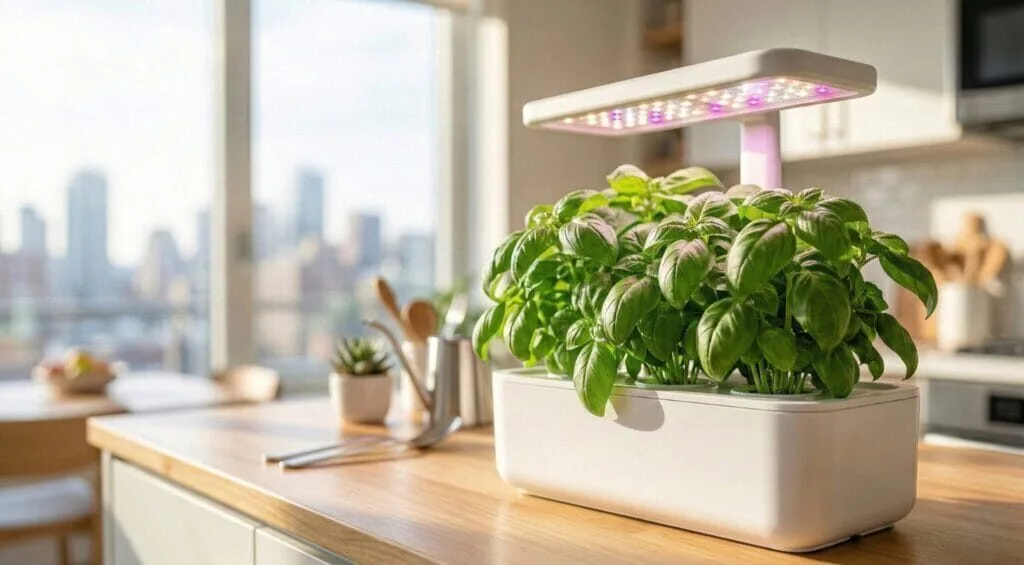
🔌 Countertop Smart Gardens
Plug-and-play units handle lighting and circulation for you, which suits anyone who would rather not measure nutrients weekly. They look tidy on a narrow shelf and come with pre-measured plant food.
Two limits are worth knowing. Their pre-measured pods often target lettuce strength, which leaves chives underfed, so check the tank with a meter and raise it toward 1.9. Root space also runs out, and a tangled root ball eventually blocks the internal pump and floods the deck, so prune the mass when it thickens. Models worth a look are in the 3 best countertop hydroponic systems for apartment beginners, with a wider view at the best countertop hydroponic systems for beginners.
🧪 Water, Nutrients, And pH
The reservoir is the whole diet, so its balance decides how the crop performs. Water chemistry sounds intimidating at first, though it settles into a short weekly habit once the numbers are familiar.
🥄 Setting EC For A Hungrier Crop Than It Looks
Electrical conductivity measures dissolved salt strength. Chives want EC 1.8 to 2.0 once established, starting seedlings at 1.0 to 1.2 and climbing as the clump fills out. That mature figure sits near basil, which surprises people who expect a grass-like plant to eat like lettuce.
Underfeeding is the mistake I made for a whole season. Thin pale blades that never thicken are the signature of it, and the fix is raising EC toward 1.9 rather than adding light. Running chives at lettuce strength does not kill them, it just stalls them indefinitely.
Overshooting causes the opposite problem. Push a jar past the 1.8 to 2.0 range chasing faster growth, and the tips go brown and crisp within days. My guides on EC and nutrient strength for apartment herbs and lowering EC safely in tiny reservoirs cover both directions, while the best EC and TDS meter for small reservoirs covers the tool.
⚖️ Setting pH For Root Health
Hold pH between 5.5 and 6.5. Chives tolerate that whole band comfortably, so unlike cilantro this is not a crop where small drift causes trouble. Test every few days regardless, since a slide well outside the range still locks out iron and manganese and pales the new blades.
A digital meter beats paper strips by a wide margin, particularly under coloured LED light where reading a strip becomes guesswork. My beginner pH meter review covers pens that hold calibration, and why pH keeps drifting in small systems explains what to do when it will not settle.
🧃 Mixing And Feeding Routine
Choose a formula built for leafy greens, then follow the same order every time so the readings stay comparable week to week.
- Fill a clean pitcher with fresh water.
- Add liquid nutrients to the manufacturer’s schedule.
- Stir for a full minute so every salt dissolves.
- Test EC, aiming at 1.8 to 2.0 for an established clump.
- Adjust pH last, into the 6.0 to 6.5 band.
Product options are in my roundup of the best hydroponic nutrients for small apartment systems, and the beginner feeding schedule guide breaks it down week by week. The free pH and nutrient calculator gives starting doses for your reservoir size.
🛑 Reservoir Changes And Stagnation
Correct readings with pale leaves usually means the water has gone stale. Unused mineral salts accumulate over weeks, shifting the solution’s profile so roots stop absorbing properly. The plant then starves while sitting in fertiliser.
Top off with plain pH-adjusted water as the level drops, then run a full reservoir change every 2 weeks. Never top off an old murky reservoir indefinitely, because that habit is behind most sudden indoor plant deaths. My guides on how often to change hydroponic water and topping off without wrecking your nutrients cover both halves.
Chives look fine long after the numbers drift, so test instead of guessing. These are the meters I use:
- KETOTEK pH, EC and temperature meter: one pen for all three readings, so it is the one I would buy first on a tight budget
- Apera PH20 pH tester: a dedicated pH pen, worth having because a second reading catches a probe that has drifted
- For feeding several containers I pair it with the Apera EC20 EC tester: EC only, but it is the pen I reach for when several containers need checking
I have used the KETOTEK, the PH20 and the EC20 in my own grows. For side-by-side comparisons, see my pH meter roundup and then the EC meter roundup.
💡 Lighting And Temperature
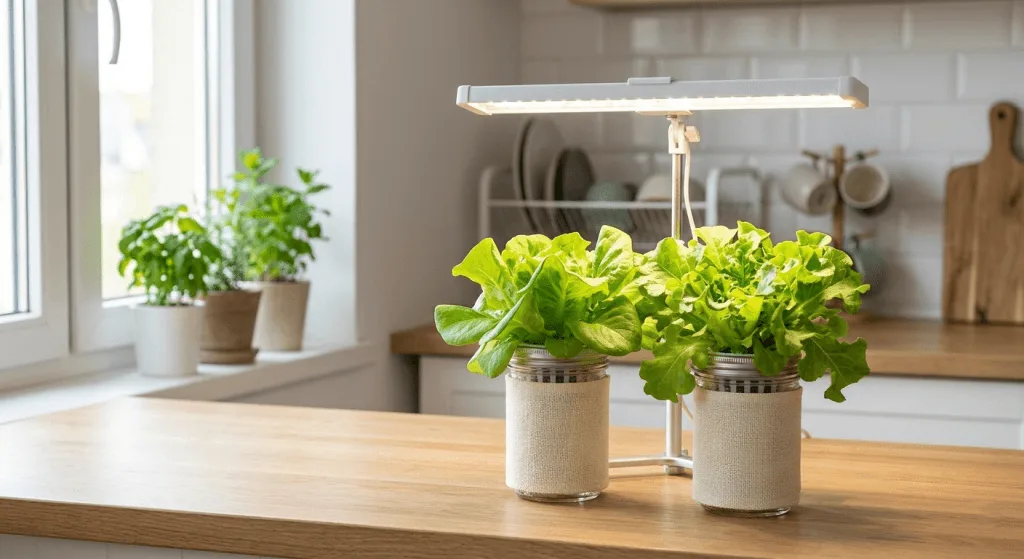
Windowsills rarely supply enough light on their own, especially through winter. Supplemental LED keeps blades upright rather than stretched and floppy, and temperature decides stalk thickness alongside it.
⏱️ Light Schedule And Height
Run 14 hours on and 10 hours off, matching the rest of the shelf. Chives will cope with 12, though 14 keeps them in step with everything else and removes a variable. Never run 24 hours, since the dark period is when the plant processes what it absorbed.
Hang the panel 6 to 8 inches above the blades, targeting 200 to 300 µmol/m²/s. Too high and the stalks stretch and flop, which is the most common structural complaint with this crop.
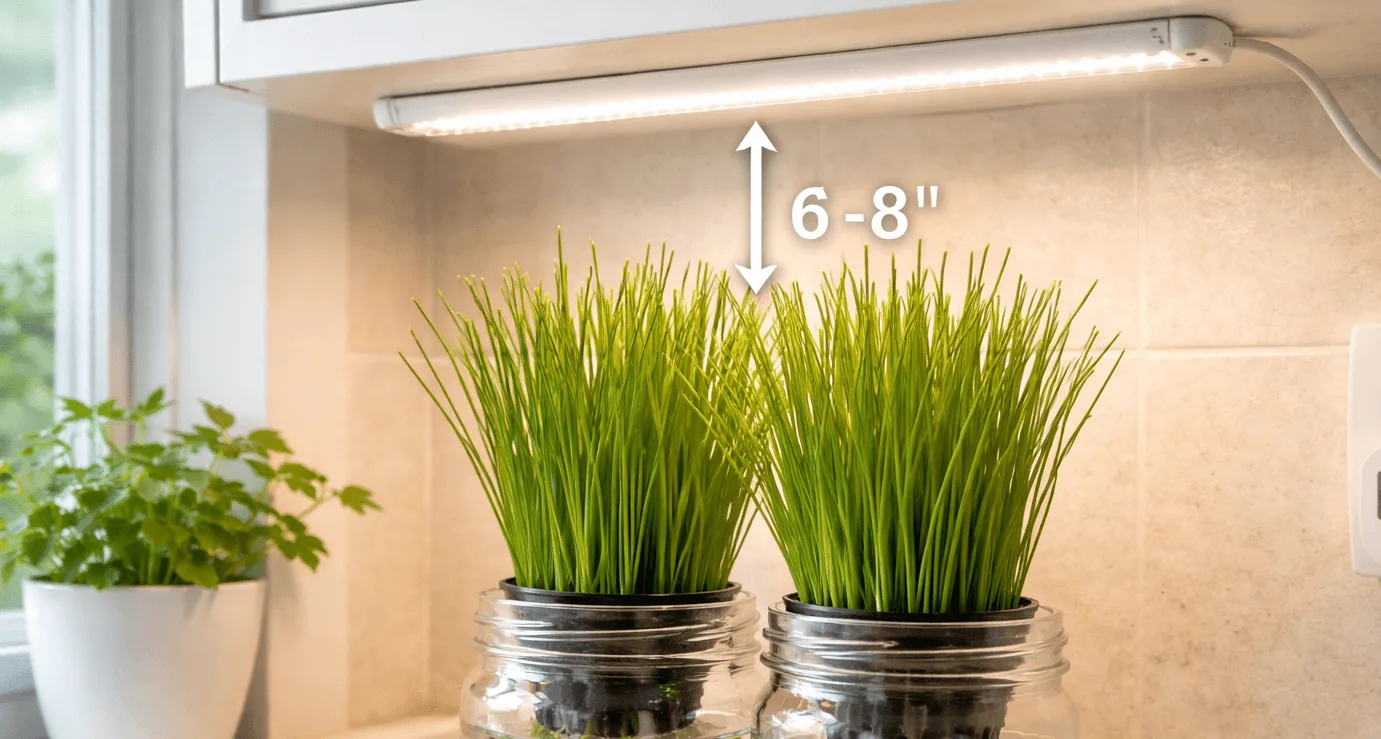
The grow light calculator sizes the fixture for your shelf, and how far grow lights should sit from herbs on a shelf covers the margins per crop. Budget picks are in the best grow lights for low-light apartments under $50, and watch for bleached tips, which signal grow light burn rather than feeding trouble.
🌡️ Managing Temperature
Chives handle heat better than cilantro or spinach, so this is a forgiving crop on temperature. Air can sit anywhere from 65 to 75°F (18 to 24°C) without complaint, at 50 to 70 percent humidity.
Water temperature matters more than air, because warm water holds less dissolved oxygen. Keep the reservoir in 65 to 75°F (18 to 24°C). Above that, roots struggle to breathe and disease risk climbs. Keep jars away from radiators and out of direct afternoon sun, and wrap them in reflective foil if the counter heats up. To cool a reservoir, rest a frozen sealed bottle against the outside of the container rather than dropping ice into the solution, which shocks roots and fades within the hour. My guide to small hydroponic temperature problems and fixes covers the rest.
🌬️ Airflow For Sturdy Blades
Indoor plants never feel wind, and wind does real structural work. Movement triggers a hormonal response that thickens cell walls, so stems that get pushed around grow sturdier than stems that never move.
Without it, indoor chives grow flimsy and lean. A small clip or desk fan aimed across the canopy for a few hours a day fixes it, and the same airflow clears stagnant humidity from around the base where fungal spores settle. My roundup of quiet clip-on fans for apartment shelves covers models that stay silent overnight.
🔪 Harvesting Without Killing The Plant
Harvesting is the payoff, though the technique decides whether the clump keeps producing for months or stops dead. Use clean sharp scissors so the cut heals fast and pathogens cannot enter a crushed wound.
Never tear blades off by hand, since pulling damages the basal plate where all new growth originates. The seed to harvest countdown calculator tracks your dates from seed or transplant, which helps when a 7 to 9 week wait starts feeling like failure.
📏 Leave One To Two Inches Standing
Gather the outer blades into a loose bunch and slice cleanly across, leaving 1 to 2 inches standing above the net cup. That remaining green is what powers regrowth.
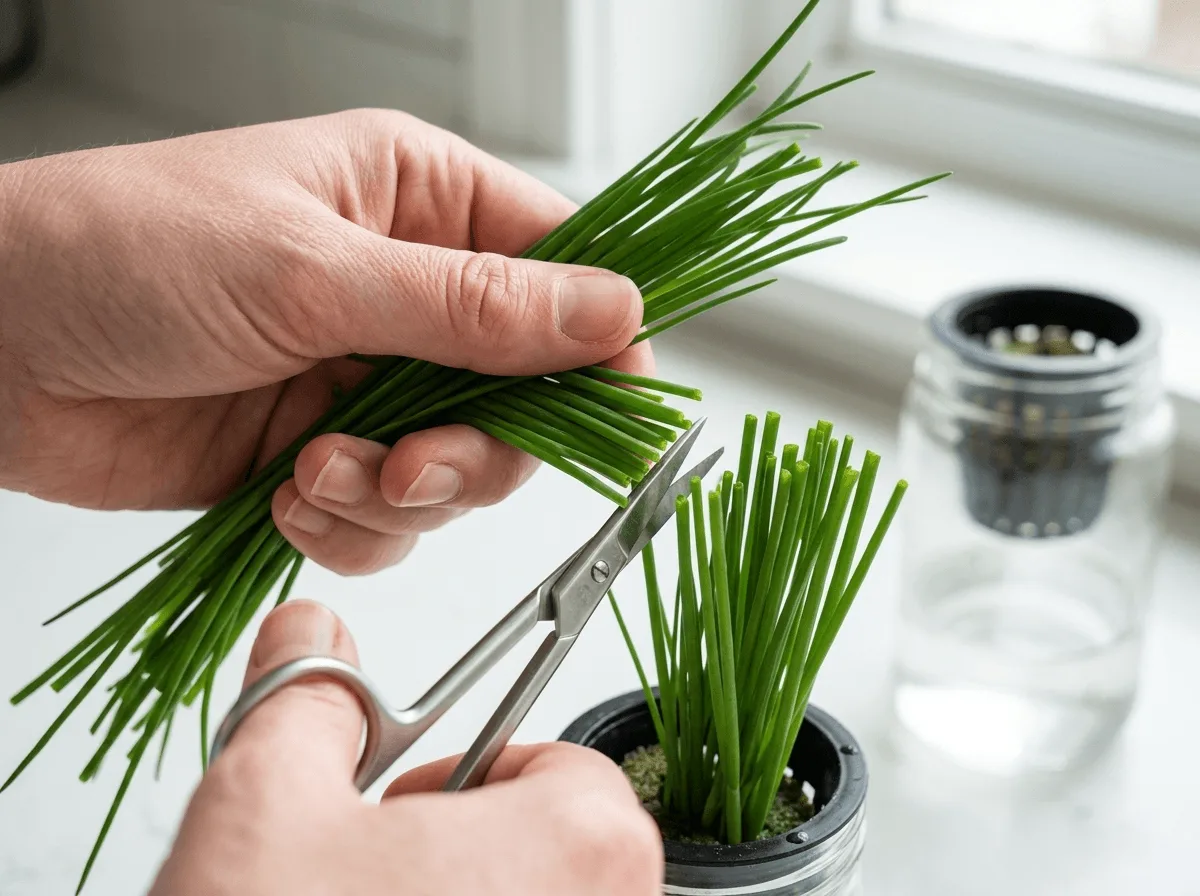
Cut flush with the medium and the plant has nothing left to photosynthesise with, so it sits inert and eventually rots. That single mistake is the most common way people lose an otherwise healthy clump. Take the outside first, since those are the oldest blades and the new shoots emerge from the centre. Harvest every 2 to 3 weeks, with visible regrowth inside 3 to 4 days.
❄️ Storing Your Cuttings
Water-grown blades hold more internal moisture than soil-grown ones, so sealing them in plastic turns them to slime fast.
- Pat the cut blades dry with a paper towel.
- Wrap the bundle loosely in a dry clean cloth.
- Stand the wrapped bundle in an open glass jar in the fridge.
- Use within five days for the best flavour.
For a longer hold, chop them and freeze in ice cube trays with a little olive oil. Chives are best raw, since heat destroys the mild onion flavour quickly, so treat the frozen cubes as a finishing touch rather than a cooking ingredient.
🐌 If Regrowth Slows After Several Cuts
A clump that stops producing after three or four cycles usually has a crowded root zone or an exhausted solution. Dead tissue from old cuts can also choke the basal plate.
- Check the reservoir for a tangled root mass blocking flow.
- Empty it and mix a fresh batch at EC 1.8 to 2.0.
- Trim away brown or dead roots with sterile scissors.
- Confirm the light still sits at 6 to 8 inches as the clump has grown.
Pale foliage during a slowdown points at feeding or lockout, and why apartment hydroponic plants turn yellow covers the full diagnosis.
🚨 Troubleshooting Common Problems
Chives carry the lowest pest risk on my shelf, because vertical blades give aphids no leaf underside to hide beneath. What does go wrong is usually water hygiene or feeding.
🦠 Fixing Root Rot
Healthy roots look white or light tan. Brown slimy strands smelling like a swamp mean root rot, which follows warm water or poor oxygenation rather than dirt.
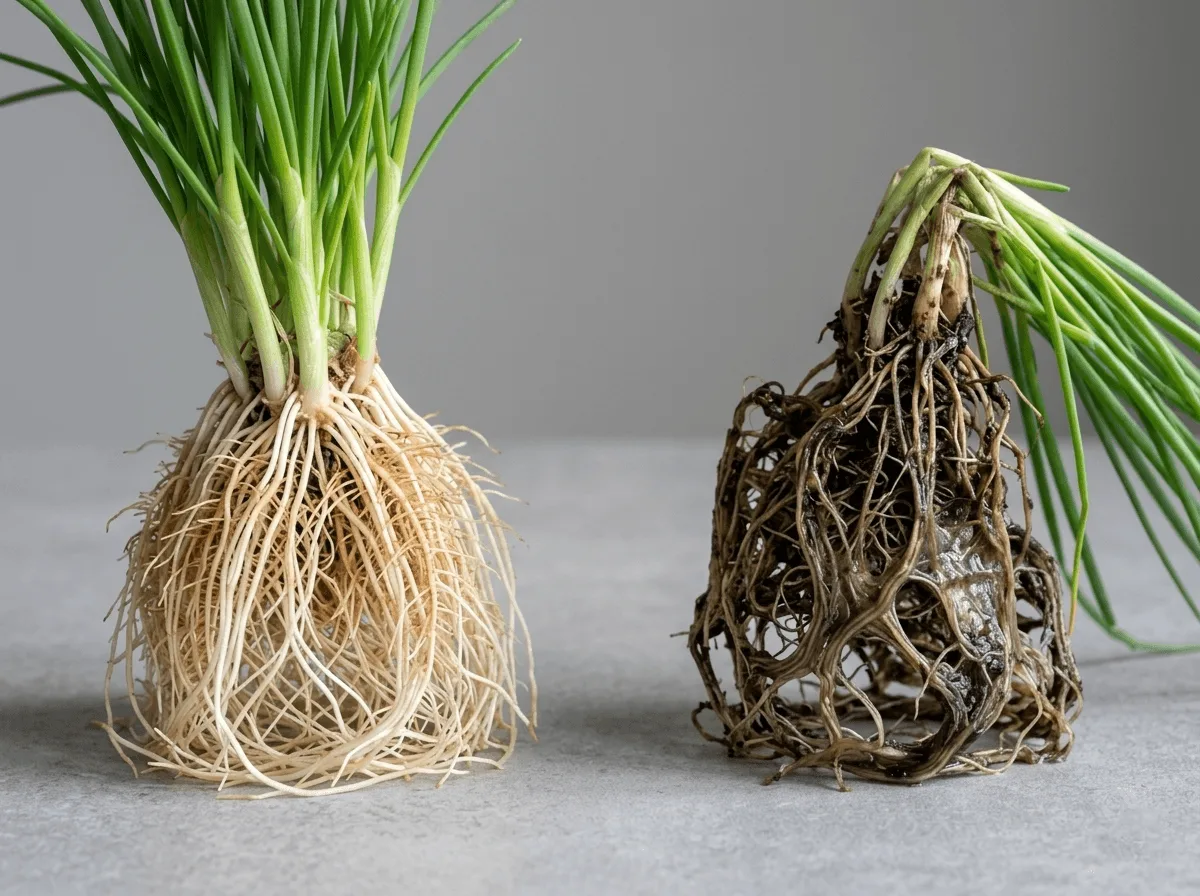
- Lift the clump out and rinse the roots under lukewarm water.
- Trim the worst slimy sections away with sterile shears.
- Clean the empty reservoir with diluted hydrogen peroxide, then rinse.
- Refill at EC 1.2 to 1.5 and hold that for 4 to 7 days while it recovers.
- Return to 1.8 to 2.0 once new blades appear.
Peroxide treats the symptom and breaks down within hours, so fix the water temperature too or it returns. My guides on preventing root rot before it starts and using hydrogen peroxide safely give exact dilutions, while cleaning a small hydroponic system without making a mess covers routine maintenance. If algae showed up alongside the rot, the algae in hydroponic jars guide covers sealing the light leaks behind both.
🌾 Thin, Pale Blades That Never Thicken
This is the signature chive complaint, and it is almost always hunger rather than light. The plant looks healthy in shape while staying anaemic in colour and thickness, month after month.
Test EC before touching anything else. Anywhere below 1.5 on an established clump means underfeeding, so raise it toward 1.9 over a week rather than in one jump. Growth usually responds within a fortnight. Chives simply want more than their grass-like appearance suggests.
📉 Why Blades Flop Over
Thin stalks that lean over the container lack structural strength, which comes down to light distance and airflow. Both are quick to test.
Measure from the LED to the tips first, and lower the panel if the gap exceeds 8 inches. Check the water level next, because a Kratky jar that has dropped too far leaves roots dry and the plant loses turgor. Refill so the solution touches the bottom of the root mass, and the blades usually lift within twelve hours. Add a fan for the longer-term fix.
🧻 Dealing With Fungus Gnats
Gnats lay eggs in damp exposed rockwool, and the larvae chew fine upper roots. Adults circling the counter mean they are already breeding.
Cover the top of the net cup with dry clay pebbles, which denies them the moist surface they need. Yellow sticky traps at the container edge catch the adults before the next generation. Keep the roots below wet throughout, since drying the top layer is the goal rather than drying the plant.
📚 Want to see where these numbers come from? The chives section of the crop sources page shows the sources behind each growing number, with a label for how well each one is backed.
💬 A Word From Sarah
My first chive failure was a seeding mistake. I buried the tiny black seeds deep in wet rockwool assuming they needed covering, and they rotted before they ever saw light. Barely pressing them into the surface took germination from almost nothing to around ninety percent.
The second failure took much longer to spot. I grew chives for most of a year at lettuce strength, around EC 1.2, and could not work out why the blades stayed thin and pale while everything else on the shelf thrived. They were hungry the whole time. Raising the reservoir toward 1.9 thickened them within a fortnight.
The last thing I would pass on is patience. Five to seven weeks to a first cut feels slow next to basil, and I nearly binned a jar at week four thinking it had failed. That same clump then fed me for eight months.
❓ Frequently Asked Questions
🧪 What EC do hydroponic chives need?
Run 1.8 to 2.0 once established, starting seedlings at 1.0 to 1.2. Chives are a medium to heavy feeder despite looking like grass, sitting closer to mint than to lettuce. Feeding them at lettuce strength is why so many indoor clumps stay thin and pale.
⏳ How long do hydroponic chives take to grow?
First harvest arrives 7 to 9 weeks from seed, with germination alone taking 7 to 14 days. A transplanted seedling is ready in about 4 weeks, and a divided clump in 2 to 3. The slow start is normal, and afterwards the same clump produces for six months or more.
🌾 Why are my chives thin and pale?
Underfeeding, nine times out of ten. Test EC and raise it toward 1.9 if the reading sits below 1.5 on an established clump. Move in steps across a week rather than one jump, and expect thicker greener blades within a fortnight.
⚖️ What pH suits hydroponic chives?
Aim for 6.0 to 6.5, the upper half of the usual range, which is where every source agrees chives do well. Nothing supports running them down at 5.5. Test every few days, because a big slide still locks out iron.
🛒 Can I grow chives from store-bought cuttings?
Yes, provided the bundle still has white bulbous bases with roots attached. Rinse the roots under lukewarm water, root them in a shallow glass for a week, then transfer into a net cup of clay pebbles. That skips the seedling phase and several weeks of waiting.
🔪 How do I cut chives so they grow back?
Leave 1 to 2 inches standing above the net cup and take the outer blades first. Cutting flush with the medium removes the plant’s ability to photosynthesise, so it stalls and rots instead of regrowing. Regrowth shows within 3 to 4 days when you leave enough.
📅 How often can I harvest?
Every 2 to 3 weeks once the clump is established. Trimming that regularly also encourages the basal plate to divide, so a single plant becomes several clumps over a few months and yields rise without any replanting.
📉 Why are my chives falling over?
Weak stalks come from light sitting too far away or from no airflow at all. Lower the panel to 6 to 8 inches above the blades, then add a small fan across the canopy. Mechanical movement thickens cell walls, so the stalks stiffen within days.
🚿 How often should I change the water?
Run a full reservoir change every 2 weeks, and top off with plain pH-adjusted water between those. Endlessly topping off a murky reservoir lets salts accumulate until the plant starves in a full tank, which is behind most sudden indoor deaths.
🌬️ Do I need an air pump?
No, the passive Kratky method works well for chives. The air gap that forms as the level drops supplies all the oxygen the roots need. A deep water culture setup with a pump grows roots faster, though it adds a hum to the room.
🚫 Can I use soil fertiliser in a hydroponic jar?
No, and it causes more trouble than it saves. Soil formulas lack the full micronutrient profile a soilless crop depends on, and their organic matter rots in standing water and triggers bacterial blooms. Use a liquid product formulated for hydroponics.
🍂 Why do my chive tips turn brown and crisp?
Nutrient burn from EC climbing past 2.0, usually. Dry air and heat produce the same symptom, so check humidity sits in the 50 to 70 percent band too. Dilute with plain pH-adjusted water and retest rather than guessing at the correction.
Happy growing! 🌿
Sarah, Urban Hydro Space

Sarah Whitfield is the founder of Urban Hydro Space and an indoor gardening enthusiast dedicated to helping apartment dwellers grow fresh herbs and vegetables in small spaces. She researches hydroponic systems carefully from real specifications and verified buyer feedback, and shares practical tips and honest, clearly labeled product picks to make indoor gardening accessible for beginners.