⏳ 15 min read · Last updated: May 2026
Finding out how to regrow green onions hydroponics is the most rewarding way to start your indoor apartment garden. You buy a bunch from the grocery store, use the green tops for dinner, and then save the leftover white roots. Next, you place them in water to start an endless supply of fresh scallions. You never have to buy them again. I started doing this three years ago on a tiny kitchen windowsill. It changed how I viewed food waste. Now I will show you how to sprout them in plain tap water and upgrade them to a robust indoor system.
Learning this process builds a foundation for all indoor gardening. You get to watch root development up close. Because of this, you learn how plants respond to water levels and light changes in real time. Grab a jar from your recycling bin, and we will build your first zero-waste setup today.
🧅 How to Regrow Green Onions Hydroponics in Three Simple Phases
This guide breaks the process into three phases so you always know exactly where you are. Phase 1 uses plain tap water and takes 3 to 5 days. Phase 2 moves the sprouted roots into a hydroponic system with diluted nutrients. Phase 3 maintains the ongoing harvest cycle for months. If you have never grown anything hydroponically before, the apartment hydroponics beginner guide gives you a quick overview of how water-based systems work before you start.
- Save the bottom 1 to 2 inches of root from store-bought scallions. → how to cut
- Keep water shallow for the first 3 to 5 days before adding any nutrients. → setting up the glass
- Maintain your nutrient solution at pH 5.5 to 6.5 for optimal uptake. → mixing nutrients
- Harvest by cutting and leaving 1 inch above the base to keep them growing. → harvesting guide
- Run your grow light for 14 hours on, 10 hours off for thick, crisp stems. → lighting guide
🔎 Quick Diagnosis Table
| What you see | Most likely cause | Check this first |
|---|---|---|
| Yellow tops | Nutrient deficiency or high pH | Test your water pH level |
| Brown mushy roots | Root rot from low oxygen | Lower water to create an air gap |
| Slimy soft stems | Water has stagnated | Rinse roots and refresh water |
| Pale thin growth | Insufficient lighting | Move light closer to 6 to 8 inches |
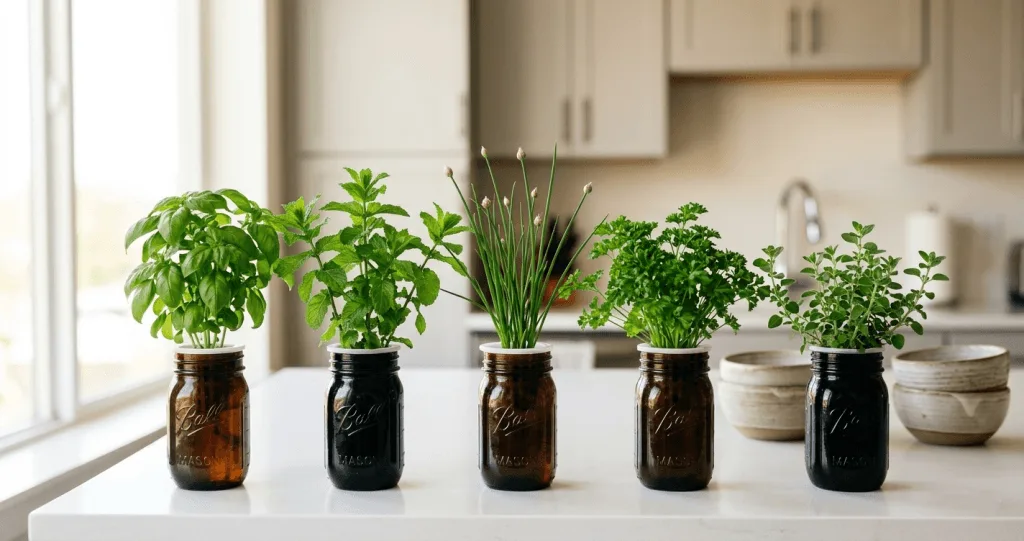
- Sunny windowsill → Simple Kratky jars
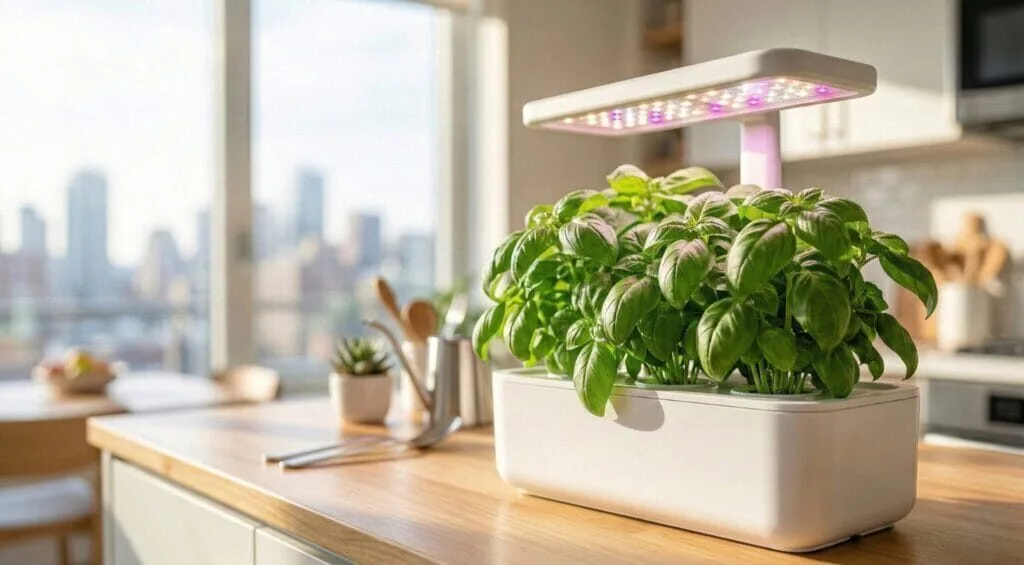
- Low light kitchen → Countertop smart garden
- Want fastest growth → Mini DWC setup
- Just brought green onions home today → Phase 1: Sprouting Kitchen Scraps
- Roots are already growing in a glass → Phase 2: Hydroponic Transfer
- Already in a system and seeing problems → Quick Diagnosis Table above
- Ready for your first harvest → Harvesting Tips
- Why Regrow Green Onions Hydroponics?
- Phase 1: Sprouting Kitchen Scraps In Plain Water
- Phase 2: Move Them Into Hydroponics
- Mixing Nutrients To Regrow Green Onions Hydroponics
- Lighting And Environment For Indoor Scallions
- Harvesting Tips To Regrow Green Onions Hydroponics
- A Word From Sarah
- Frequently Asked Questions
🌱 Why Regrow Green Onions Hydroponics?
Choosing to regrow green onions hydroponics bypasses the mess of potting soil in your apartment. Scallions belong to the allium family, which means they store energy in a basal plate at the bottom of the stem. When you submerge this plate in water, it triggers rapid root expansion. New shoots emerge from the center of the cut stem within hours. This makes them the perfect beginner plant.
Many people throw the white roots into the compost bin. By saving them, you harness a natural survival mechanism. The plant wants to continue growing. Providing water and a steady light source encourages continuous harvests.
💧 The Zero-Waste Kitchen Benefit
Food waste is a common issue in modern kitchens. We often buy a large bunch of herbs for a single recipe and discard the rest. When you propagate green onions for hydroponics, you close that loop. Every bunch you purchase becomes a mother plant for future meals.
This process reduces your grocery bills and cuts down on plastic packaging. Most store-bought scallions come wrapped in plastic bands and bags. By growing your own supply on your counter, you eliminate that plastic waste. Additionally, you avoid the carbon footprint of shipping delicate herbs across the country.
📏 Faster Growth Than Soil
Hydroponic systems deliver oxygen and minerals directly to the basal root plate. In potting soil, roots spend energy pushing through dirt to find water. Without that physical barrier, the plant directs all its energy upward. Because of this, hydroponic scallions grow roughly twice as fast as their soil counterparts.
You also avoid the bugs associated with dirt. Fungus gnats in potting soil can frustrate any indoor gardener. Keeping a clean water reservoir ensures your kitchen stays pest-free while producing consistent yields.
🧙 Phase 1: Sprouting Kitchen Scraps In Plain Water
The journey starts the moment you unpack your groceries. Your first goal is waking up the dormant roots. The scallions have likely spent days in a dark, cold refrigerator truck. They need warmth and hydration to restart their growth cycle.
Do not rush to add fertilizer during this phase. The plant has enough stored energy in the white stem to push out its first set of leaves. Introducing salts too early will shock the system and cause the delicate roots to shrivel. Plain, room-temperature tap water works well. If you are unsure whether your local tap water is suitable for hydroponics, the guide on using tap water for hydroponics explains what to check before you start.
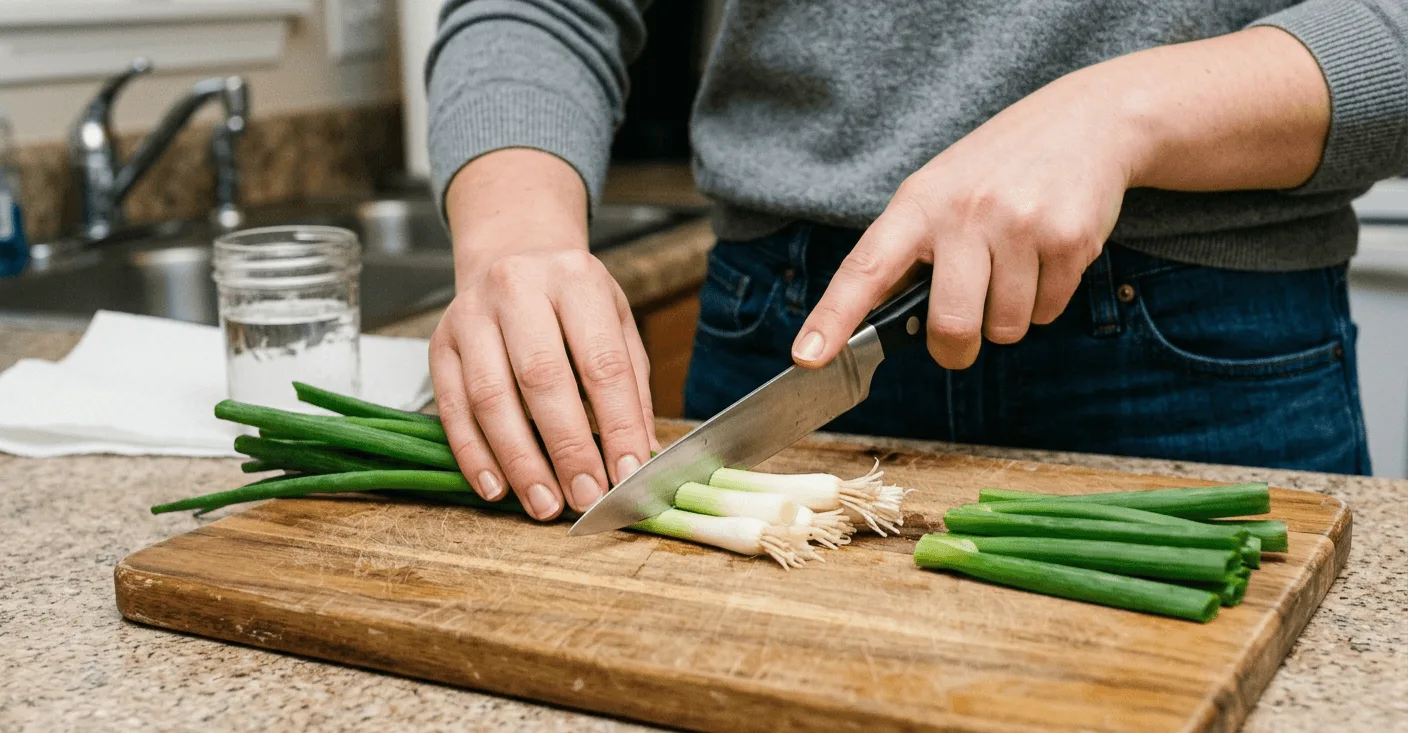
🔪 How To Cut Your Store-Bought Onions
Preparing the stems correctly dictates your success rate. If you cut them too short, the plant lacks the energy to recover. If you leave them too long, the outer layers will rot in the water.
- Wash the scallions under cool tap water to remove dirt.
- Peel away any brown or papery outer layers.
- Place the bunch on a clean cutting board.
- Measure 1 to 2 inches up from the fuzzy roots.
- Make a clean, flat cut across the stems using a sharp knife.
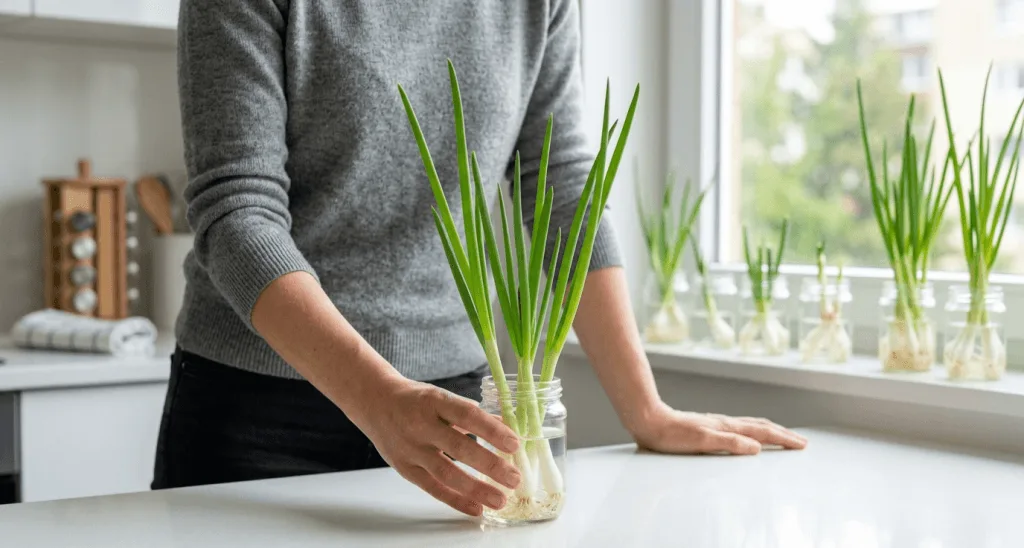
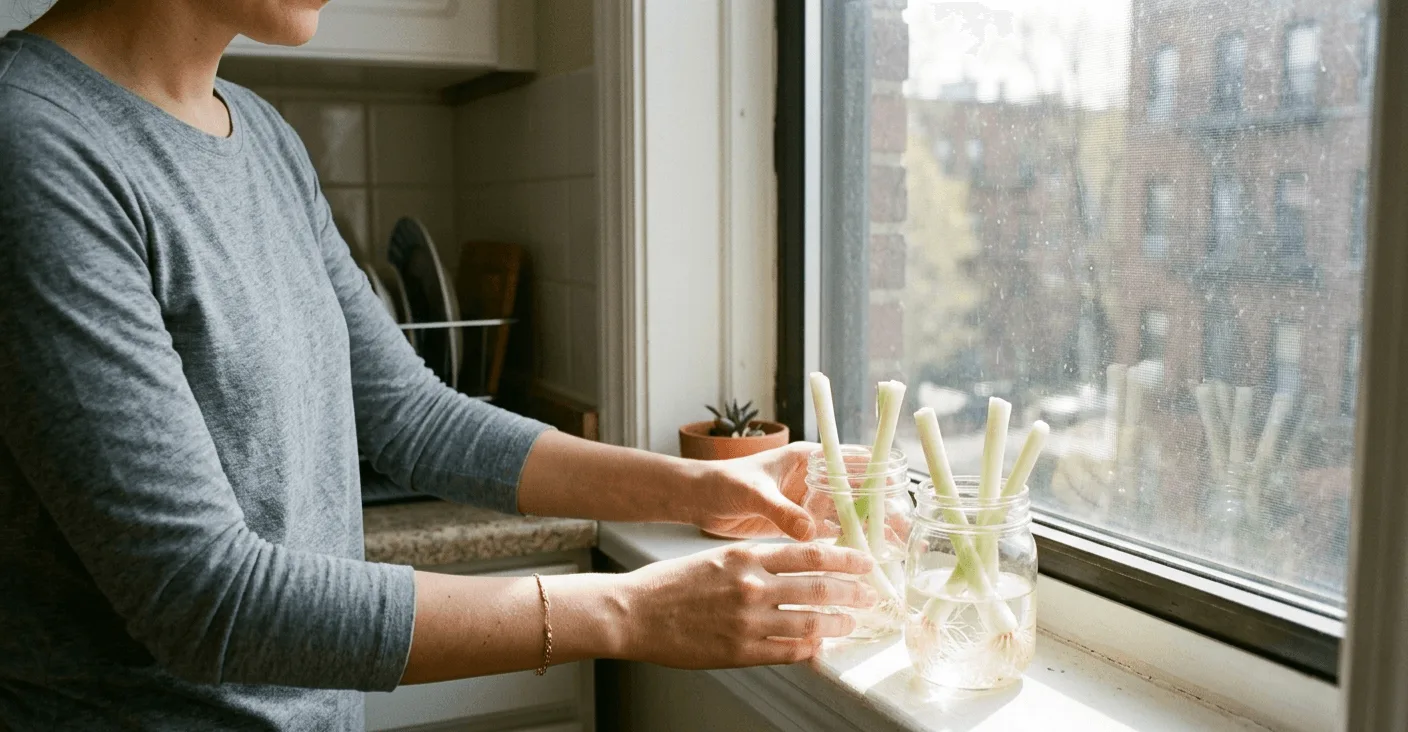
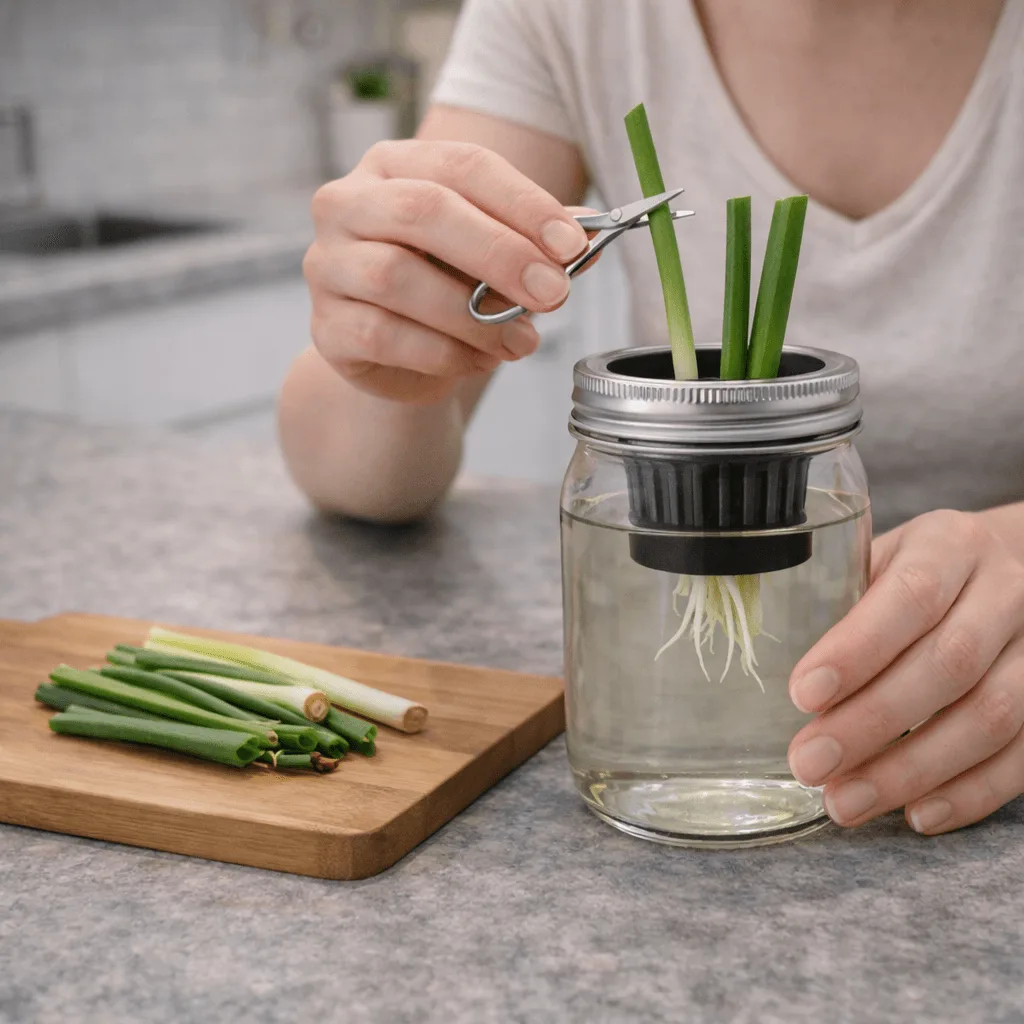
🚰 Setting Up The Regrowth Glass
You need a small, narrow container to keep the stems standing upright. A shot glass or a small jam jar works well for an apartment kitchen. The goal is to submerge the roots while keeping the top cut dry.
- Place the cut stems root-side down into your glass.
- Add enough water to cover the roots. Leave the top half of the white stem exposed to the air.
- Place the glass on a bright windowsill or under a desk lamp.
- Empty and replace the water every single day.
Changing the water provides fresh dissolved oxygen to the roots every day. Stagnant water depletes oxygen and suffocates the plant within a few days.
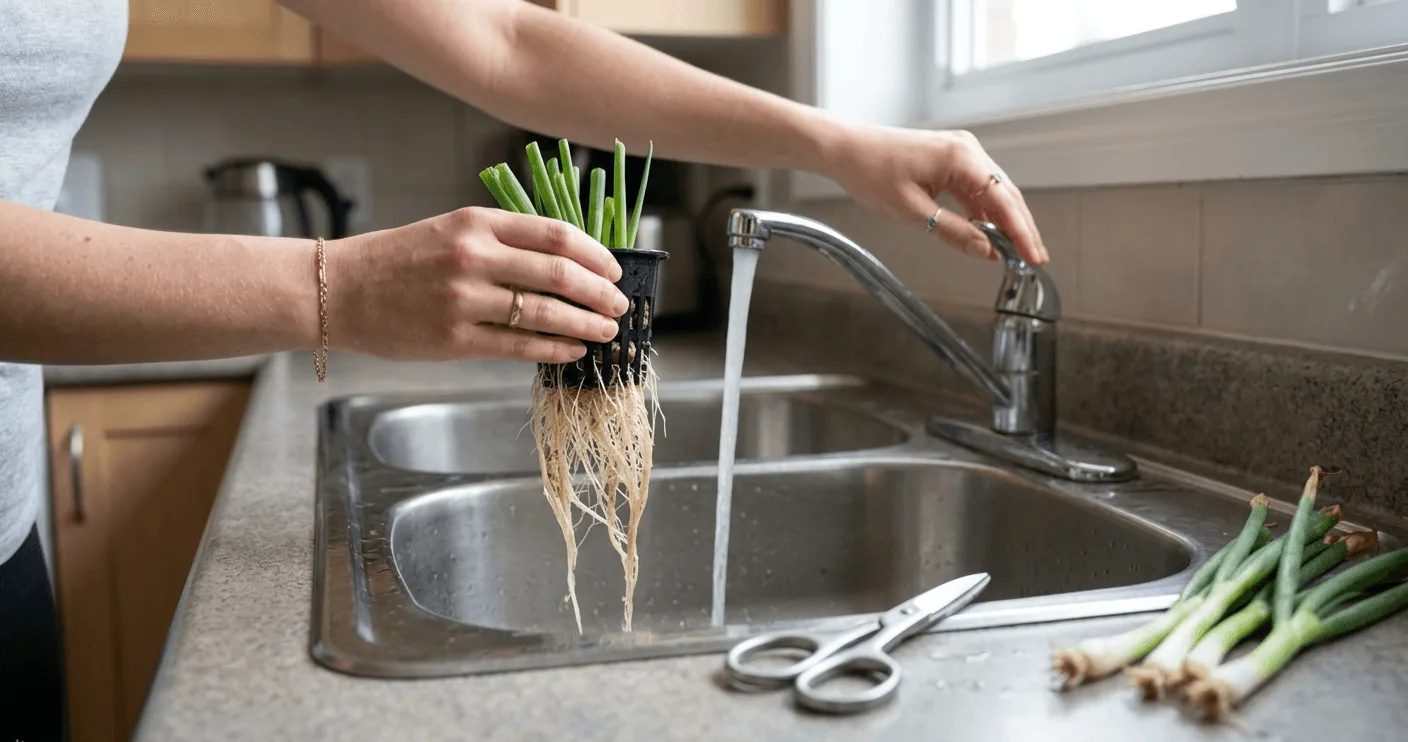
🩺 What To Do If Your Scraps Get Slimy
Slimy water will frustrate beginners who expect clean growth. A slippery coating on the roots indicates bacterial buildup. This happens when the water level sits too high or when temperatures climb above 75 degrees Fahrenheit. You must address it before the plant dies.
- Remove the stems from the glass and discard the foul water.
- Rinse the roots under a gentle stream of lukewarm water.
- Use your fingers to rub away the slimy film.
- Peel off the outermost layer of the white stem if it looks mushy.
- Sterilize your glass with soap, then refill with fresh water.
🌿 Phase 2: Move Them Into Hydroponics
After a week in plain water, your scallions will have long, white water roots and new green shoots. At this point, the plant has exhausted its stored energy. Keeping it in a plain water glass will result in pale, thin stems. You must move them to a real system.
Transitioning plants from water to a nutrient solution requires a gentle touch. The roots are fragile. You need a setup that holds the stems upright while letting the roots dangle into a nutrient-rich reservoir. To streamline this process, use the free shopping list builder to grab your net pots and growing media before you start.
📦 Choosing A Simple Apartment System
You have two main options for growing green onions hydroponically in a small space: the Kratky method or a Deep Water Culture (DWC) setup. The Kratky method uses no moving parts. You fill a jar with nutrients and leave an air gap for the roots to breathe. DWC uses an air pump to bubble oxygen into the water. For a full side-by-side comparison, read the guide on DWC vs Kratky for apartment beginners.
If you use a small air pump for a DWC setup, place a folded towel under it. This reduces vibrations so your apartment stays peaceful. A quiet setup prevents noise complaints and keeps your living space comfortable.
→ Small-scale hydroponics guide (University of Minnesota Extension)
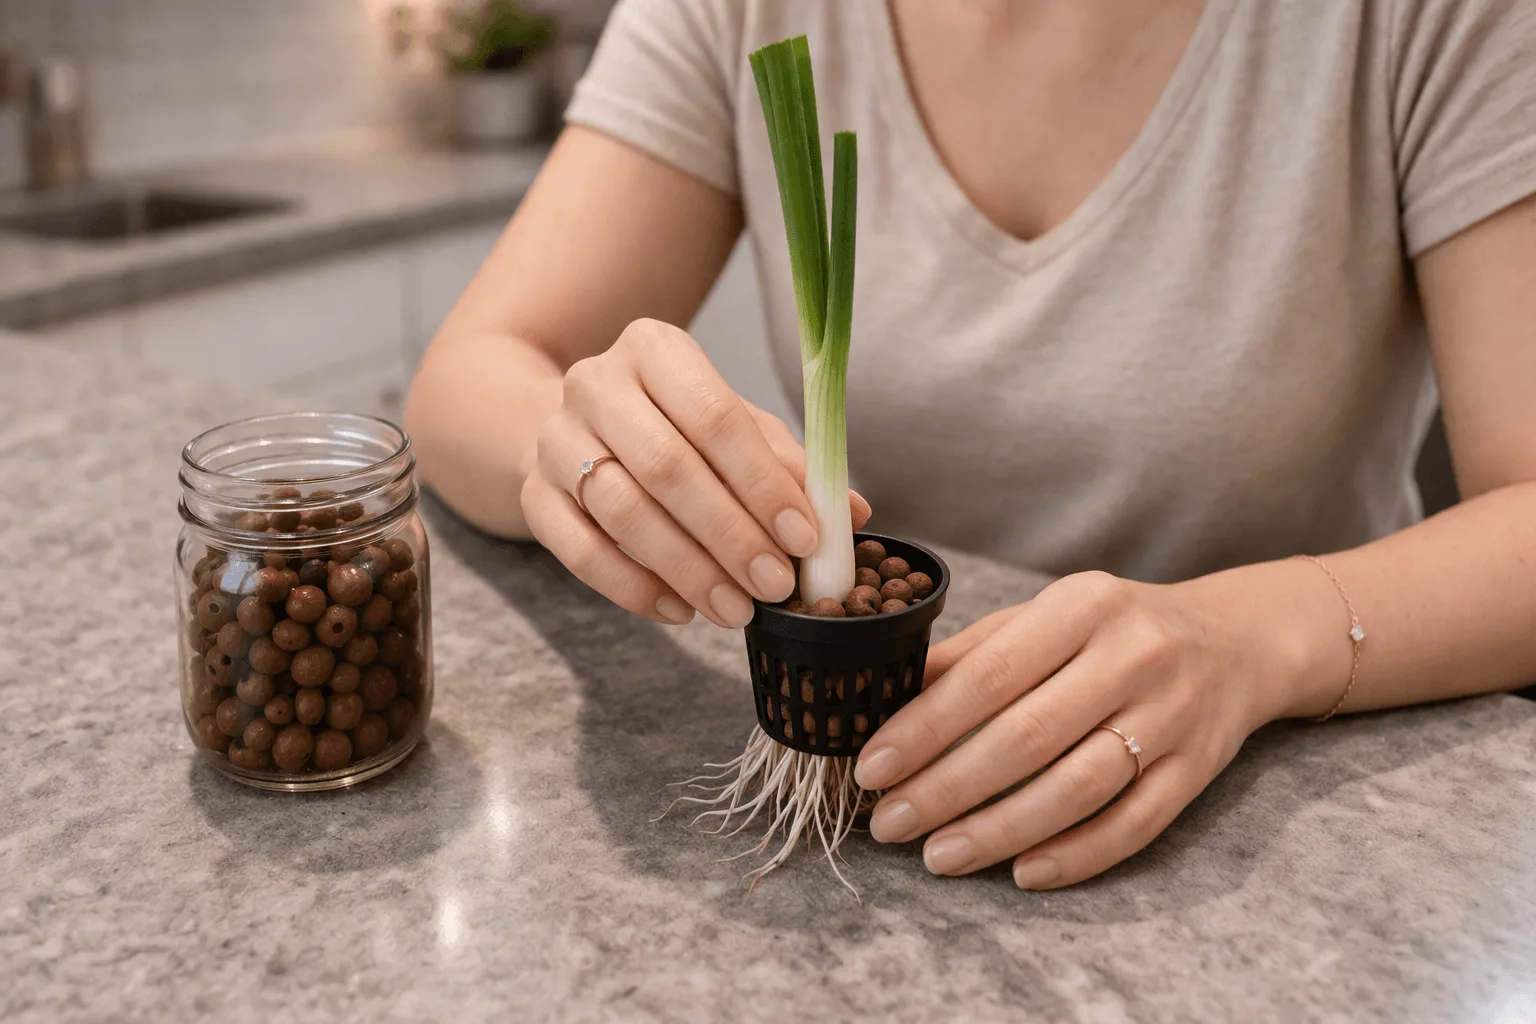
🧽 Securing The Stems In Net Pots
A net pot provides structure. You place the scallion inside and surround it with a growing medium to keep it steady. Clay pebbles (LECA) work well because they are reusable and drain cleanly between uses.
- Rinse clay pebbles thoroughly under running water before use.
- Place the scallion base inside the net pot.
- Pack clay pebbles around the stem loosely. Support without crushing.
- Lower the net pot into the lid hole of your jar so the roots dangle into the liquid below.
For help choosing the right net cup size for your mason jar lid, the mason jar net cup guide compares sizes and materials so you pick one that fits your jar opening without gaps.
🧪 Mixing Nutrients To Regrow Green Onions Hydroponics
Getting the water chemistry right is where most beginners stall when they try to regrow green onions hydroponics. The good news is that scallions are forgiving. They do not need perfect numbers to produce a harvest. However, getting close to the right range makes a visible difference in stem thickness and harvest frequency. The guide to the best hydroponic nutrients for small apartment systems covers which formulas work best for leafy crops like these.
📊 Starting Nutrients Gradually
Do not pour full-strength fertilizer into the water on day one of the hydroponic phase. Roots that grew in plain water need time to adjust to a mineral-rich solution. Start with a very weak mix at EC 0.8 to 1.0. After one week, increase to the mature range of EC 1.2 to 1.6.
To dial in your exact measurements based on your reservoir size, use the free pH and nutrient calculator. It prevents accidental overdosing and works for any jar size.
| Growth Stage | Target EC | Target pH |
|---|---|---|
| Week 1 (Plain Water) | 0.0 to 0.2 | Tap normal |
| Week 2 (Transition) | 0.8 to 1.0 | 5.5 to 6.5 |
| Week 3+ (Mature) | 1.2 to 1.6 | 5.8 to 6.2 |
🚨 What To Do If Tips Turn Brown
Crispy brown tips indicate nutrient lockout or fertilizer burn. This happens when the water evaporates, leaving the salts behind to concentrate. The roots absorb the heavy salt load, burning the leaf tissue from the inside out.
- Use sterilized scissors to trim the brown tips off.
- Dump the entire reservoir down your kitchen sink.
- Rinse the root mass under plain tap water for one minute.
- Refill the system with plain, pH-adjusted water.
- Wait two days before reintroducing nutrients at half strength.
💡 Lighting And Environment For Indoor Scallions
Light drives photosynthesis, which produces the sugars needed to regrow green onions hydroponics. A kitchen window works fine during the summer. However, winter days lack the intensity required for robust growth. Your stems will grow thin and pale without supplemental light.
Apartment environments fluctuate. Heating vents run in the winter, and air conditioning runs in the summer. Scallions prefer stable, cool conditions. Managing your light and temperature prevents the plants from stressing out and bolting to seed.
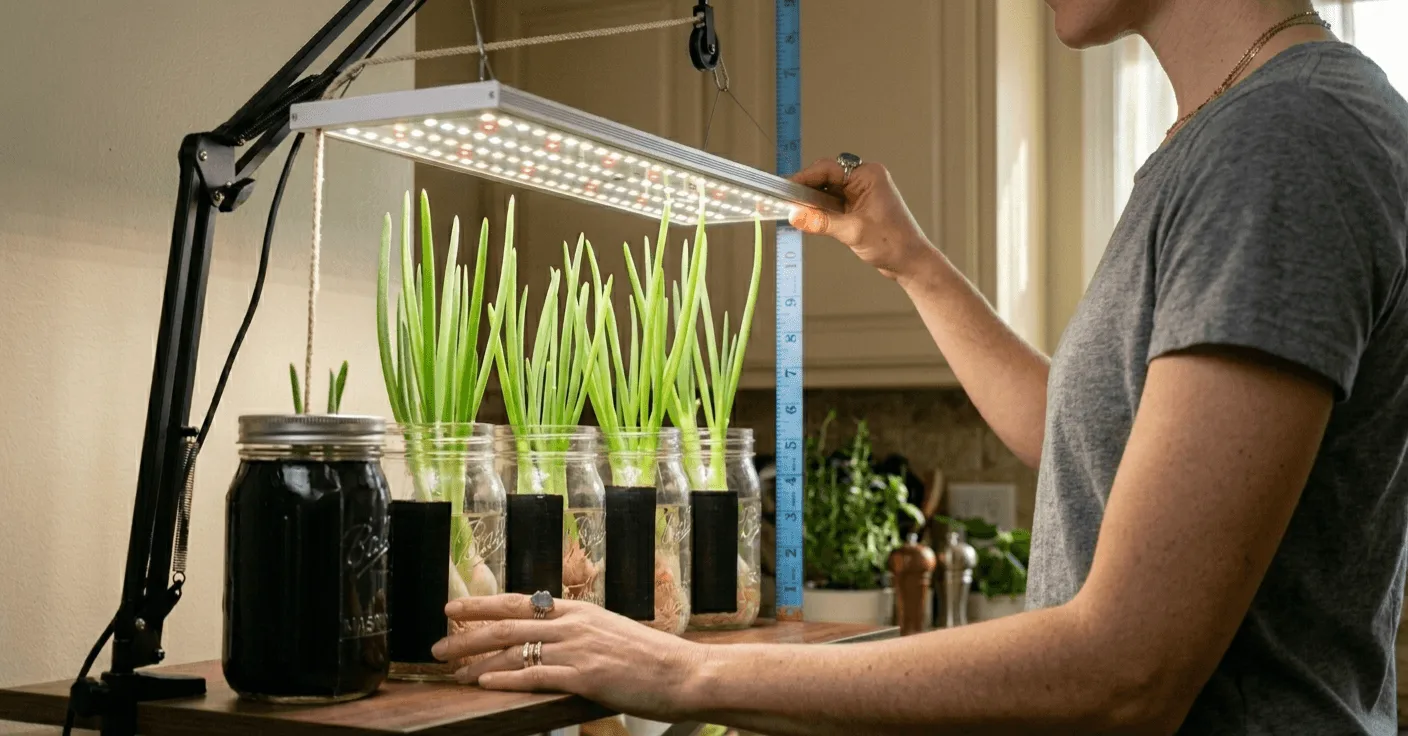
🔆 Setting Up A Countertop Grow Light
An LED grow light ensures consistent growth regardless of the weather outside. You do not need massive industrial panels. A small, full-spectrum LED panel or bulb fits over a jar setup.
- Hang the light 6 to 8 inches above the plant tops.
- Run the light for 14 hours on and 10 hours off every day.
- Use a smart plug to automate the daily schedule.
- Raise the light as the scallions grow taller.
Use the free grow light calculator to find the correct wattage for your specific shelf dimensions. This prevents you from wasting electricity on an oversized fixture.
🌡️ Managing Apartment Temperatures
Green onions are cool-weather crops. They thrive when the ambient room temperature sits between 60 and 70 degrees Fahrenheit (15 to 21 degrees Celsius). If your apartment gets too hot, the reservoir water heats up above the target of 65 to 72°F (18 to 22°C). Warm water holds less dissolved oxygen, which leads directly to root rot.
Keep your setup away from radiators, ovens, and sunny south-facing windows in the summer. If the water feels warm to the touch, place a frozen water bottle beside the reservoir for 30 minutes to cool the root zone. The guide on managing temperature in small hydroponic systems covers additional cooling methods for hot apartments.
🔍 What To Do If Stems Get Leggy
Leggy growth happens when the plant reaches toward a weak light source. The cells elongate, making the stem fragile and floppy. Fix it in four steps:
- Lower your grow light so it sits 6 to 8 inches closer to the canopy.
- Increase the daily light duration up to the full 14 hours.
- Harvest the floppy tops to reduce weight on the stem.
- Ensure your nutrient mix contains adequate calcium to build strong cell walls.
✂️ Harvesting Tips To Regrow Green Onions Hydroponics
The joy of this project comes at harvest time. You can begin snipping green tops within two weeks of your initial setup. Because you grow them indoors, you can harvest fresh garnishes year-round regardless of the season.
Continuous harvesting requires maintenance. The root system will expand, taking up space in your jar. Old roots will die off, and new ones will take their place. Managing this cycle keeps the system healthy and productive.
🧺 A Reliable Way To Regrow Green Onions Hydroponics
The cut-and-come-again method ensures your scallions survive multiple harvests. If you chop the plant all the way down to the roots, it might not recover. You must leave enough stem to pull in light and produce energy.
- Wait until the green shoots reach 6 to 8 inches tall.
- Use sterilized scissors to cut the stems.
- Always cut at least 1 inch above the white base.
- Leave the central, newest shoot intact if possible.
By leaving the base intact, the plant pushes new growth within days. Use the seed to harvest countdown tool to predict your ongoing cut cycles and plan meals around your harvest schedule.
🪱 Preventing Root Issues Over Time
After a few months, the root ball will become massive. A dense root system traps dead plant matter. This decaying material invites bacteria and ruins water quality. You must maintain the roots just like you maintain the green tops.
During your bi-weekly reservoir change, inspect the root mass. Trim away any brown, mushy, or stringy roots using sharp scissors. Healthy roots appear white or light tan. For the full reservoir change process, the guide on how often to change hydroponic water covers exactly when and how to do a proper flush. To clean jars, diluted hydrogen peroxide works well. White vinegar is a safer alternative if you have pets. Always rinse the container thoroughly before adding plants back in.
🧯 What To Do If Yields Slow Down
No plant lives forever. After four or five harvests, the green shoots will emerge thinner and weaker. The mother plant exhausts its genetic potential. When this happens, adjusting nutrients will not fix the problem.
- Accept that the mother plant has reached the end of its lifespan.
- Remove the entire plant from the net pot.
- Compost the old root mass.
- Wash and sterilize your clay pebbles in boiling water.
- Buy a fresh bunch of scallions from the store and start over.
💬 A Word From Sarah
The mistake I made that cost me the most time was rushing the nutrient transition in Phase 2. My roots looked strong and healthy after eight days in plain water, so I jumped straight to EC 1.4 instead of starting at the weak level. Within 36 hours the new green tips went pale and the roots started looking stringy. I had to dump the reservoir, rinse everything under the tap, and restart the nutrient phase from EC 0.6.
What I learned from that batch: roots that grew in plain water need at least two full days at EC 0.8 to 1.0 before you push the concentration up. The guide says start low, but it doesn’t emphasize holding that level long enough. If the tips stay bright green after two days at the weak level, you can move up. If they look even slightly pale or the new growth slows, stay at the same EC for two more days before increasing. Rushing that transition is the most common reason a strong Phase 1 batch fails immediately after moving into nutrients.
❓ Frequently Asked Questions
🧅 How long does it take to regrow green onions hydroponics?
Green onions regrow fast in a hydroponic setup. You will see new green shoots within 3 days. By day fourteen, you can harvest fresh scallions for the first time. The exact timing depends on your light source and room temperature, with warmer, brighter setups producing faster results.
⏱️ Do I need nutrients to regrow green onions hydroponics?
You can start the roots in plain tap water for the first 3 to 5 days. However, long-term growth requires a balanced liquid fertilizer. Plain water lacks the minerals needed for thick stems and continuous harvests. Transition to a weak nutrient solution at EC 0.8 to 1.0 and hold it for two full days before ramping up to mature strength.
☀️ Can I regrow green onions hydroponics on a windowsill?
A sunny windowsill works well for sprouting roots in plain water during Phase 1. Moving them to a permanent hydroponic setup requires more reliable light. You will likely need a small LED grow light if your window faces north or gets blocked by buildings, especially in winter when natural light intensity drops significantly.
🌴 How many times can you regrow green onions hydroponics?
You can harvest the same green onion root base 4 to 5 times. Eventually the plant loses energy and the stems become noticeably thin. Once the yields drop significantly, buy a fresh bunch from the store and start the process again with sterilized media. Each new batch gives you another full cycle of free harvests.
🚿 Why do my green onions smell bad in hydroponics?
Foul odors indicate rotting roots or stagnant water. This happens when the water level sits too high and drowns the plant without an air gap. Change the reservoir immediately, trim away any brown or mushy root material, and ensure the waterline sits below the net cup so the upper roots breathe between the water surface and the bottom of the cup.
🫚 What is the best pH to regrow green onions hydroponics?
Scallions thrive in a mildly acidic environment. Keep your reservoir water between pH 5.5 and 6.5, targeting 5.8 to 6.2 for mature plants in the ongoing harvest phase. This range allows the roots to absorb all necessary minerals without experiencing nutrient lockout or the brown leaf tip burn that comes from pH spikes.
🧂 Should I peel the outer layer of green onions before planting?
Remove any dry, papery skins from the base before placing them in water. Peeling the dead outer layer prevents rot from spreading into the live stem and keeps your water clear during Phase 1. Leave the firm, white stem completely intact to support the new green growth emerging from the center.
Happy growing! 🌿
— Sarah, Urban Hydro Space

Sarah is the founder of Urban Hydro Space and an indoor gardening enthusiast dedicated to helping apartment dwellers grow fresh herbs and vegetables in small spaces. With hands-on experience testing hydroponic systems, she shares practical tips and honest product reviews to make indoor gardening accessible for beginners.