⏳ 16 min read · Last updated: September 2026
My first Kratky tote setup lasted three days before I nearly killed it. I had moved six seedlings out of their jars into one dark storage bin, and because more water sounded like less work, I filled it right up to the lid. By the third morning the basil was lying flat, and when I lifted a net cup the roots were brown and smelled like a pond. I poured about three gallons down the sink, and the plants still took two weeks to recover.
That mistake taught me more than the build did. A tote is the obvious next step once a row of jars starts eating your counter, since one reservoir replaces six separate top-offs. However, the method only works if you respect how Kratky actually works: the water level has to fall, and the roots left in the gap have to breathe. So this guide covers the parts that matter, from sizing the bin and cutting the lid to refilling it without drowning anything.
🌿 Why a Kratky Tote Setup Beats a Row of Jars
A jar is a lovely way to learn. Six jars, however, mean six pH readings, six fill lines and six chances to forget one. A tote pools all of that into one reservoir, so you test once and top off once. The bigger volume also moves more slowly, because a few ounces of drinking or evaporation barely shift the strength of several gallons.
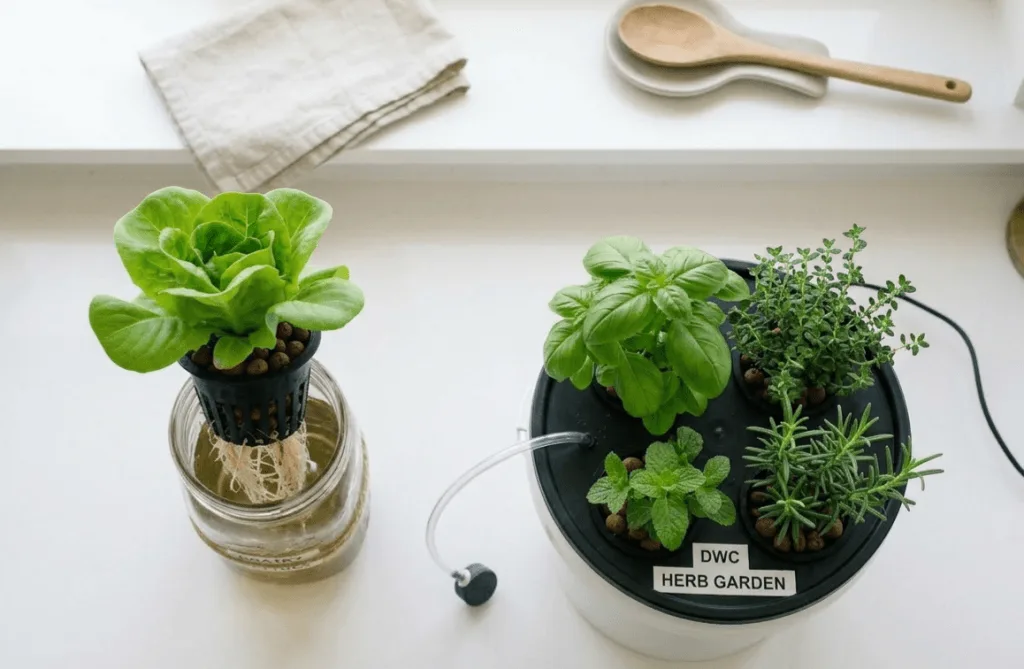
It also stays silent. There is no pump, no air stone and no hum at night, which is why passive hydroponics suits a studio better than a bucket system. Still deciding between the two methods? My DWC vs Kratky comparison for small apartments lays out the trade-offs. Meanwhile, the complete beginner’s guide to apartment hydroponics covers the basics first.
- Size the tote for the crop: Kratky’s own lettuce method budgets 1.5 to 2 gallons per plant.
- Start with the bottom half inch to 1 inch of each net cup in the solution, then let the level fall.
- Once roots hang down, keep a 1 to 2 inch air gap and never refill above it.
- Mix a shared solution at EC 1.5 and pH 5.5 to 6.5.
- Top off daily with plain pH-adjusted water, and do a full reservoir change every 2 weeks.
📊 Crops for a Shared Tote at a Glance
These six grow well together in a passive tote, as long as you pair them by room temperature. Every number comes from the same crop table the rest of the site uses.
- A warm room and you want a fast first cut → plant basil
- A cool room that rarely passes 70°F (21°C) → plant lettuce
- Kitchen scraps and no patience → regrow green onions
- The most forgiving herb → try mint, but give it the corner spot
🛠️ Building Your Kratky Tote Setup
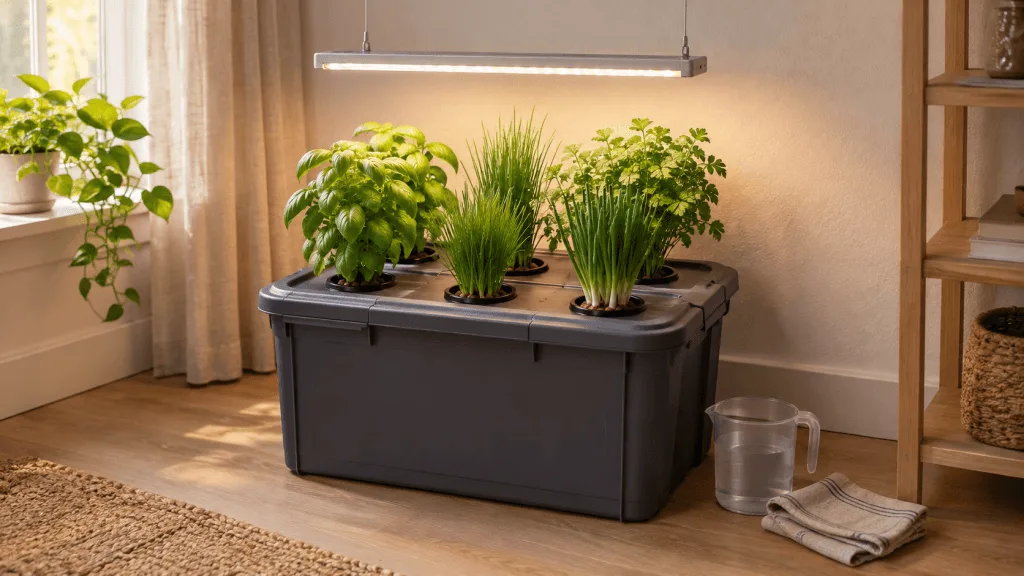
The build takes about an hour, although most of that is measuring. Because the whole method depends on a dark, still reservoir, the container choice decides more than any other part.
📏 How much water six plants really need
Most tote guides skip this number, and it is the one that decides how often you refill. Bernard Kratky developed the method as a horticulturist at the University of Hawaiʻi. He fills his lettuce tanks with 1.5 to 2 gallons of solution per plant, so the crop can finish on a single fill. Six plants on that basis want 9 to 12 gallons.
A 5-gallon (19-litre) bin still works, though. It simply means you top off more often in the last few weeks, when big plants drink the most. If you have the floor space, a 10-gallon (38-litre) opaque tote gets much closer to hands-off, while a shallow under-bed box looks tempting but runs dry quickly under six thirsty herbs.
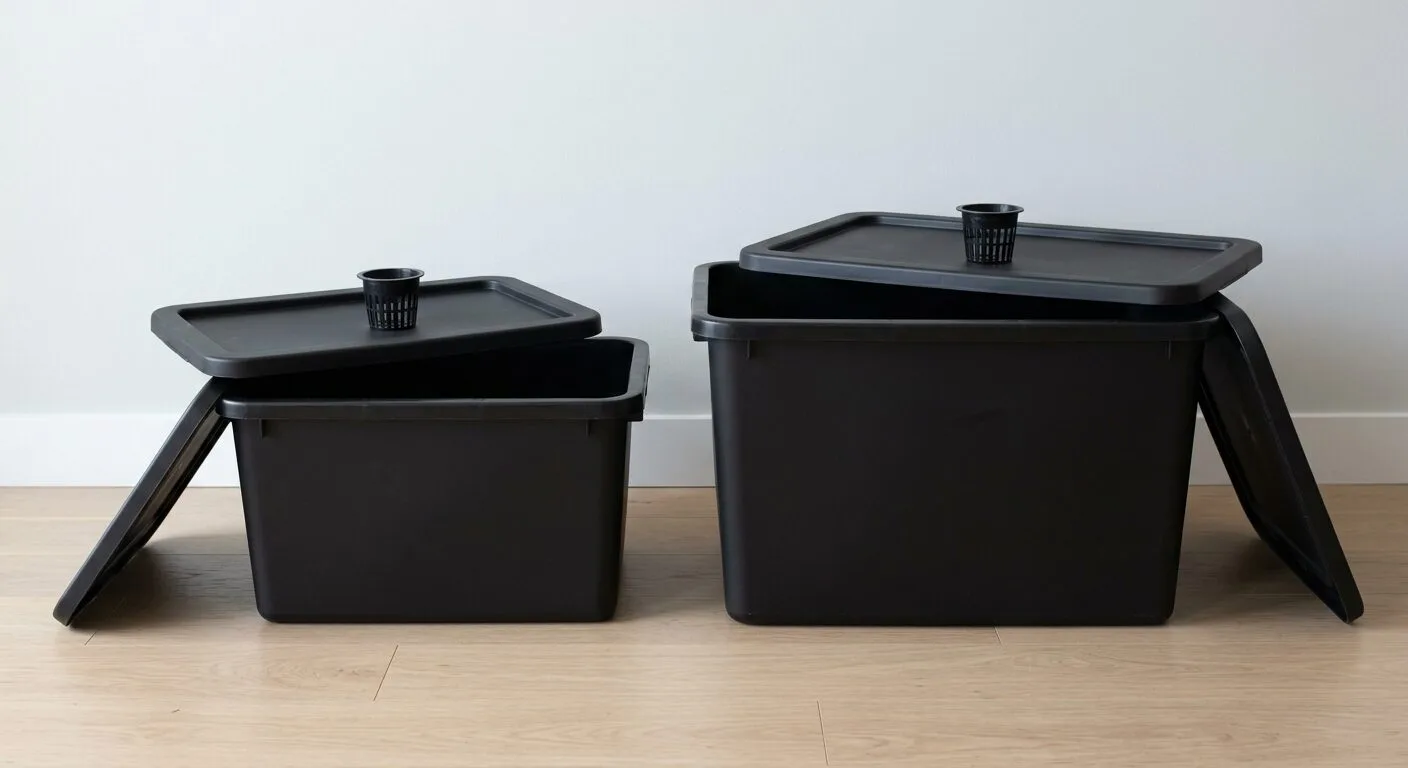
Before you shop, run your crop list through the hydroponic shopping list builder. For the tote itself you need:
- An opaque storage tote in black, grey or dark green, with a flat, fairly stiff lid
- Six 2-inch net cups
- A drill with a 2-inch hole saw
- Rockwool cubes or clay pebbles, depending on how you start seedlings
- A marker and some sandpaper
Before you buy, hold the empty tote up to a bright window. If you can see the light through the walls, algae will see it too, so pick a darker one or plan to wrap it.
✂️ Cutting the lid without cracking it
First, plan the layout: two rows of three holes fit most rectangular lids. Leave roughly 5 to 6 inches between hole centres for herbs you will keep cutting. Full heads of lettuce need more room than that, so plant four instead of six if heads are the goal.
Cold, brittle lids crack easily, so work slowly:
- Mark the six centres with a marker and check the spacing twice.
- Lay the lid on a scrap block of wood so the plastic is supported under each mark.
- Cut about three quarters of the way through, then flip the lid and finish from the other side. Kratky recommends this for a cleaner hole and fewer plugs stuck in the saw.
- Sand the edges until a net cup drops in and sits flush.
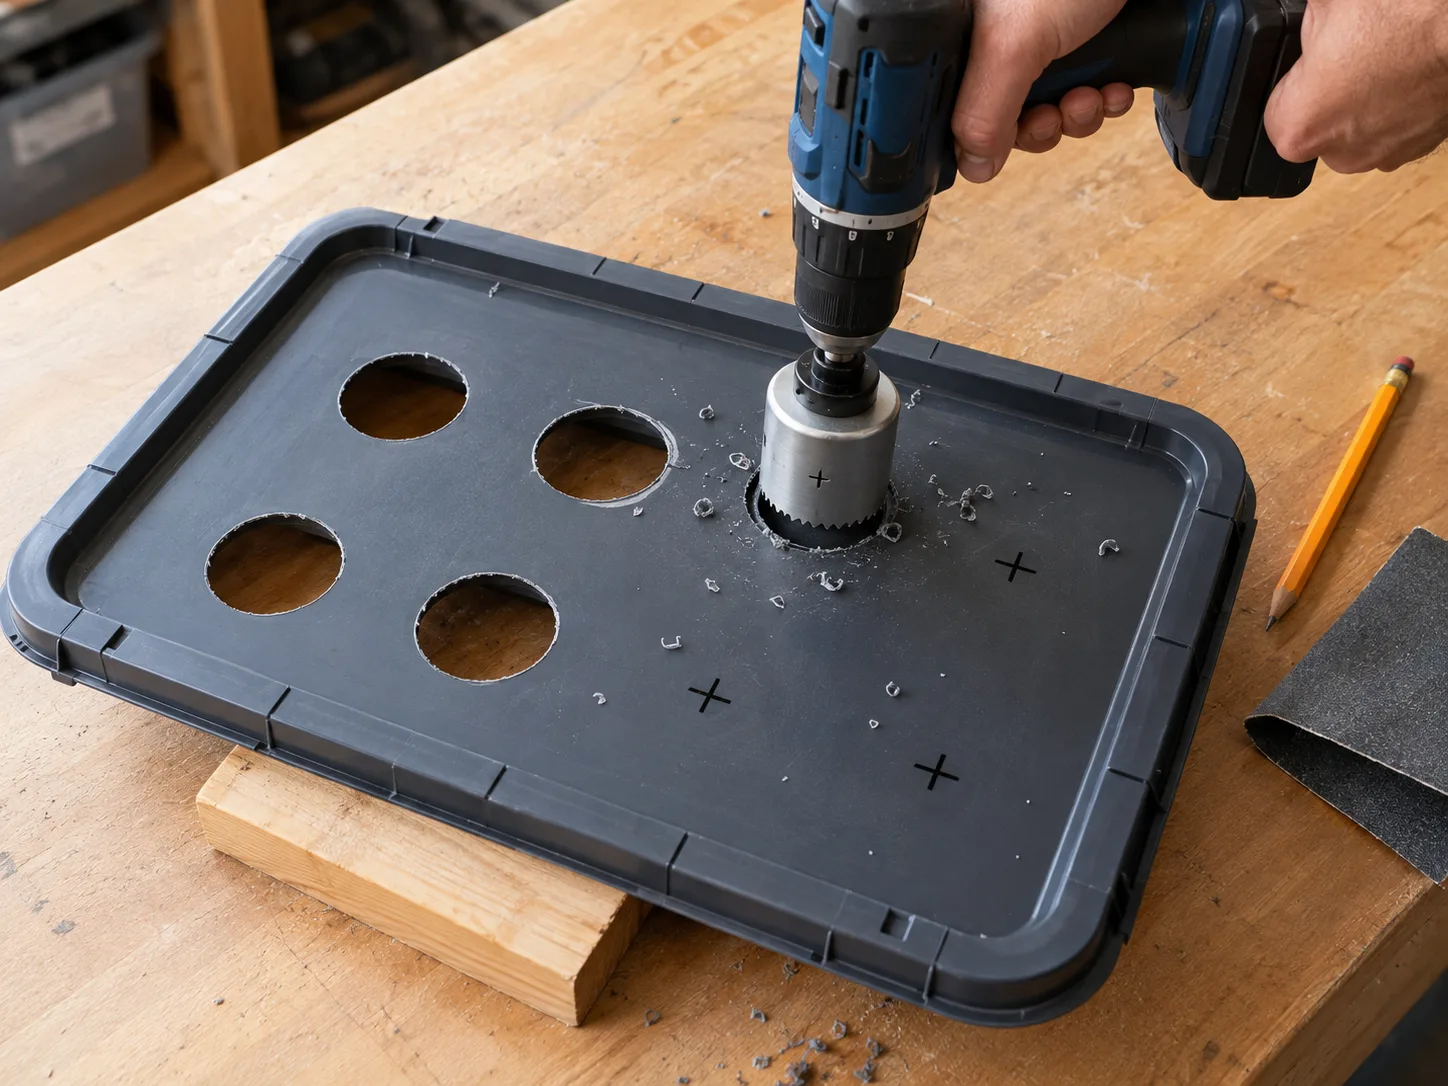
A thin lid can sag in the middle once six wet plants sit on it. Kratky’s fix is to stand an upturned plastic pot on the floor of the tank under the centre, which is easy to copy in a tote.
Started in jars? Simple apartment friendly Kratky setups you can build with jars
Need cups that fit? Best net cups and lids for simple Kratky setups
💧 Filling and Planting a Kratky Tote Setup
Everything in a Kratky tote setup is decided on day one, since you never pump or stir anything afterwards. Mix carefully, set the level carefully, and the tote mostly runs itself.
⚗️ Mixing one solution for six plants
Six plants sharing one reservoir means one strength for all of them. EC 1.5 is the middle ground I use for mixed herbs and greens, even though basil and mint would take more on their own. Meanwhile, keep the solution between pH 5.5 and 6.5, because outside that range the plants lock out nutrients even when the EC reads fine.
To fill the tote:
- Mix the nutrients in a separate jug first, following the label or the hydroponic pH and nutrient calculator.
- Pour it into the tote, then check it reads EC 1.5.
- Adjust pH last, a few drops at a time, stirring between readings.
Two-part nutrients need a little extra care here, because the two concentrates react if they meet undiluted. So add each part to the water separately, and the beginner nutrients guide explains what each bottle does.
🌊 Setting the first water level
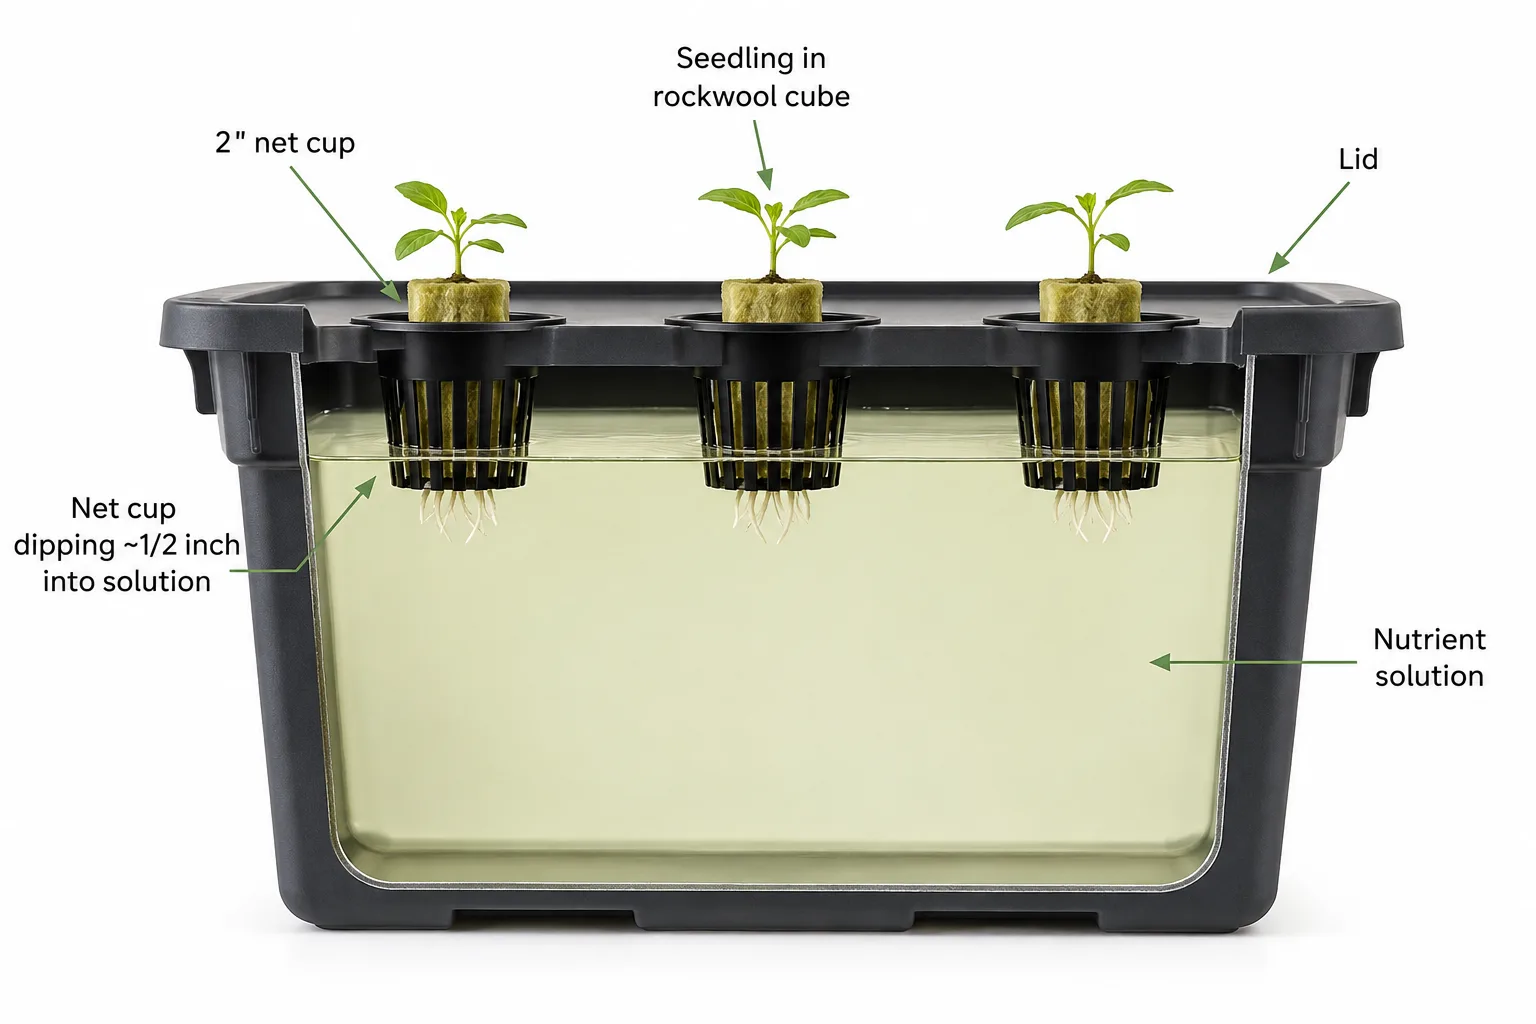
At planting, the bottom half inch to 1 inch of each net cup should sit in the solution. That is the level Kratky uses, and it works because the growing medium wicks water up to the seedling before it has roots of its own. A rockwool cube wicks that water up well, which is why it suits a Kratky start.
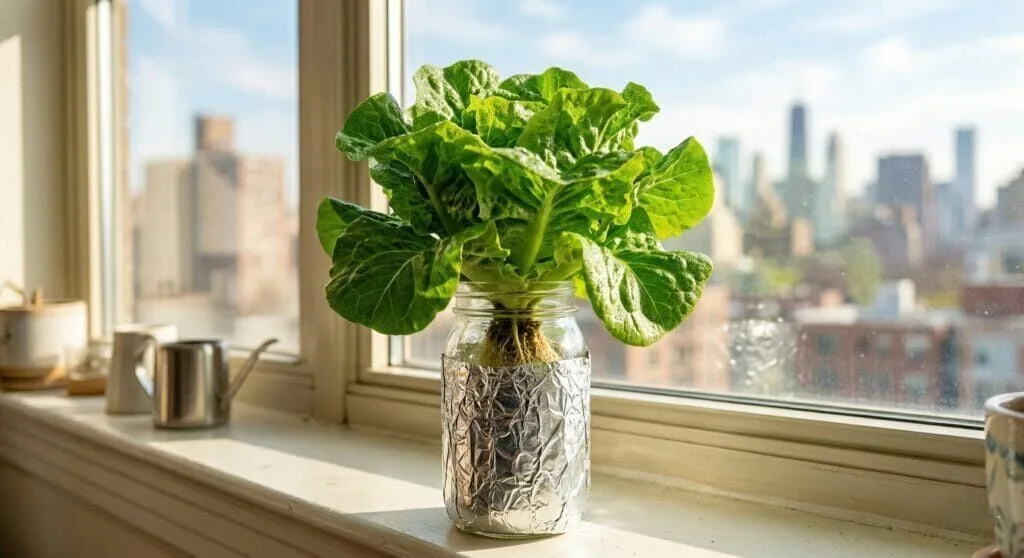
After that, leave the level alone. Over the next few weeks the plants drink it down, and the roots follow the water. The ones left hanging in the damp space under the lid turn into air roots, which take their oxygen straight from that air. Those roots are the reason a tote needs no pump.
📅 The Daily and Two-Week Routine
This part is where tote growers go wrong. Pure Kratky never raises the water, while this tote gets a daily top-off, so what follows is a modified Kratky. The fill line is what keeps the air roots safe.
📏 Keeping the air gap with a fill line
When the roots have grown well past the cups, mark a line on the inside of the tote 1 to 2 inches below the bottom of the net cups. That is your fill line from now on, and the space above it belongs to the air roots.
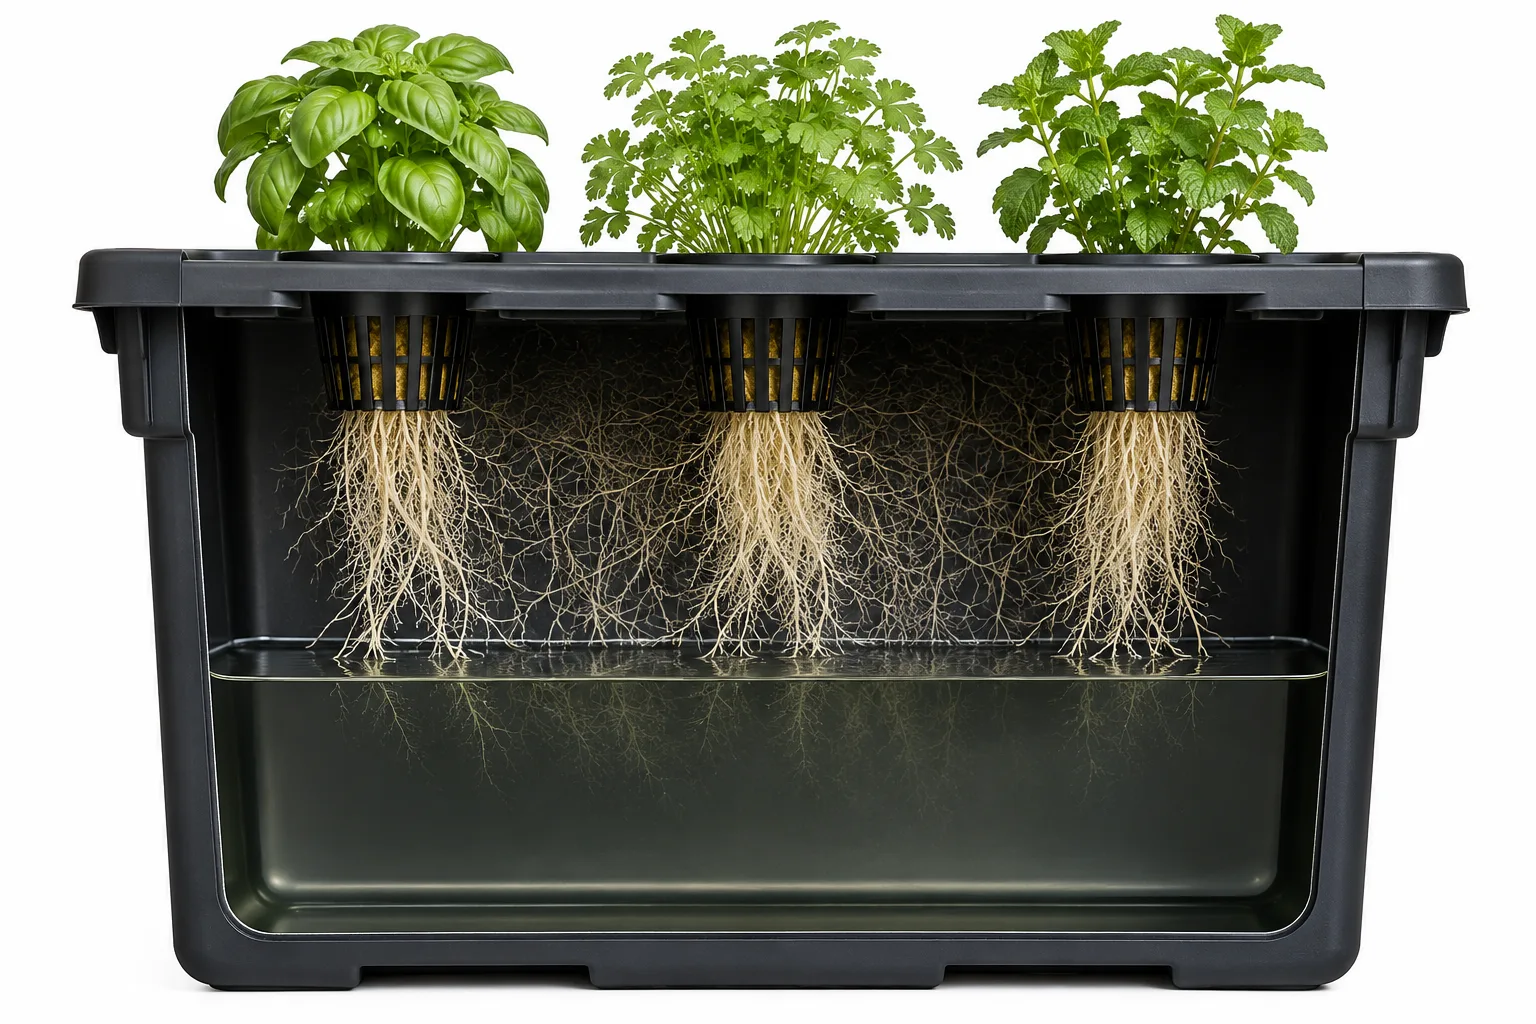
Each day, top off with plain pH-adjusted water up to that line and no higher. Plain water matters, because the salts stay behind as the plants drink. Adding more nutrient solution on top would push the EC higher every single day.
Prefer to run it pure Kratky, with no daily top-offs? Then size the tote for the whole crop and let the level fall on its own. If it runs low near the end, top up with nutrient solution rather than plain water, and by no more than 1 inch, because by then the plants have used much of the feed.
🧪 The full reservoir change every 2 weeks
Even with careful top-offs, the balance of nutrients drifts as the plants take what they want and leave the rest. So do a full reservoir change every 2 weeks. The trick is to move the lid and plants as one unit rather than pulling cups out one at a time:
- Mix the fresh solution in a jug first, at EC 1.5 and the right pH.
- Lift the whole lid straight up and rest it across a second bin or a deep baking tray, so the roots hang free.
- Pour the old solution down the sink and wipe the inside of the tote.
- Refill to the fill line, never above it, and lower the lid back on.
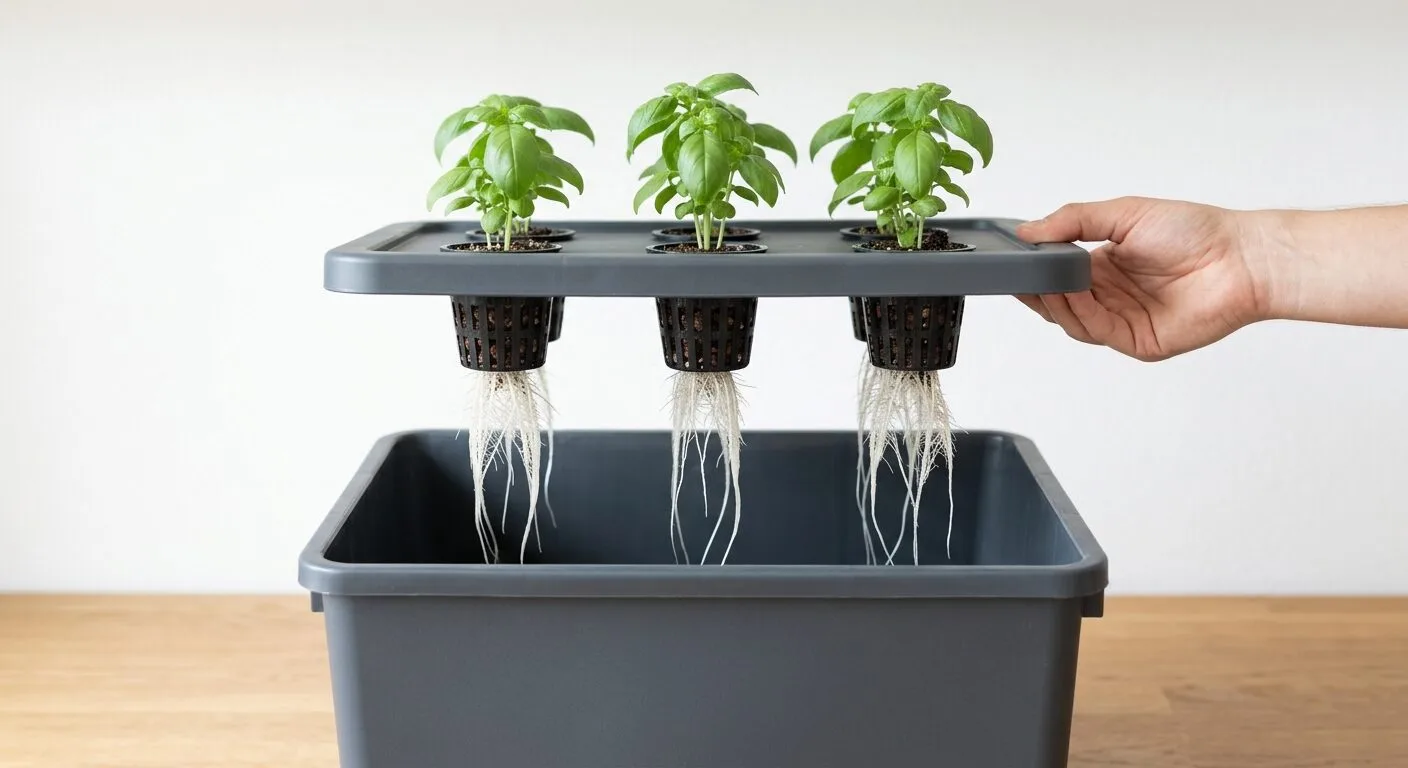
The whole job takes about five minutes. For a reminder system, the printable hydroponics tracker has columns for EC, pH and change dates.
🔍 Checking roots without tearing them
Resist the urge to lift the lid to look. Kratky warns that lifting the cover while a crop grows tears roots and sets the plants back, and a mat of air roots snaps far more easily than you’d expect. Instead, lift a single net cup a little way and look down the hole with a phone torch. Once every two weeks, during the change, you get a proper look anyway.
🌿 Choosing Crops That Share One Reservoir
Kratky’s method was built for crops that finish quickly on a modest amount of water. Leafy greens and cut-and-come-again herbs suit a Kratky tote setup well, whereas long-season fruiting plants drink far more than a passive bin can supply.
🌡️ Pair crops by temperature, not just by EC
This is the pairing rule most guides miss. Basil, mint, chives, parsley and green onions all like warm air around 65 to 75°F (18 to 24°C). Lettuce is happiest at 65 to 75°F (18 to 24°C) by day with cooler nights, and in a kitchen that runs warmer than that it turns bitter and bolts while the basil beside it thrives.
So pick one group per tote. A warm tote of basil, chives and parsley works nicely at EC 1.5, while a cool tote of mixed lettuces runs happily on the same reservoir in a spare room. For more on each crop, see my guides to growing hydroponic lettuce on a countertop and growing hydroponic chives in an apartment.
🪴 Why mint gets the corner spot
Mint is the easiest plant in the table, yet it is also the one most likely to take over. Its roots spread fast through a shared reservoir, and its leaves shade whatever sits next to it. Give it a corner hole, cut it back hard every week, and read the hydroponic mint guide before you plant it next to anything slow.
Timing matters as well. Because a slow crop like parsley takes 6 to 8 weeks to a first cut, it sits in shade if you plant it beside basil on the same day. Start the slow one a week or two early, then use the seed to harvest countdown calculator to line up the harvests.
💡 Light and Temperature for a Passive Hydroponic Tote
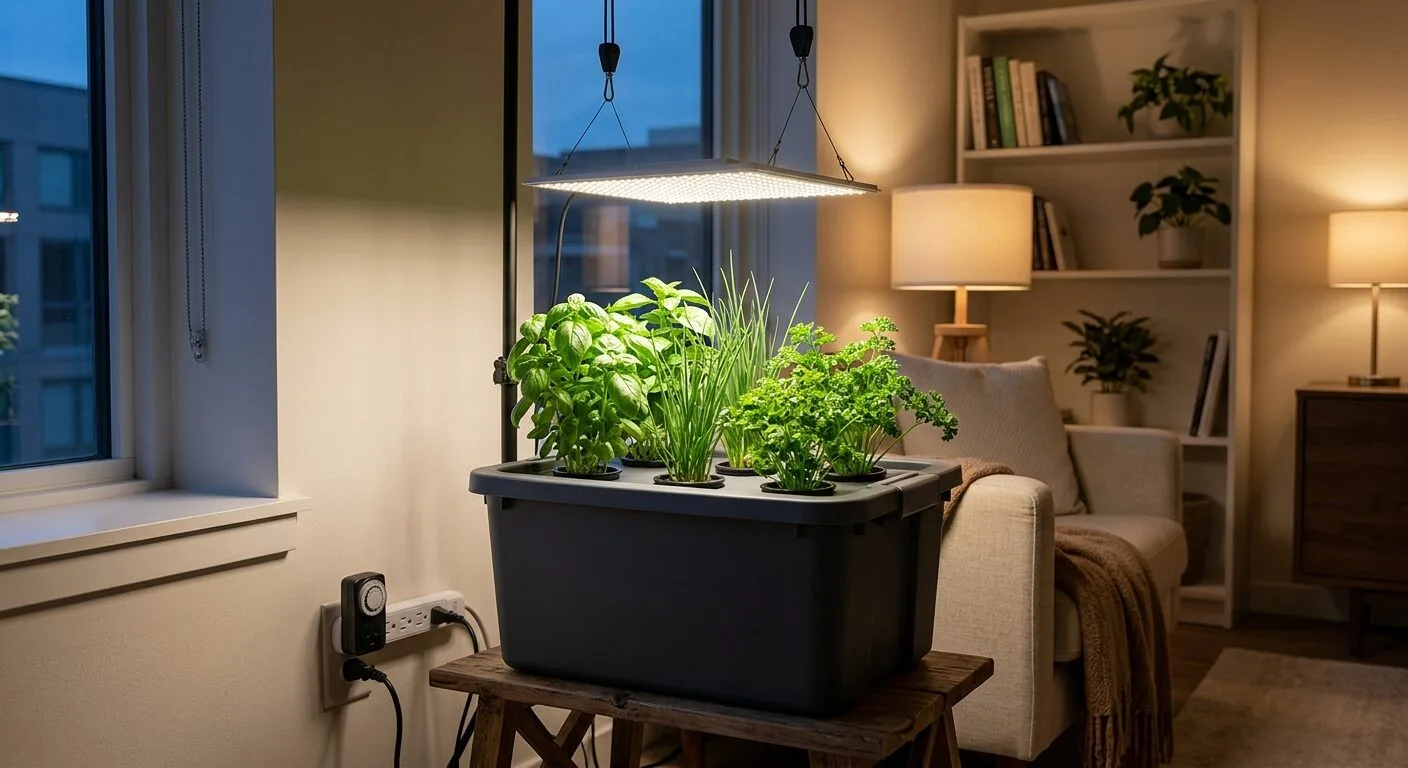
A Kratky tote setup on an apartment floor rarely gets enough window light for six plants. Leggy stems and pale leaves are the usual result, so plan on a grow light from the start.
☀️ Setting up the grow light
Hang one LED panel centred over the lid, 6 to 8 inches above the top leaves. To match the wattage to your tote, run its footprint through the grow light calculator. If you are still choosing a fixture, my roundup of the best grow lights for low-light apartments under $50 covers panels that fit a tote.
Then set a timer for 14 hours on, 10 hours off, and raise the light an inch whenever the tallest plant closes the gap. Spinach is the exception at 12 hours, which is one more reason to keep it out of a mixed tote. The compact timers for apartment grow lights roundup covers models that fit a crowded power strip.
🌡️ Keeping the reservoir cool
Aim for water between 65 and 75°F (18 and 24°C). Above 75°F the solution holds less oxygen, and root rot becomes more likely the further it climbs. A tote on a sunny floor or next to a radiator warms up faster than you’d think.
When the water runs warm, move the tote somewhere cooler first. Failing that, press a frozen water bottle against the outside of the tote, since ice dropped straight in shocks the roots and wears off within the hour. My guide to controlling temperature in a small hydroponic system has more summer fixes.
🩺 Troubleshooting Your Kratky Tote Setup
A Kratky tote setup fails quietly. Because nothing beeps, the clues are in the leaves, the meter and the smell of the water.
📈 EC keeps climbing between changes
In warm weather plants drink proportionally more water than nutrients, so the EC rises even when you do everything right. Kratky notes the same pattern in his tanks. Top off with plain water to the fill line, and if the reading still sits well above the 1.5 you mixed, bring the full change forward a few days. Next, the steps for bringing a high reading down are in how to lower EC in a small hydroponic system. After that, a decent meter from my best EC and TDS meters for small reservoirs roundup takes the guessing out.
⚗️ pH drifting out of range
A big tote drifts more slowly than a jar, but it still drifts. Check it at least twice a week, and daily for the first week after planting. If it keeps wandering, why hydroponic pH keeps drifting goes through the causes, and my pH meter picks for beginners compares pens that hold calibration.
🌥️ Plants wilt at midday, then recover
A little afternoon droop is normal in Kratky systems, and Kratky himself describes plants that wilt at midday and recover by late afternoon. So don’t reach for the jug. Wilting that lasts into the evening is different: check whether the water has fallen so far that the lowest roots no longer reach it.
🚨 Brown roots and a swampy smell
Healthy roots look white or light tan, and they smell of almost nothing. Brown, slimy roots with a pond smell mean rot, usually triggered by warm water or a drowned air gap. In a shared tote it spreads from plant to plant within days, so act the same day:
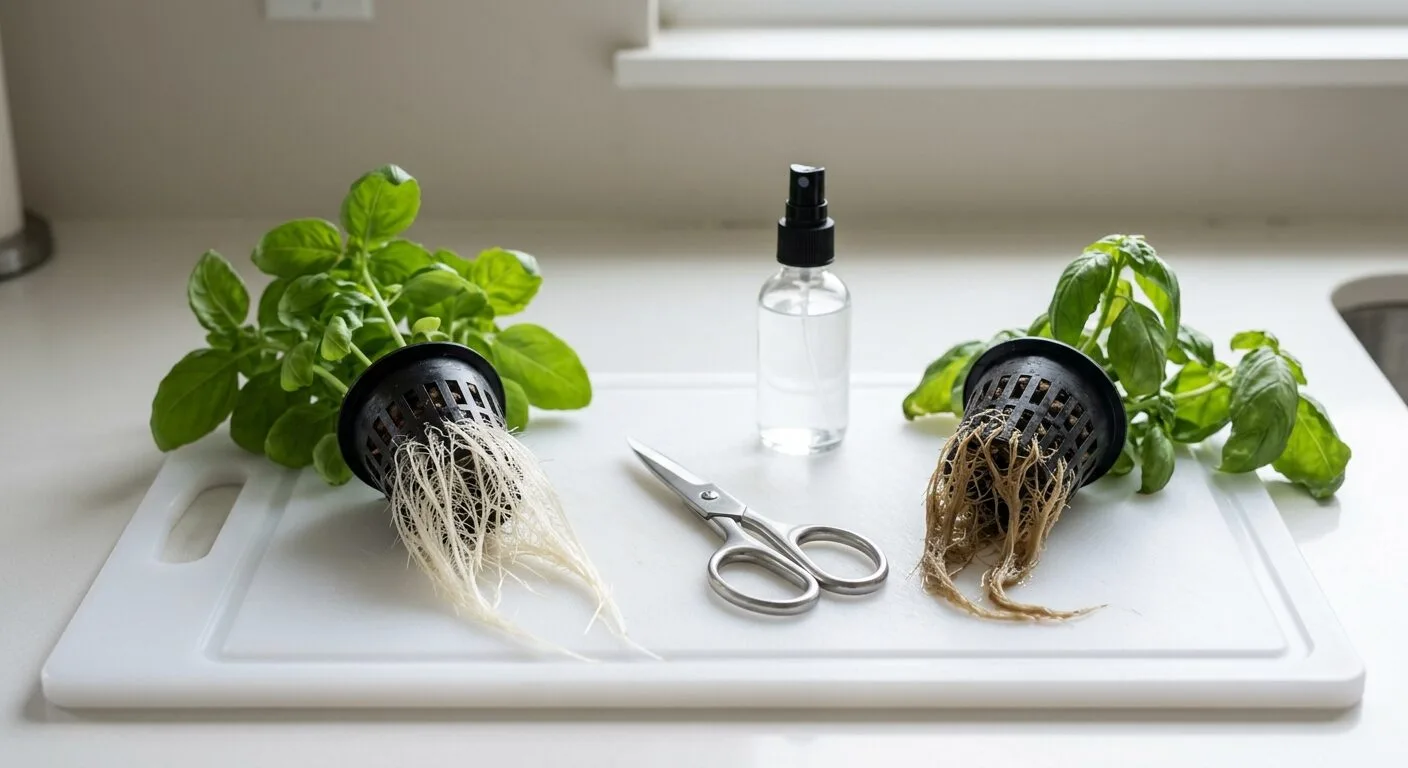
- Lift the lid and plants as one unit and set them across a spare bin.
- Rinse the roots gently under lukewarm water and cut away anything mushy with clean scissors.
- Empty the tote and clean it with diluted hydrogen peroxide, then rinse well.
- Refill with fresh solution at EC 1.5, but only to the fill line.
For doses and safety, read using hydrogen peroxide for root rot, and for stopping it coming back, how to prevent root rot in small hydroponic systems.
🟢 Green water or slime on the walls
A green tint means light is getting in, so block it first. Cover empty holes, tape over any thin spot in the plastic, and wrap a see-through tote in foil tape. My guide to stopping algae in hydroponic jars applies to totes just as well. If rot keeps returning despite all of this, a pump is the next step, and the quietest air pumps for apartment DWC turns the same tote into an aerated system.
The original method: Kratky, A Suspended Net-Pot, Non-Circulating Hydroponic Method (University of Hawaiʻi CTAHR)
For pH targets: University of Missouri Extension: Hydroponic Nutrient Solutions
For EC readings: Oklahoma State Extension: Electrical Conductivity and pH Guide for Hydroponics
💬 A Word From Sarah
Before the tote, I kept four jars on the kitchen counter and checked every one of them each morning. The switch to one bin felt like a downgrade at first, because I could no longer see the roots through the glass. It took me a full grow to trust a closed lid. What changed my mind was the tape on the lid. Once I started writing the EC down at every check, the numbers told me more than peering at roots ever had. So I stopped disturbing the plants just to reassure myself.
❓ Frequently Asked Questions
📏 How big should a tote be for six plants?
Kratky’s lettuce method budgets 1.5 to 2 gallons of solution per plant, so six plants would finish on 9 to 12 gallons without refills. A 10-gallon opaque tote gets close. A 5-gallon tote still works, but you will top off with plain water far more often late in the grow.
💧 Can I use a clear tote for a Kratky setup?
Not without covering it. Light reaching the solution feeds algae, which competes with your plants and clouds the water. Choose an opaque tote in black, grey or dark green, or wrap a clear one fully in foil tape and cover any unused lid holes.
🌊 How big should the air gap be in a Kratky tote?
At planting, the bottom half inch to 1 inch of each net cup sits in the solution. Once roots have grown well past the cups, keep the water 1 to 2 inches below the cups. Mark that fill line inside the tote and never refill above it, because submerged air roots cannot breathe.
🚰 How often should I top off and change the water?
Top off daily with plain pH-adjusted water, up to your fill line and no higher. Do a full reservoir change every 2 weeks with fresh solution at EC 1.5. Plain water for top-offs keeps the leftover salts from concentrating between changes.
🔍 Can I lift the lid to check the roots?
Try not to while plants are growing. Kratky warns that lifting the cover tears roots and slows growth. Instead, lift one net cup slightly and look down the hole with a torch. Save the full inspection for the two-week reservoir change, when you move the lid and plants as one piece.
🌿 Can I mix different crops in one tote?
Yes, if they like the same air temperature. Basil, chives, parsley and green onions share a warm room happily at EC 1.5. Lettuce wants cooler air and bolts in a warm kitchen, so give it its own tote. Keep mint in a corner and cut it back often.
🔇 Does a Kratky tote make any noise?
No. There is no air pump or water pump, so a passive tote is silent, which makes it a good fit for a bedroom or studio. The only sound is water pouring when you top off, and the grow light timer if you choose a mechanical one.
🧪 How often should I check pH in a tote?
Daily for the first week after planting, then at least twice a week. A large tote drifts more slowly than a jar, but it still moves. Keep it between pH 5.5 and 6.5, adjust a few drops at a time, and stir before you take the next reading.
🌥️ Why do my tote plants wilt in the afternoon?
Slight midday wilting is normal in Kratky systems, and plants usually recover by late afternoon. Do not add water for that alone. If wilting lasts into the evening, check whether the water has dropped too low for the lower roots to reach, and top off to the fill line.
☀️ Do I need a grow light for a Kratky tote?
In most apartments, yes. Six plants on a floor or shelf rarely get enough window light and grow pale and leggy. Hang an LED panel 6 to 8 inches above the leaves and run it 14 hours on and 10 hours off, raising it as the plants grow.
🍅 Can I grow tomatoes in a Kratky tote?
Not well. Kratky designed this method for crops that need modest water, and a tomato drinks far more than a shared tote can supply. It also crowds out every other plant. Grow tomatoes on their own in a deeper container or an aerated bucket instead.
Happy growing! 🌿
Sarah, Urban Hydro Space
Sarah Whitfield is the founder of Urban Hydro Space and an indoor gardening enthusiast dedicated to helping apartment dwellers grow fresh herbs and vegetables in small spaces. She researches hydroponic systems carefully from real specifications and verified buyer feedback, and shares practical tips and honest, clearly labeled product picks to make indoor gardening accessible for beginners.