⏳ 13 min read · Last updated: September 2026
Disclosure: As an Amazon Associate I earn from qualifying purchases. Links marked for Amazon are affiliate links, at no extra cost to you.
🔎 Research pick: every product in this post, chosen from published specifications and owner reports rather than my own grows. How I test and choose products.
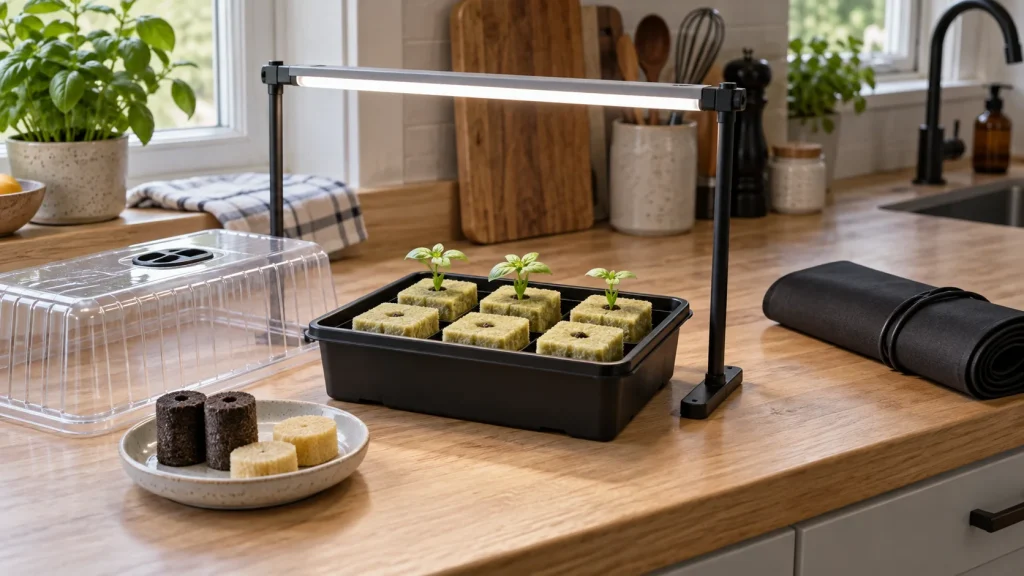
The best hydroponic seed starting kit is the one that fits your next system. For jars or DWC, that means compatible plugs, a watertight tray and enough light. For an existing countertop garden, you may only need replacement sponges and seeds. Meanwhile, a dome helps plugs stay moist in dry rooms; a heat mat solves a temperature problem. Therefore, neither belongs in every shopping basket.
This guide compares each of those parts, explains when you need them and when you can skip them, and gives a research pick for each. For the method itself, from soaking a cube to moving a seedling into its jar, the step-by-step guide to starting hydroponic seeds in rockwool covers every stage.
📐 The Seed Starting Kit at a Glance
- For jars and DWC, compare rockwool and bound starter plugs; check their fit inside your net cups before buying.
- Prepare rockwool according to its label. Our starting method uses pH 5.5 water, followed by draining without squeezing.
- Buy a dome if plugs dry too quickly. Add heat only when measured plug temperature is too low for your crop.
- Provide light as seedlings emerge. Set distance for the fixture, rather than assuming every lamp works at the same height.
- Choose first-feed strength for the crop and plug. EC 1.0 to 1.2 mS/cm is a basil example, not a universal seedling target.
📊 The Parts Compared
Prices are pulled from Amazon and were last checked on 27 September 2026 at 2:46 am. Amazon prices change often, so check the listing before buying.
Sarah’s rating is an editorial assessment of fit, preparation and usefulness in a small apartment. These are research picks rather than hands-on test scores. The stars reflect editorial judgement only.
- Kratky jars or a DWC tote → compatible plugs, a no-hole base and a seedling light; add a dome if needed
- A countertop smart garden → grow sponges sized for its baskets; reuse its light and baskets
- A cold growing spot → measure plug temperature, then add a heat mat and thermostat if your crop needs warmth
📏 Check These Four Fits Before Buying
- Plug to basket: compare the plug width and height with the basket’s inside dimensions.
- Insert to base: check the actual dimensions and rim, even when both say 1020.
- Tray to shelf: allow space to lift the tray out without tilting water onto furniture.
- Light after germination: make sure seedlings still have a secure light when you remove the dome.
The table lists alternatives. You do not need four plug types, two domes and a separate light for a garden that already has one.
🧱 Choosing a Starter Plug
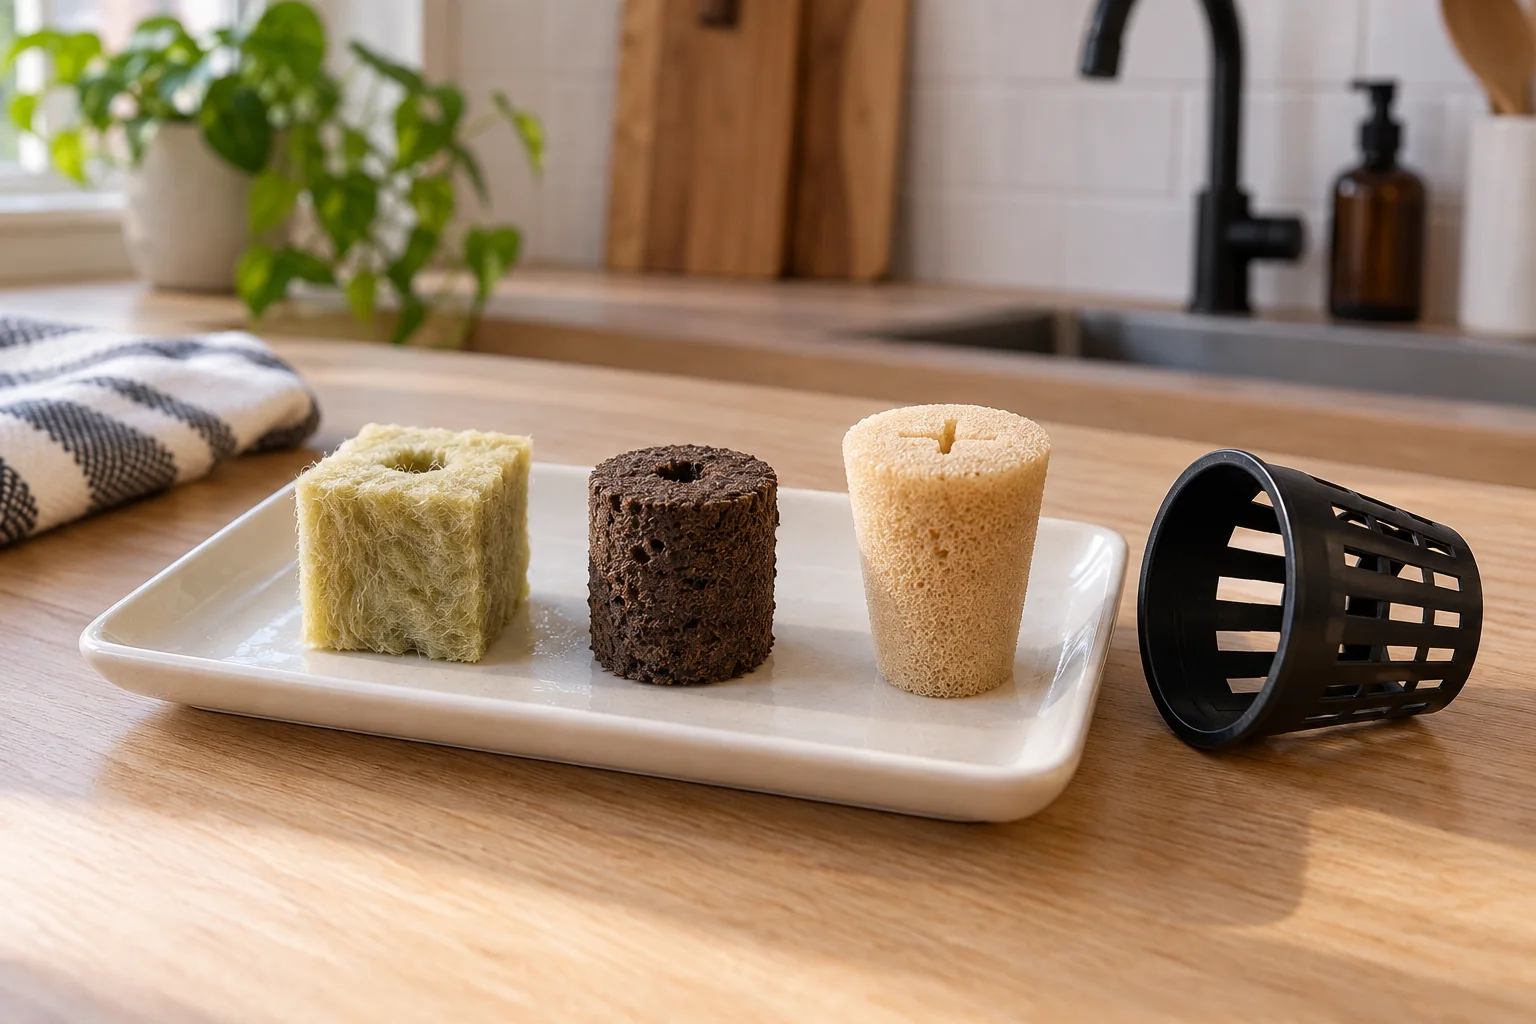
The plug is the part that decides whether seeds germinate and whether the seedling transplants cleanly, so it deserves the most thought. In a water-based system, a plug has to hold moisture and air at the same time, keep its shape when wet, and shed nothing into the reservoir. Four types dominate, and they suit different setups.
🟫 Rockwool Cubes (Best for Most Beginners)
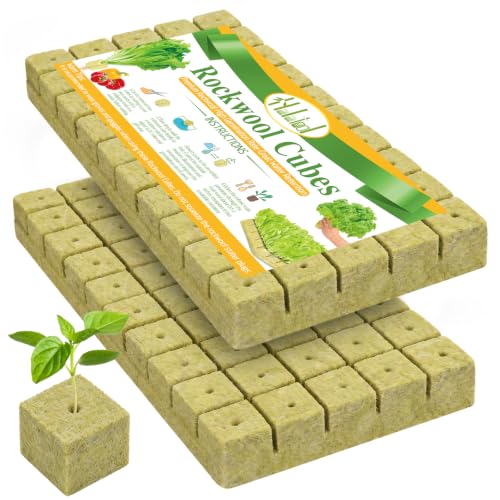
Halatool 1-inch rockwool cubes are a practical starting option for jars and DWC. The mineral fibres hold the plug together, so you move the rooted cube as one piece. However, a net cup’s advertised diameter describes its rim, not necessarily the space inside. So check the basket opening and depth against the cube dimensions.
Rockwool needs preparation before sowing. Follow the pack instructions; our rockwool method uses water adjusted to pH 5.5. Check it with a meter from the pH meter guide. Afterward, let the saturated cube drain. Do not squeeze or compress it: that damages its structure. Grodan gives the same handling advice in its growing-media guide. Handle dry fibres gently and follow the label’s precautions.
- Inert and stable in water for the whole grow
- Works with compatible net cups; measure their internal space
- Needs preparation according to the product instructions
- Easy to overwater, which invites damping off
🌿 Rapid Rooter Plugs (Bound Organic Alternative)

General Hydroponics Rapid Rooter plugs use composted material held together with a binder. The manufacturer’s preparation instructions call for a quick soak in water or a very mild nutrient solution. Keep the plug moist without leaving it in deep water. However, it can still be overwatered.
Choose these if you prefer handling a bound organic plug to mineral wool. Compare the current pack prices above with the number you will actually use. After all, a larger pack is poor value if most of it sits unused. Store spare plugs according to the label and discard any that develop mould.
🧽 Grow Sponges for Countertop Kits
If you own an AeroGarden, iDOO or similar smart garden, the plug must fit its particular basket. Growell grow sponges are a replacement option to compare with your existing pods. Check the supported model and sponge dimensions on the listing. However, similar-looking baskets are not proof of compatibility.
Prepare the sponges according to the pack instructions, then sow your own seeds. Reuse clean baskets that are still sound, so you do not buy another complete garden just to refill it. The countertop hydroponic systems guide covers the gardens themselves.
🟤 Peat Pellets (Only If Seedlings Go to Soil)
Jiffy 36mm peat pellets are cheap and familiar, because most garden centres sell them. They expand in water and hold together in a fine net. However, loose peat can escape into a reservoir, cloud the water and clog a small pump or air stone. So they earn only three stars here: a good choice for seedlings you plan to move into pots, and a poor one for a jar you will grow in for weeks.
📦 Trays and Humidity Domes
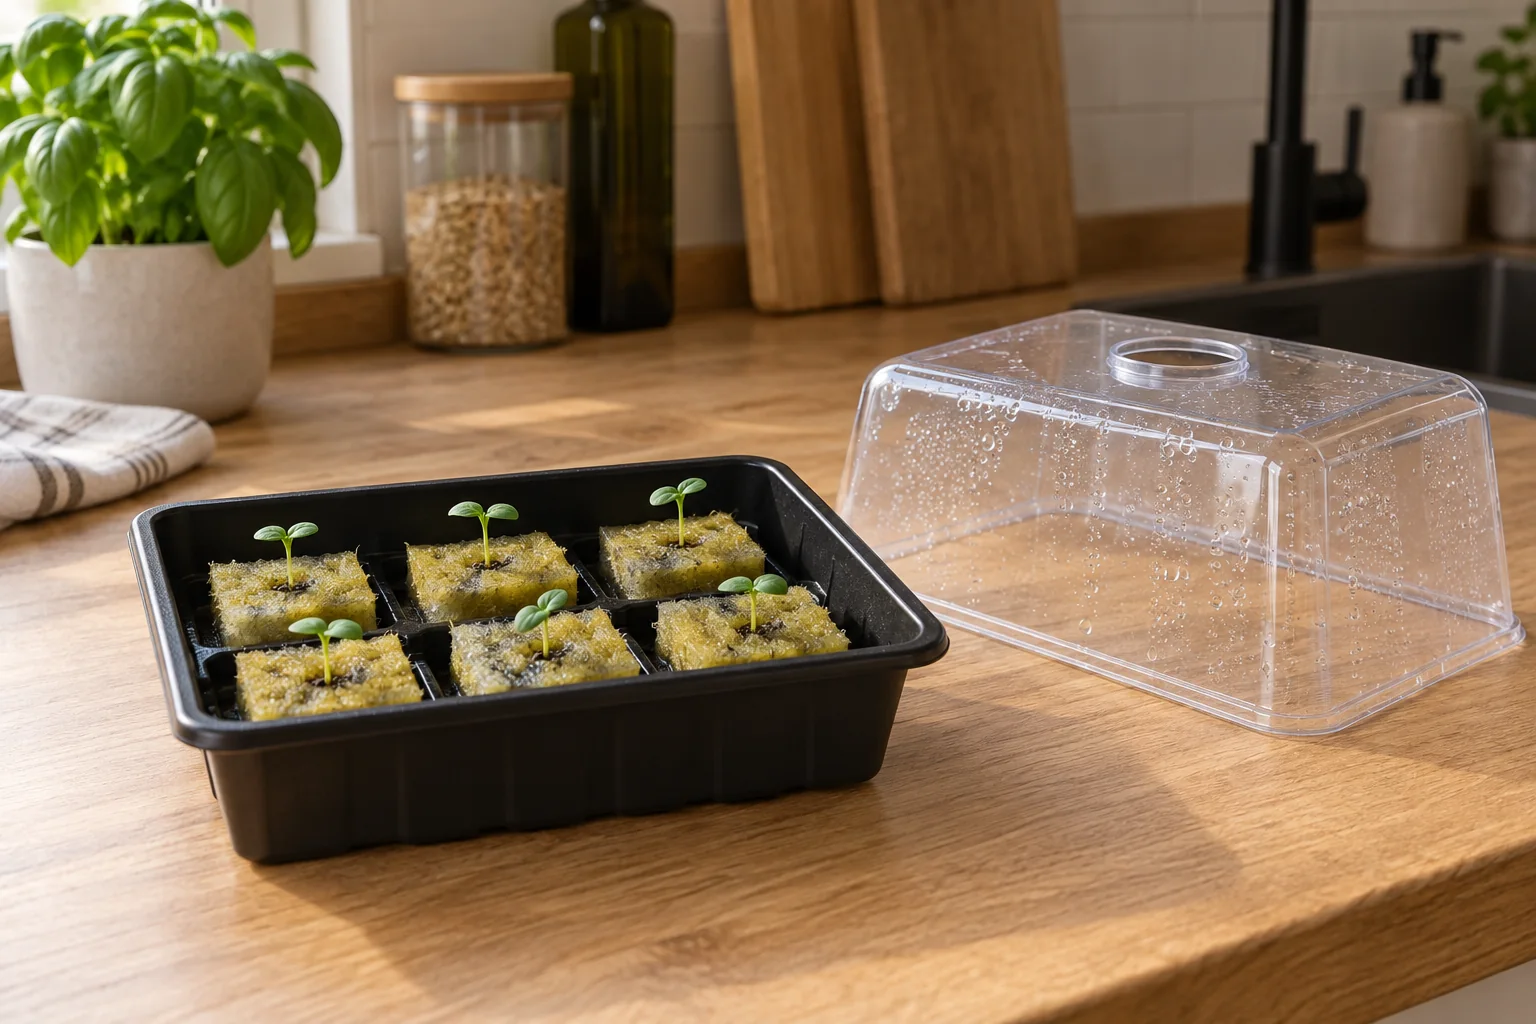
A watertight base catches drips and allows bottom-watering. Meanwhile, a separate insert can support the plugs above excess water. In a dry apartment, a dome slows moisture loss before germination. However, neither the base nor the dome replaces checking the plugs: aim for evenly moist media, not cubes standing submerged.
🗄️ A Tray Without Holes
Choose a base without drainage holes. The Yield Lab 10×20 trays suit a larger batch of plugs. Still, “1020” is a size category, not a guarantee that every insert and dome will nest correctly. Check actual outer dimensions, inner dimensions and the rim shape. For example, a smaller base for six plants may be easier to carry to the sink than a ten-pack of full-size trays.
🌤️ Choosing a Dome
For a small batch, compare the Bonviee 12-cell trays with vented domes. Check each cell’s dimensions against your chosen plug; do not force a cube into a narrow cell. Also, these domes belong with their small bases, not a full 10×20 tray.
The AC Infinity humidity dome with LED lighting combines a propagation enclosure with light bars mounted above it. Compare the exact bundle contents before buying a separate tray or lamp. Also plan how you will light the seedlings after the dome comes off. Therefore, paying for an integrated light makes less sense when your shelf already has one.
🌡️ Do You Need a Heat Mat?
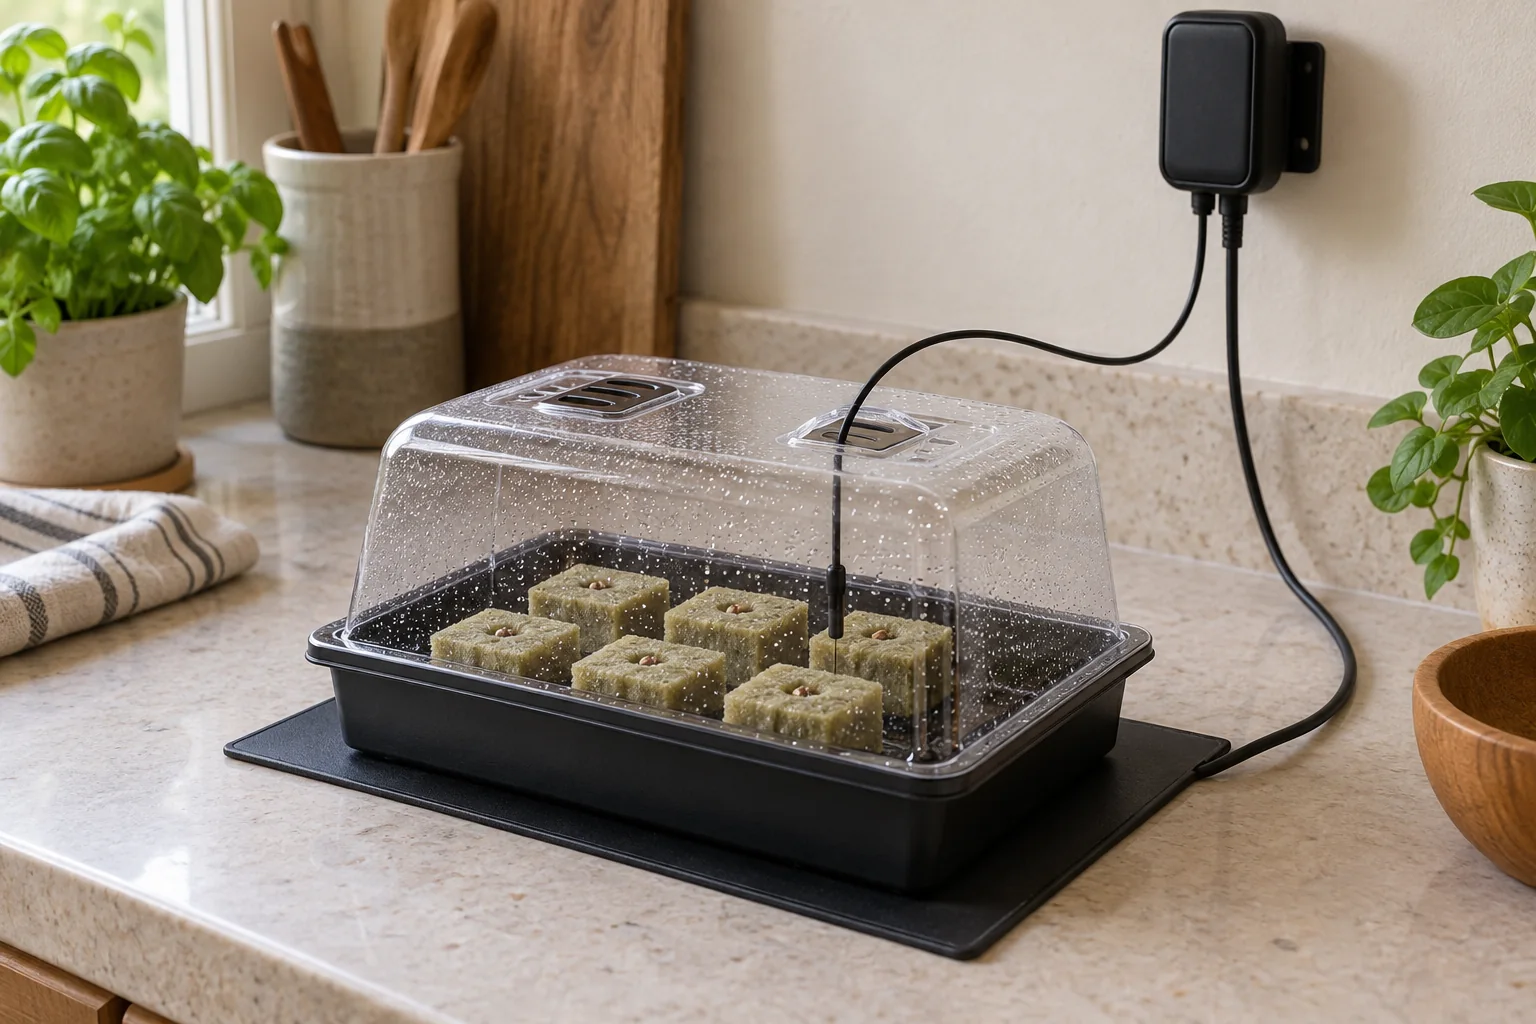
Often you do not. Most kitchen herbs and greens germinate well at ordinary room temperature, and many apartments sit comfortably warm. A heat mat earns its place in two situations: a room that runs cold, and warm-season crops such as basil, which sprout slowly when the air is cool.
If you need heat, pair the mat with a thermostat. The VIVOSUN heat mat and digital thermostat set is the option here. A mat adds heat relative to its surroundings; it does not guarantee one fixed plug temperature. Instead, place the probe in the growing medium as the controller instructions specify, and choose the target for the seed variety. Keep the mat flat, the controller and connections dry, and never immerse the equipment.
Afterward, reassess the heat once seeds emerge. Switch it off when the room provides suitable temperatures; in a cold room, control it for the crop rather than leaving it at a germination setting indefinitely. If your room is warm instead, small system temperature problems covers the opposite problem.
💡 A Light for Seedlings
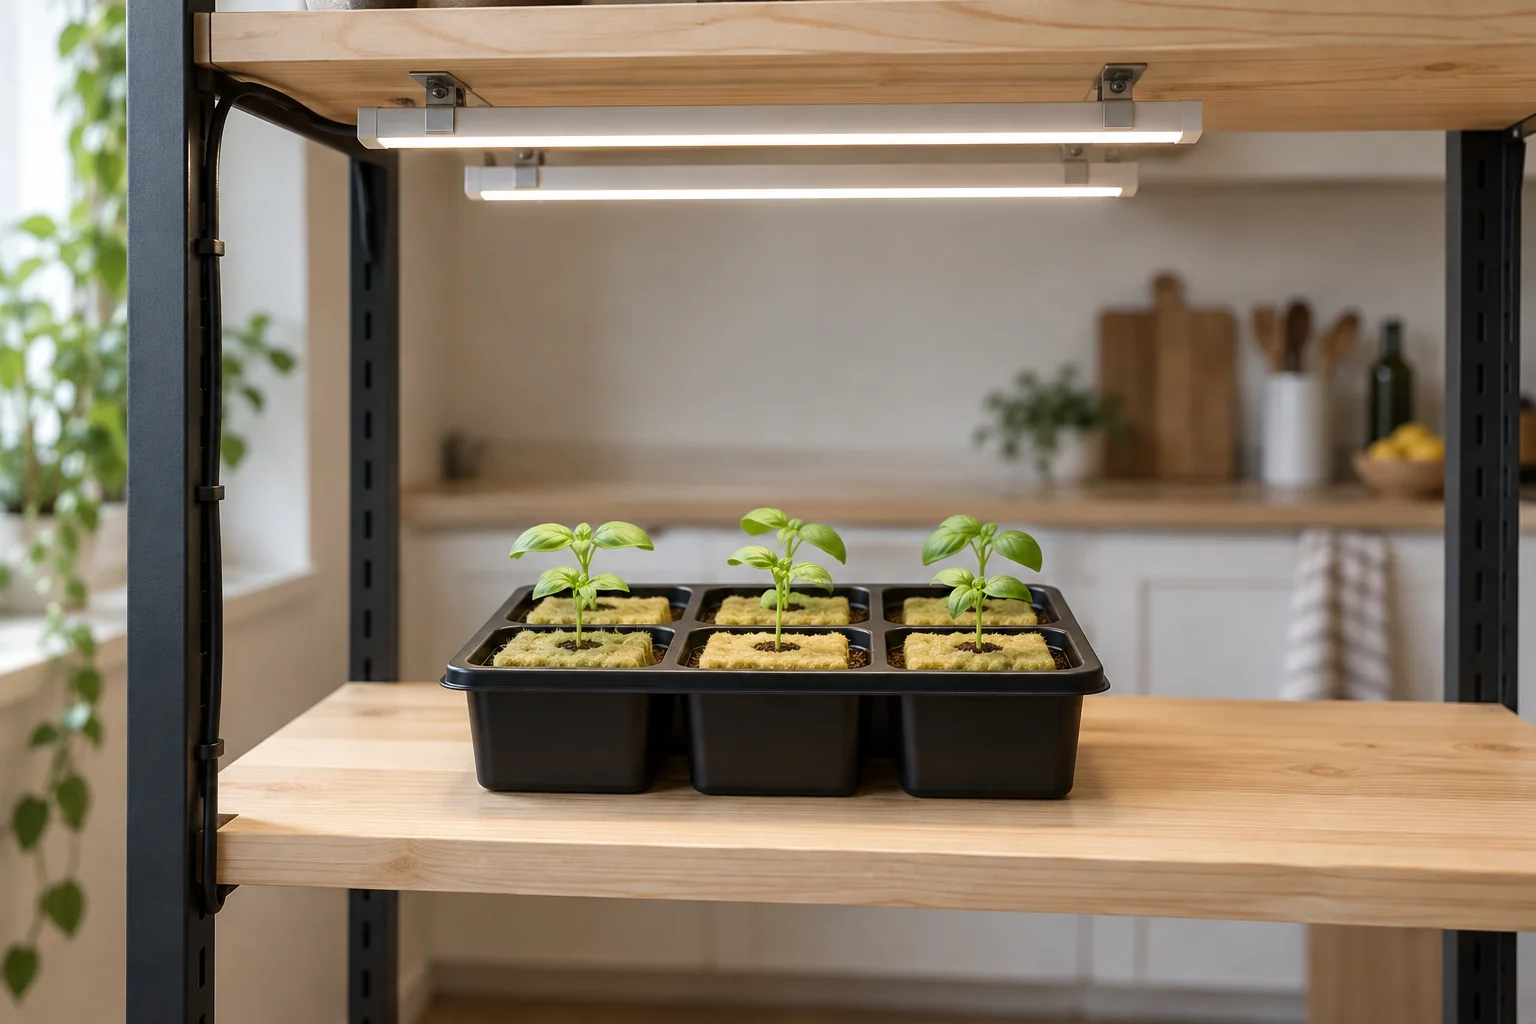
Seedlings on a windowsill stretch toward the glass within days, especially in winter, so a light is the part that turns a germinated seed into a sturdy plant. Seedlings do not need a large panel. Instead, they need gentle light close to the plugs.
The Barrina T5 1ft strips are a compact shelf option. Check the exact pack’s output and coverage before deciding how many bars to mount. Secure the fixture with suitable clips or supports above the wet tray. For small shelf LEDs, our grow light distance guide uses 10 to 12 inches as a starting point for seedlings. However, the fixture’s instructions and the plants’ response take priority over that distance.
Use 14 hours on and 10 hours off as the starting schedule for most herbs. Spinach is the exception in our growing guides: use 12 hours of light. A compact timer keeps the schedule consistent.
When seedlings move into jars and need more light, the grow lights under $50 roundup covers the next step up. Tall, floppy seedlings usually mean the light is too far away, and why seedlings stay small under grow lights explains the other common causes.
🧰 Putting the Kit Together
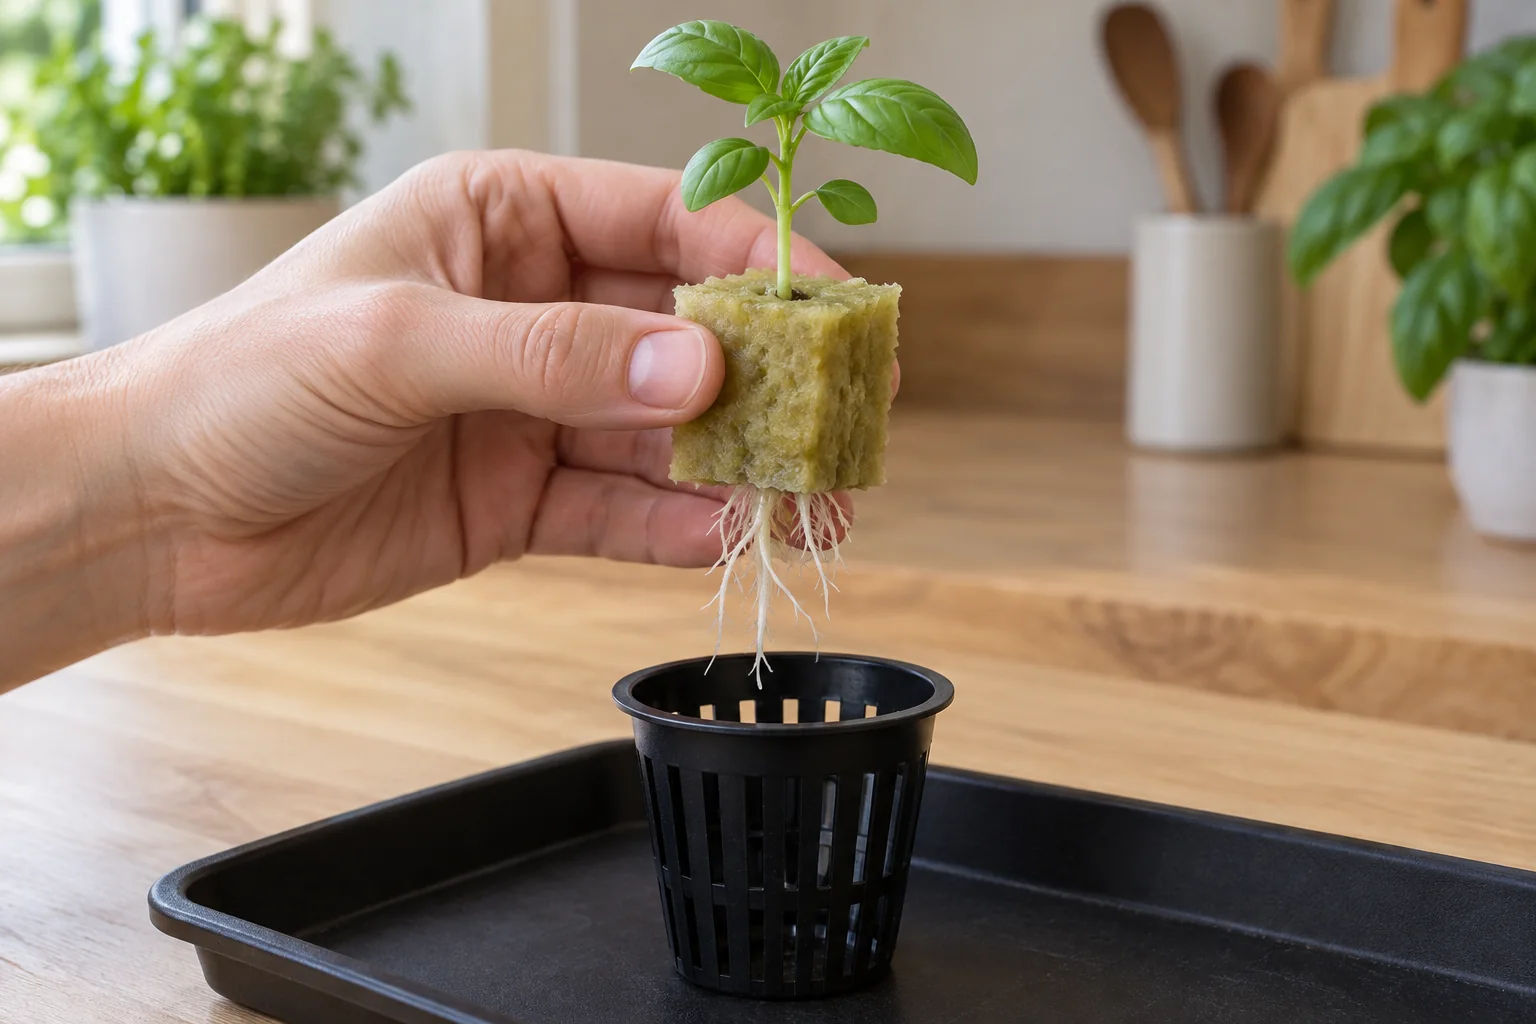
Once the parts arrive, the order you use them in matters more than the brand. This is the short version of the routine, and the rockwool seed starting guide goes through each step in detail.
- Prepare the plugs according to their label. For our rockwool method, use pH 5.5 water and let cubes drain without squeezing.
- Set the plugs in a compatible insert or base. Follow the seed packet for sowing depth and whether that variety needs light to germinate.
- Keep plugs moist without submerging them. Use a dome if they dry too fast and controlled heat only if measured plug temperature is too low.
- Move emerged seedlings out from under the cover and provide light promptly. Reassess the need for bottom heat.
- Around the first true leaves, follow the crop and nutrient maker’s seedling guidance. For basil in an inert plug, EC 1.0 to 1.2 mS/cm is a starting example. Allow for nutrients already in the plug, and thin spare seedlings with scissors.
- Transplant when healthy roots emerge and the seedling has true leaves. Then support the whole plug in its basket and make sure roots can reach moisture without submerging the stem.
The pH and nutrient calculator estimates a starting nutrient dose; verify the mixed solution with your meters, and the seed to harvest calculator estimates harvest timing, while roots and true leaves determine transplant readiness. For the move itself, when to transplant seedlings lists the signs to wait for. If you are still choosing where those seedlings will grow, the apartment hydroponics beginner’s guide compares the systems.
🚨 When Seeds Do Not Come Up
Most failures at this stage come down to water, temperature or depth. Plugs that stay soaked rot the seed, while plugs that dry out even once can kill a sprout that has just split its shell. Seeds sown too deep, meanwhile, use up their energy before reaching the light.
- A pinched, collapsing stem may indicate damping off. Remove affected seedlings and clean the tray before reuse; uncovering alone will not rescue a collapsed stem.
- Green film on the plugs is algae from light and wetness, which stopping algae in jars explains.
- Small black flies around the tray are fungus gnats, and the fungus gnat guide covers treatment.
For sowing depth and early seedling care, see University of Maryland Extension’s seed-starting guidance. Its soil-based setup differs from hydroponic plugs, but the seed packet still determines how each variety should be sown.
💬 A Word From Sarah
I would start by measuring the basket and finding a place for the light. Then buy enough compatible plugs for one small batch. Reuse a sound watertight tray if you already have one, and add a dome or controlled heat only when conditions call for it. Basil is a useful first crop, but one successful batch does not prove the same settings suit every seed.
❓ Frequently Asked Questions
❓ What do I need to start hydroponic seeds indoors?
Start with compatible plugs, seeds, a watertight base and suitable light. A dome helps in dry conditions. Meanwhile, a heat mat with a thermostat helps when the growing medium is too cold for the crop. An existing countertop garden may already provide the basket, water supply and light.
❓ What is the best starter plug for hydroponics?
Rockwool is a practical option for jars and DWC when it fits the basket. Rapid Rooter is a bound organic alternative. Countertop gardens need sponges compatible with their particular baskets. However, no plug removes the need to manage moisture.
❓ What pH should I soak rockwool cubes at?
Our rockwool method starts with water adjusted to pH 5.5. Also, check the product instructions, especially for preconditioned media. Let saturated cubes drain without squeezing or compressing them.
❓ Do I need a heat mat for hydroponic seeds?
Only if the growing medium is too cold for the variety. Use a thermostat with its probe positioned according to the instructions. Avoid unnecessary warming for lettuce and spinach, and reassess bottom heat after germination.
❓ When should I remove the humidity dome?
Uncover emerged seedlings and give them light promptly. If other seeds have not sprouted, move the emerged plugs to an uncovered tray. Also, keep checking moisture because uncovered plugs can dry faster.
❓ How far should a grow light be from seedlings?
Follow the fixture guidance because output varies between lamps. For small shelf LEDs, 10 to 12 inches is a starting point, not a universal distance. Our starting schedule is 14 hours on and 10 off for most herbs, with 12 hours of light for spinach.
❓ Can I use peat pellets in a hydroponic system?
They are a less convenient choice for water-based systems because loose peat can escape into the reservoir. Use a compatible plug that holds together for jars and DWC. Peat pellets are better suited to seedlings that will move into soil.
❓ When should I start feeding seedlings nutrients?
Follow the crop, plug and nutrient instructions around the first true leaves. EC 1.0 to 1.2 mS/cm is a starting example for basil in inert media, not a target for every seedling. Include any nutrients already present in the plug.
❓ Can I use my own seeds in an AeroGarden?
Yes, with replacement sponges that fit your model and sound reusable baskets. Follow the sponge preparation instructions and the seed packet for sowing depth. Then thin spare seedlings when needed instead of leaving every sprout crowded in one basket.
❓ When are seedlings ready to transplant into a jar?
Look for healthy roots emerging from the plug and established true leaves. Move the whole plug without pulling on the stem or roots. Finally, set it so the roots can reach moisture while the stem stays above the water.
Happy growing! 🌿
Sarah, Urban Hydro Space

Sarah Whitfield is the founder of Urban Hydro Space and an indoor gardening enthusiast dedicated to helping apartment dwellers grow fresh herbs and vegetables in small spaces. She researches hydroponic systems carefully from real specifications and verified buyer feedback, and shares practical tips and honest, clearly labeled product picks to make indoor gardening accessible for beginners.