⏳ 13 min read · Last updated: May 2026
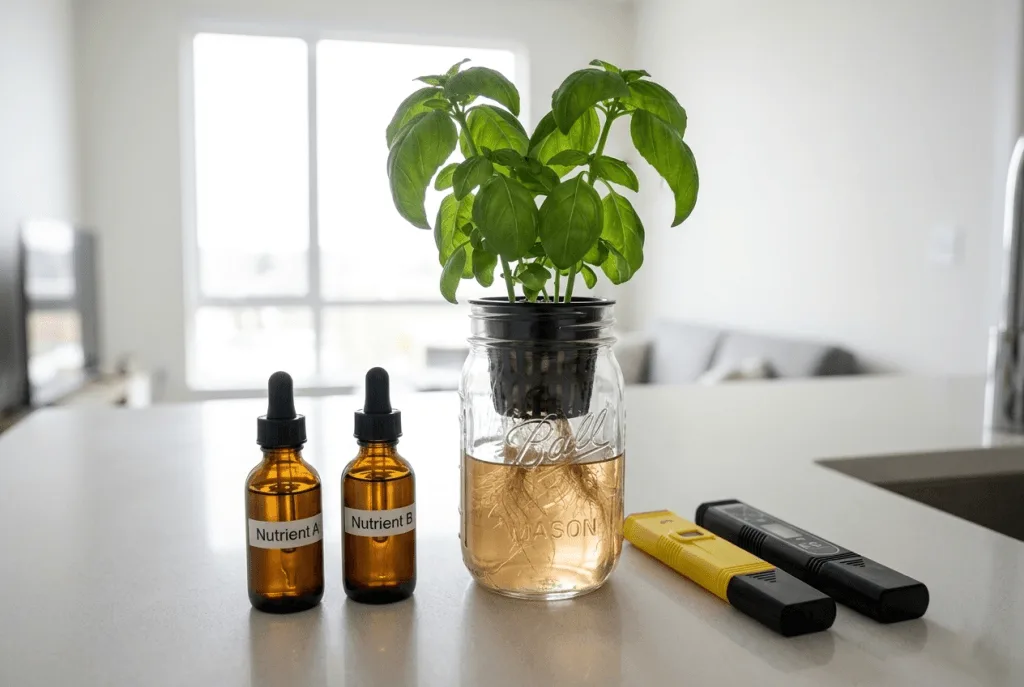
Finding the right hydrogen peroxide root rot hydroponics treatment saved my very first indoor basil plant. I noticed the roots turning a slimy brown in my 1-liter Kratky jar, and the leaves began drooping overnight. I lived in a tiny studio with no outdoor space to wash equipment, so I needed a clean, indoor-friendly fix. After some trial and error, I discovered the precise dilution needed to kill the slime without burning the delicate roots.
When you grow food in confined apartment spaces, water temperatures fluctuate and oxygen levels drop. This environment invites pathogens. Knowing how to apply a targeted hydrogen peroxide treatment allows you to rescue your herbs before the rot spreads. This guide covers exactly how to measure, mix, and apply this common household staple to bring your plants back to life. If you haven’t set up your indoor system yet, start with the complete apartment hydroponics guide for beginners before diving into troubleshooting.
- Not sure what is wrong yet → start with Diagnosing Root Rot vs Nutrient Stains
- You know the cause → jump to The Right Dose or How To Apply It
- Apply 2 teaspoons of 3% peroxide per quart of water for active infections.
- Perform a full reservoir change every 2 weeks to prevent pathogen buildup.
- Keep your nutrient solution at 65 to 72°F (18 to 22°C) to maintain oxygen levels.
- Never mix peroxide with beneficial bacteria products like Hydroguard in the same reservoir.
🔍 Diagnosing Root Rot vs Nutrient Stains
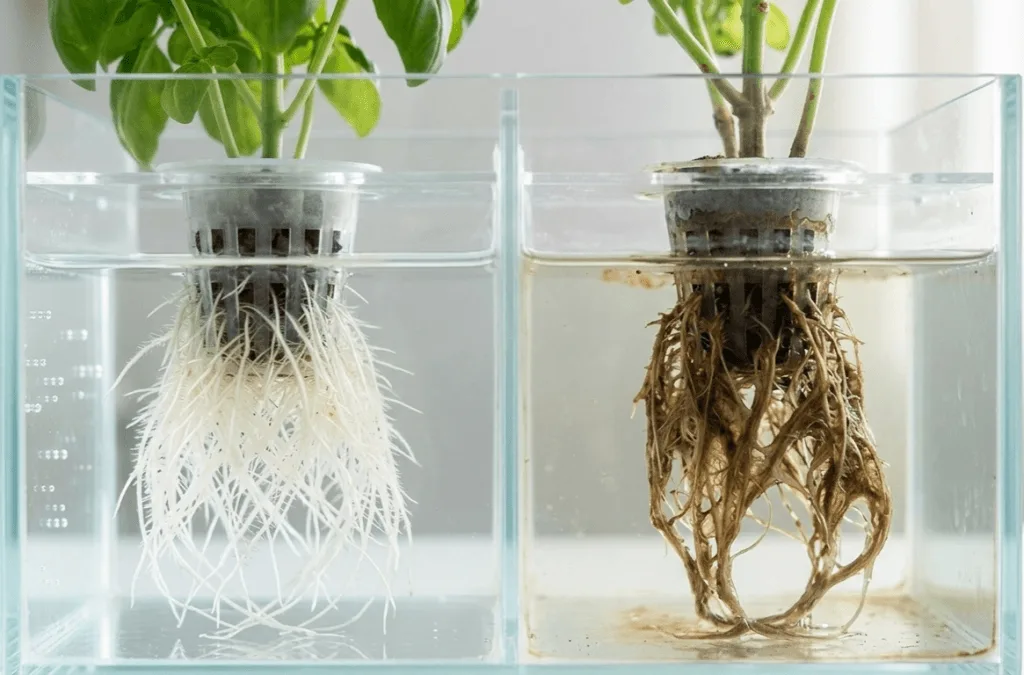
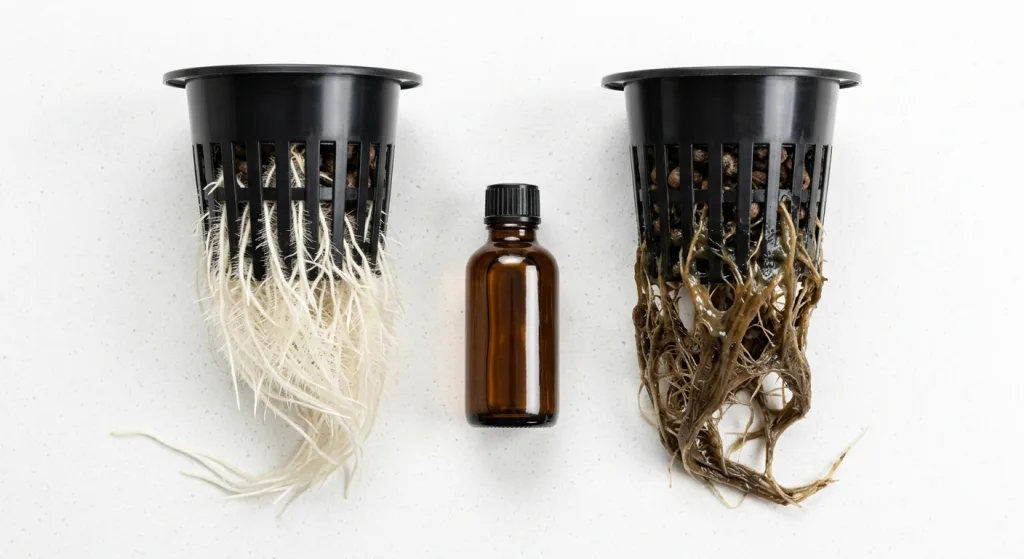
Before applying any hydrogen peroxide treatment, you need to confirm the roots are actually infected. Many dark nutrient solutions tint healthy white roots a tan or light brown color. Treating healthy, stained roots with strong oxidizers will stress your plants unnecessarily and strip the root hairs the plant depends on.
🔎 Quick diagnosis table
| What you see | Most likely cause | Check this first |
|---|---|---|
| 🟡 Brown roots that smell earthy but feel firm | Nutrient staining from dark fertilizers | Smell test (no sulfur smell means it’s safe) |
| 🟡 Slimy, mushy roots that smell like a swamp | Pythium or active root rot infection | Check water temperature is below 72°F (22°C) |
| 🟡 Green fuzz on roots near the net cup | Algae growth from light leaks | Block light from entering the reservoir |
👆 The Touch and Smell Test
You can identify genuine root rot using your senses. When pathogens like Pythium attack your hydroponic herbs, they break down the plant tissue. This decay process gives off distinct signals that nutrient stains lack.
To perform a root check in your countertop setup:
- Lift the plant gently from the jar or reservoir
- Smell the root mass for a foul, sulfur-like, or rotting cabbage odor
- Pinch a small section of the brown root between your fingers
- Pull gently to see if the outer sheath slides off, leaving a hair-like thread behind
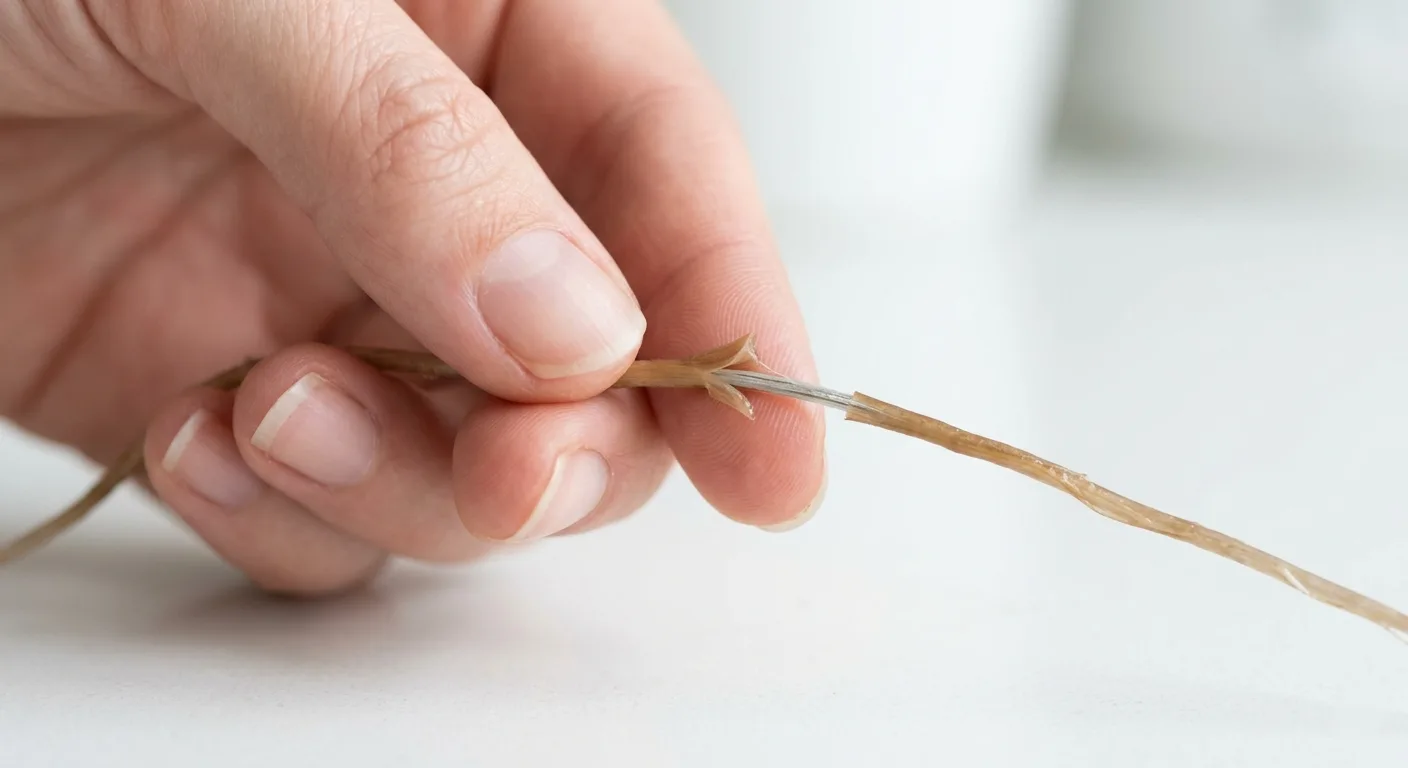
If the root stays firm and smells like wet soil, it’s just stained. If the outer layer sloughs off easily and feels slimy, you have an active infection. At this stage, the guide on why hydroponic seedlings stay small under grow lights covers how stunted growth from root damage presents in the early recovery phase.
🍃 Above-Ground Symptoms
Your plant will tell you it’s struggling before the roots turn completely to mush. Root rot destroys the plant’s plumbing system, so the upper foliage starves even when sitting in a reservoir full of nutrient-rich water.
Watch your canopy for these visual cues:
- Sudden wilting during the day despite roots touching water
- Lower leaves turning pale yellow and dropping off
- New growth appearing twisted or abnormally small
- Overall lack of vigor and slow water uptake from the jar
If you spot these signs, grab your EC and TDS meter to verify your nutrient strength isn’t compounding the stress. Maintaining an EC 1.8 to 2.2 is great for mature basil, but it shocks a plant that’s already struggling. When you confirm rot, a targeted peroxide application becomes necessary. The full prevention guide on preventing root rot in small hydroponic systems covers every root-check technique in detail.
⚗️ The Right Dose for Small Systems
Getting the hydrogen peroxide dose right for a small hydroponic system requires precision. A 5-gallon bucket gives you a wide margin for error, but a 1-liter mason jar doesn’t. Too much oxidizer scorches surviving root hairs, while too little won’t kill the pathogen.
💧 Why 3% Household Peroxide Is the Right Choice
Many commercial growers recommend 35% food-grade peroxide. However, handling 35% concentration in a tiny apartment kitchen poses real safety risks. It burns skin on contact and requires strict storage protocols. For countertop setups, standard 3% household peroxide is the right choice.
Benefits of using 3% peroxide in apartments:
- Safe to handle without specialized chemical gloves
- Available at any local pharmacy for under two dollars
- Degrades into plain water and oxygen, leaving no toxic residue
- Provides a gentler oxidation process for fragile Kratky jar roots
🧪 Calculating Ratios for Small Jars
When dosing a small container, you must convert gallons to liters and quarts. The standard treatment for active rot is roughly 2 to 3 teaspoons of 3% peroxide per gallon. Apply that full amount to a 1-liter jar and you’ll overdose the plant immediately.
To mix an accurate treatment batch:
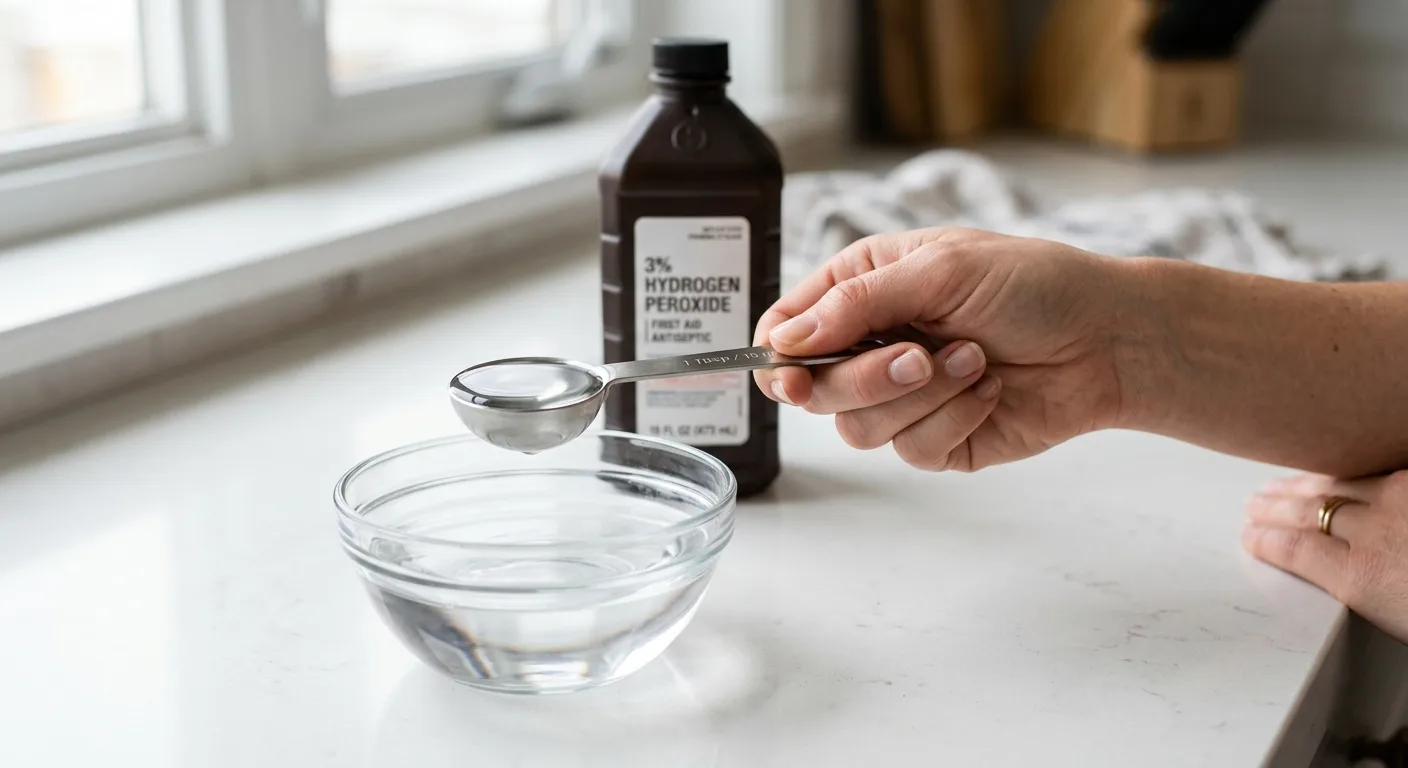
- For a 1-liter (1-quart) jar, measure exactly 2 teaspoons of 3% H2O2.
- For a 2-liter (half-gallon) jar, measure 4 teaspoons of 3% H2O2.
- Dilute the peroxide into a cup of fresh water before adding it to the reservoir.
- Stir the reservoir gently to distribute the oxygen evenly throughout the water.
After treating the water, use the free pH and nutrient calculator to recalibrate your feed before the plant goes back in. Getting the nutrient balance right after treatment is essential for a smooth recovery.
| Crop | Difficulty under grow light | Peroxide Tolerance |
|---|---|---|
| Mint | Easy | High (recovers rapidly) |
| Arugula | Easy | Medium (watch for leaf tip burn) |
| Lettuce | Easy | Medium (watch for leaf tip burn) |
| Oregano | Medium | Low (use half-strength doses) |
| Thyme | Medium | Low (use half-strength doses) |
| Cilantro | Medium | Low (very sensitive to root shock) |
🩹 How To Apply the Hydrogen Peroxide Treatment
Pouring raw peroxide into a dirty jar won’t fix the problem. The organic matter floating in the water will consume the oxidizer before it can penetrate the infected roots. A successful treatment requires a systematic cleaning process that isolates the plant from the contaminated reservoir.
✂️ The 20-Minute Root Bath
Instead of treating the dirty reservoir, give your plant an isolated root bath. This concentrates the bubbling action directly on the slime without wasting the peroxide on old nutrient salts. It’s the most effective approach for clearing severe Pythium infections in countertop setups.
Follow these steps for a safe root bath:
- Remove the plant and its net cup from the infected jar.
- Rinse the root mass under lukewarm tap water to dislodge loose slime.
- Fill a clean mixing bowl with one quart of fresh water.
- Add 3 teaspoons of 3% peroxide to the bowl and stir.
- Submerge the roots in the bowl for exactly 20 minutes, then remove them.

While the plant soaks, you’ll see fizzing bubbles as the oxygen attacks the dead tissue. Afterward, use sterilized scissors to snip away long, stringy roots that are completely dead. If you’re using municipal water, the guide on using tap water for small apartment hydroponic systems explains how to check whether your base water is adding chlorine stress on top of the peroxide treatment.
🩴 Sterilizing the Reservoir
While the roots are bathing, reset the home they’re returning to. Pathogen spores cling to the glass walls and hide in the porous net cup edges. If you don’t sterilize the container, the rot will return within days.
To sanitize your equipment properly:
- Drain the old, smelly nutrient solution down the sink
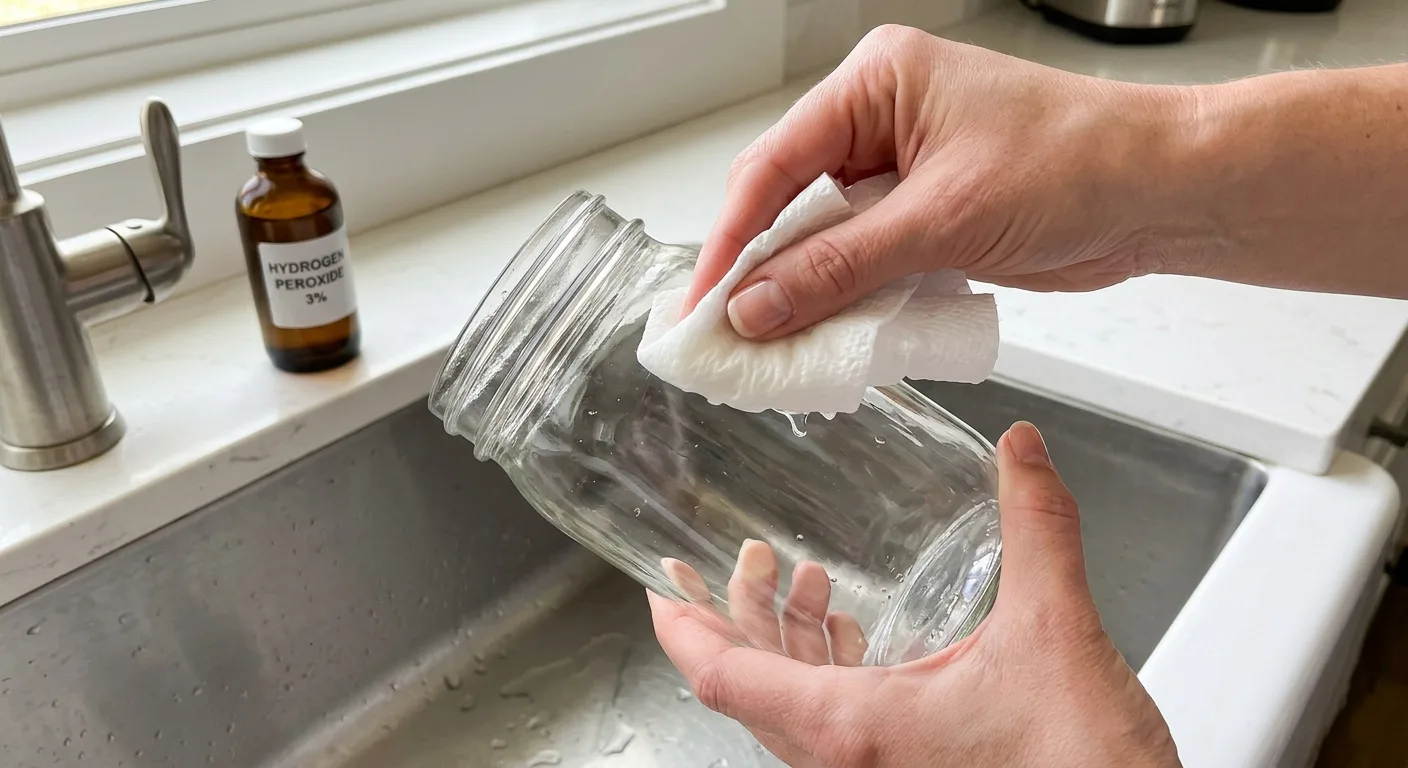
- Scrub the inside of the jar with hot water and dish soap
- Wipe the rim and net cup with undiluted 3% peroxide on a paper towel
- Rinse everything thoroughly with cold tap water before refilling
Once clean, refill the jar with a fresh nutrient mix at a mild EC 1.5 to avoid burning the newly exposed root tissue. The guide on how to lower EC safely in small hydroponic reservoirs explains how to dial back the concentration if you accidentally mixed too strong. For multi-site countertop units rather than single jars, the guide on cleaning small hydroponic systems in an apartment covers the full sterilization routine.
→ Why Algae Keeps Growing In Hydroponic Jars (And How To Stop It)
→ Best pH Meter for Hydroponics Beginners
☀️ Preventing Future Pathogen Outbreaks
Treating root rot is stressful. Preventing it requires fixing the environmental triggers that allowed the pathogens to bloom in the first place. Root rot rarely strikes a well-oxygenated, cool reservoir that’s maintained on a consistent schedule.
🌊 Managing Temperature and Oxygen
Warm water holds less dissolved oxygen than cool water. When your apartment heats up, the jar water temperature spikes and suffocates the roots. Pathogens thrive in this low-oxygen, high-heat environment.
To keep your small reservoir stable:
- Maintain water temperature at 65 to 72°F (18 to 22°C)
- Move jars away from sunny windows, as glass acts like a greenhouse
- Top off daily with plain water to keep the liquid volume high and cool
- Do a full reservoir change every 2 weeks to refresh oxygen and clear waste salts
The guide on small hydroponic system temperature problems and apartment fixes covers practical cooling methods that work without a chiller. The guide on how to top off small hydroponic systems without messing up nutrients explains the daily plain-water routine that prevents EC spikes and keeps the reservoir oxygen-rich. Use the free seed to harvest countdown calculator to harvest before older plants naturally decline, since mature, stressed plants are far more vulnerable to rot than young, vigorous ones.
🐛 Beneficial Bacteria as a Long-Term Alternative
You don’t have to rely on a peroxide treatment forever. Many growers prefer a biological approach using beneficial bacteria like Bacillus amyloliquefaciens, found in products like Hydroguard. These microbes colonize the root zone and outcompete rot-causing pathogens without the chemical risks.
If you choose beneficial bacteria, you must follow strict compatibility rules. Hydrogen peroxide is non-selective and kills both the bad pathogens and the beneficial microbes you just added. You cannot run Hydroguard and peroxide in the same reservoir. Choose one strategy and commit to it. If you want to switch from peroxide to bacteria, wait 48 hours for the peroxide to fully dissipate before inoculating the water.
Once you drained the infected water, the guide on whether you can reuse old hydroponic nutrient solution explains safe disposal options so the old water doesn’t spread pathogens to your houseplants. For routine maintenance on the biweekly change schedule, the guide on how often to change hydroponic water in a small system explains why consistency is your strongest defense against recurring rot.
💬 A Word From Sarah
I tried treating a severe case of root rot on my cilantro by pouring a generic glug of 3% peroxide directly into the running 2-liter jar. The bubbling reaction stripped the roots bare, and the plant collapsed completely within 48 hours. I learned the hard way that you must measure exactly 4 teaspoons per half-gallon. Now I always dilute it properly in a separate bowl first before it ever touches my plants.
❓ Frequently Asked Questions
💧 How much 3% hydrogen peroxide do I use per gallon?
For treating active root rot in a small system, use 2 to 3 teaspoons of 3% hydrogen peroxide per gallon of water. If you maintain a preventative dose, use 1 teaspoon per gallon. Never exceed this amount, as stronger concentrations will burn the delicate root hairs that survived the infection.
⏱️ Can I leave hydrogen peroxide in the reservoir?
Yes, you can leave a diluted hydrogen peroxide mixture in your reservoir. It breaks down into plain water and oxygen within a few days under grow lights. You don’t need to flush it out unless you notice the plant responding poorly to the treatment or you plan to switch to a beneficial bacteria product.
🐛 Does hydrogen peroxide hurt beneficial bacteria?
Yes, hydrogen peroxide kills both bad pathogens and beneficial bacteria without distinction. You cannot use products like Hydroguard at the same time as a peroxide treatment. Choose either a sterile peroxide approach or a biological approach. If you switch from peroxide to bacteria, wait 48 hours for the peroxide to fully dissipate first.
⚠️ Will 35% food grade peroxide work better?
While 35% peroxide is stronger, it poses a severe handling risk in a small apartment kitchen. A tiny measuring error will destroy your plants and can cause skin burns. For countertop jars and 1-gallon setups, standard 3% household peroxide is safer, cheaper, and provides sufficient oxidizing power for the job.
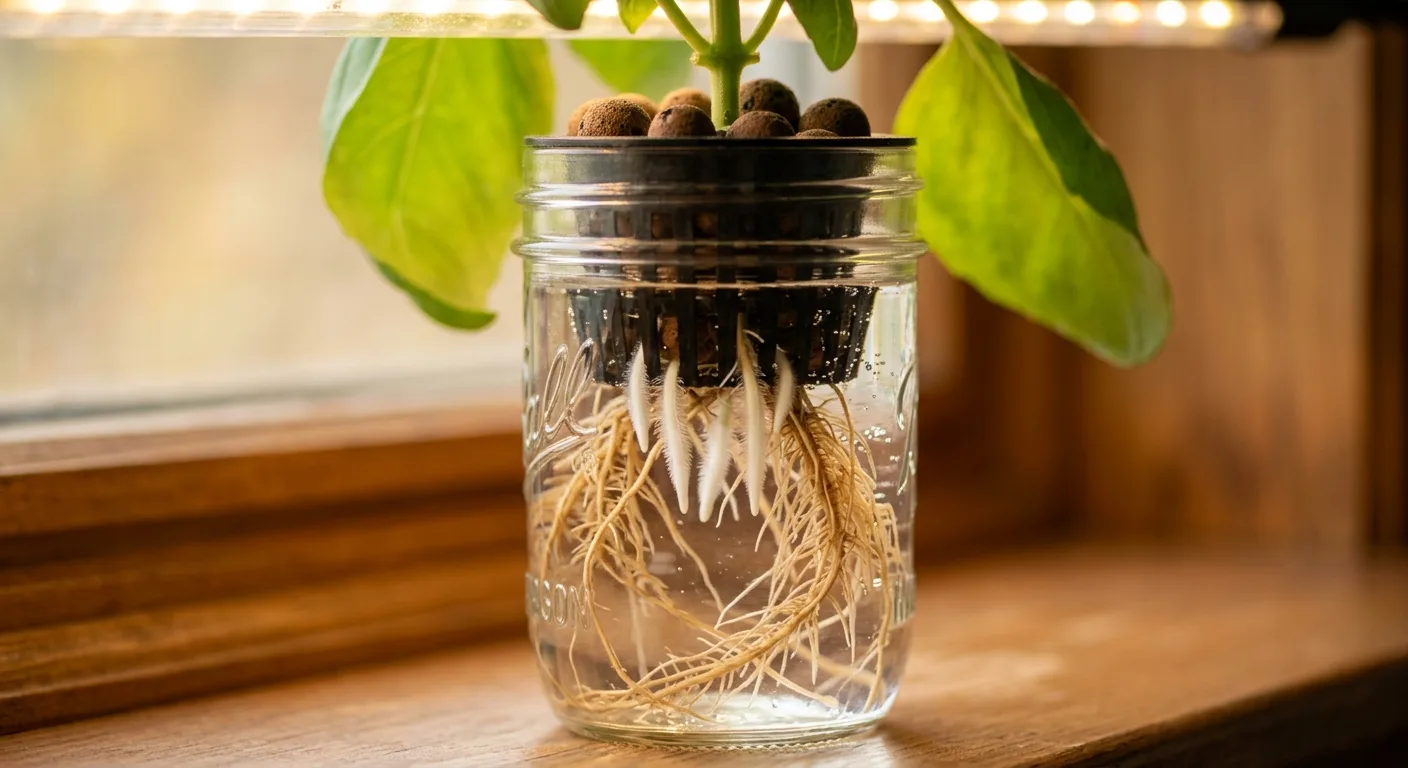
⏳ How long does it take for roots to recover after treatment?
New, healthy white roots usually emerge from the upper stem base within 7 to 14 days after a successful treatment. The old brown roots won’t turn white again. Trim away the dead material once the new root mass has established itself and the plant shows signs of new top growth.
🌱 Can I use hydrogen peroxide on seedlings?
Seedling roots are fragile and prone to chemical burns from oxidizers. If a seedling develops rot, use a very weak solution of half a teaspoon of 3% peroxide per gallon. Often, starting a new seed is safer and faster than stressing a young plant through a chemical treatment it may not survive.
🔄 How often should I apply peroxide treatments?
Apply the treatment during a full reservoir change when you first confirm the infection. If the rot persists after the first treatment, you can add a mild preventative dose every 3 to 5 days during the recovery period. Frequent full-strength applications stress the plant and delay the natural regrowth of white root tips.
Happy growing! 🌿
— Sarah, Urban Hydro Space

Sarah is the founder of Urban Hydro Space and an indoor gardening enthusiast dedicated to helping apartment dwellers grow fresh herbs and vegetables in small spaces. With hands-on experience testing hydroponic systems, she shares practical tips and honest product reviews to make indoor gardening accessible for beginners.