⏳ 15 min read · Last updated: May 2026
Growing hydroponic arugula in a small apartment changed how I make salads. I used to buy those plastic clamshells from the store, only to find them wilted a few days later. I decided to try growing my own peppery greens on a spare kitchen shelf. My first attempt failed because I treated the plant like a heavy feeder. I kept the water too warm and added an oversized dose of nutrients. The leaves grew thin and tasted harsh. I dropped the room temperature to 68°F (20°C) and switched to a weaker nutrient mix. Two weeks later, I had crisp, spicy leaves ready for harvest. You’ll find that cultivating these greens without soil takes up very little space once you understand the basic metrics.
If you haven’t set up your first indoor system yet, the complete apartment hydroponics guide for beginners covers the full foundation before you start working with a crop-specific setup like this one.
- Set your nutrient solution to pH 5.5 to 6.5 for optimal mineral absorption.
- Maintain a mild EC 1.0 to 1.6 to avoid burning delicate roots.
- Keep the reservoir water cool, aiming for 65 to 72°F (18 to 22°C).
- Hang your grow light 6 to 8 inches above the plant canopy.
- Commit to a full reservoir change every 2 weeks to prevent mineral buildup.
- Why Hydroponic Arugula Beats Soil In A Small Apartment
- Setting Up Your Hydroponic Arugula Jar
- Dialing In Nutrients And pH For Hydroponic Arugula
- Managing Temperature And Environment In Tiny Kitchens
- Grow Light Setup For Peppery Greens
- Troubleshooting Hydroponic Arugula Problems
- Harvesting For Continuous Yields
- Cleaning And Resetting The Jar For The Next Round
- A Word From Sarah
- Frequently Asked Questions
🥬 Why Hydroponic Arugula Beats Soil In A Small Apartment
Many apartment renters worry they lack enough room for an indoor garden. A single jar fits almost anywhere. You won’t need bulky trays or loud mechanical parts to enjoy fresh greens year-round. An indoor setup transforms a tiny corner into a productive food station.
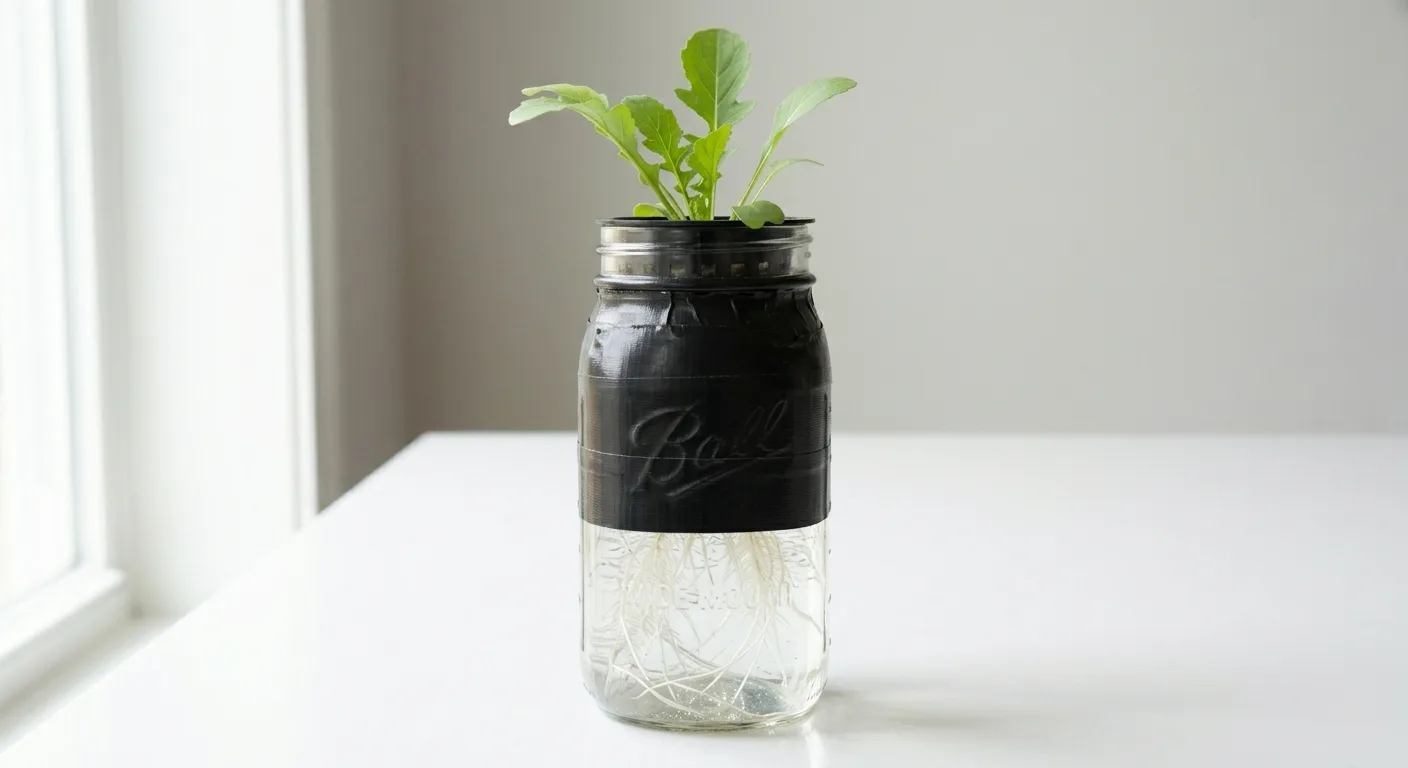
🩴 The Kratky Jar Advantage
The Kratky method requires zero electricity for water circulation. It relies on an air gap between the water line and the net cup. Because of this, the plant roots absorb oxygen naturally without suffocation. You’ll avoid the humming noises associated with traditional active setups. If you’re sensitive to sound, Kratky jars operate in complete silence and need no air pump at all.
This method provides a few unique benefits for apartment renters:
- No power cords trailing across your kitchen counter
- No vibration noise at night
- No moving parts that require maintenance
- Lower initial setup costs compared to mechanized systems
If you want to understand how the Kratky method compares to an active DWC setup before committing to either, the DWC vs Kratky comparison for apartment beginners breaks down the trade-offs clearly.
🐛 Avoiding Pests And Dirt
Bringing potting soil indoors often invites fungus gnats into your living space. Growing hydroponic arugula keeps your counters clean. You’re mixing clean water with mineral salts instead of hauling bags of dirt upstairs. An indoor water setup simplifies your routine considerably.
Growing without soil offers distinct hygiene benefits:
- Zero risk of soil-borne pests invading your home
- No muddy spills on your kitchen counters
- No foul odors from organic compost breaking down indoors
🍃 Consistent Flavor Control
Outdoor arugula often turns unbearably bitter when summer heat strikes. When this happens, the plant sends up a flower stalk and ruins the harvest. Indoor growing allows you to manipulate the climate to suit the plant. You’ll harvest tender, mildly peppery leaves on your own schedule, which means spring-quality greens in the middle of a freezing winter or a blazing summer.
Controlling the environment requires a few simple daily checks:
- Monitoring the ambient room temperature
- Testing the reservoir strength before adding food
- Maintaining a steady lighting schedule
🛠️ Setting Up Your Hydroponic Arugula Jar
Putting together a hydroponic arugula jar takes about ten minutes. Gather your supplies before mixing any liquids. Having everything within reach prevents spills in a tight kitchen environment. It’s a straightforward process once you understand the components. Use the hydroponic shopping list builder to confirm you have everything before you start.
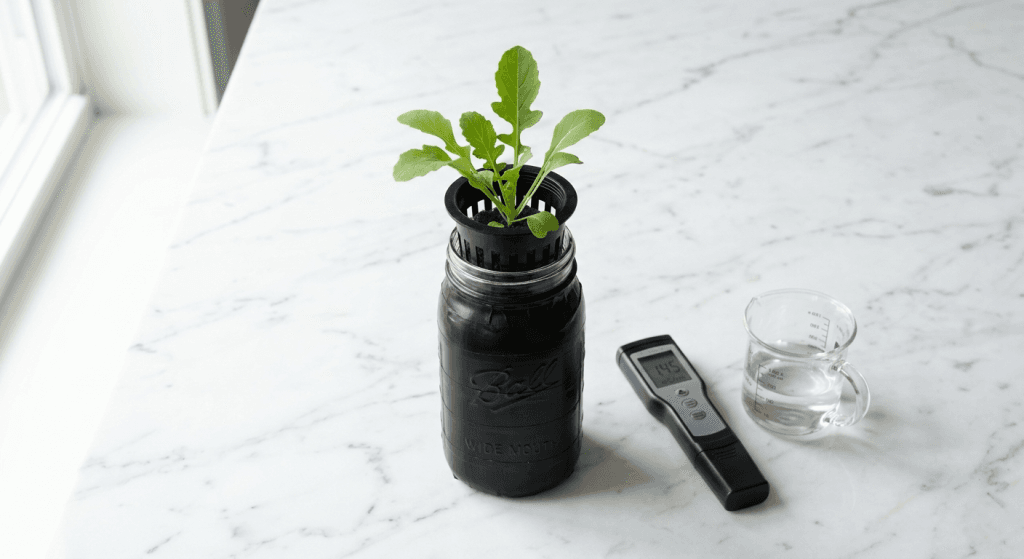
🧪 Choosing The Right Jar Size
Your container choice dictates how often you’ll need to add water. A larger vessel provides a more stable buffer for delicate roots. A wide-mouth quart mason jar works beautifully for leafy greens. Map out your exact timeline using the hydroponic seed to harvest calculator.
| Jar Size | Best For | Maintenance Frequency |
|---|---|---|
| 16 oz Pint | Seedlings only | Daily top-offs needed |
| 32 oz Quart | Single mature plant | Top off every 2 to 3 days |
| 64 oz Half-Gallon | Large leafy greens | Top off weekly |
- You want the lowest maintenance → choose a 64 oz half-gallon jar
- You have very limited vertical shelf space → choose a 32 oz quart jar
🔆 Blocking Light To Prevent Algae
Clear glass jars invite trouble if left uncovered. When grow lights hit nutrient-rich water, algae blooms within days. This green sludge competes with your plant for food and oxygen. Wrap the glass tightly to keep the interior dark. The guide on why algae keeps growing in hydroponic jars covers every prevention method worth knowing. You might also find the Kratky jar setup guide useful for pairing the right jar size with the right wrapping approach.
You have a few excellent options for light-proofing:
- Wrapping the jar in thick black duct tape
- Slipping the jar into an opaque fabric sleeve
- Painting the outside with matte black spray paint
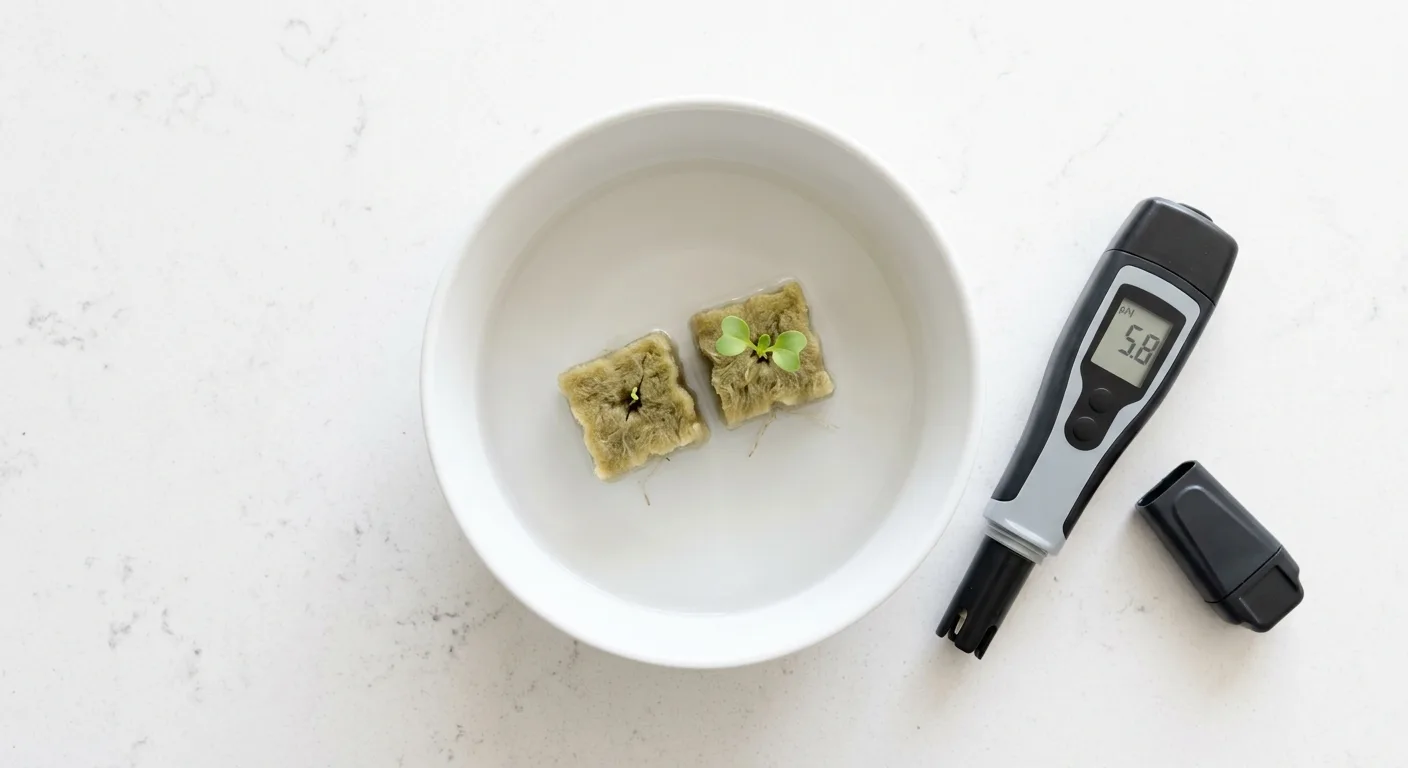
⚗️ Prepping The Rockwool Cubes
Rockwool cubes serve as an excellent anchor for delicate roots. However, these cubes arrive with an alkaline pH that can shock young seeds. You must soak them before planting. Prepare a small bowl of water adjusted to pH 5.5. Place the cubes in the bowl and let them sit for thirty minutes. Never squeeze the cubes when you remove them from the bowl — squeezing crushes the internal air pockets that your seeds need for oxygen.
To prep your growing medium correctly:
- Fill a bowl with lukewarm tap water.
- Add a tiny drop of pH Down and stir well.
- Test the liquid until it reads pH 5.5.
- Drop the rockwool cubes in and let them sink naturally.
- Lift them out gently and shake off excess drips without squeezing.
The guide on starting hydroponic seeds in rockwool without damping off covers the full germination process if this is your first time working with rockwool.
🌱 Planting The Seeds
Arugula seeds are tiny and require minimal depth to germinate. Drop two or three seeds into the center hole of your prepared rockwool. If you bury them too deep, they struggle to push through the fiber. Place the loaded cube into a plastic net cup, then drop the cup into your jar.
Once the seeds are settled, watch for these milestones in order:
- The taproot emerging from the seed coat within 3 to 5 days
- The first set of tiny cotyledon leaves unfolding
- True serrated leaves appearing after about ten days
⚗️ Dialing In Nutrients And pH For Hydroponic Arugula
Hydroponic arugula thrives when you provide exact mineral concentrations. You don’t need to guess how much food to mix. Measuring the water using digital meters keeps you in full control. For a full breakdown of mixing ratios by jar volume, the hydroponic nutrient calculator guide does the math for you.
🌊 Hitting The Right EC Level
Arugula is a light feeder compared to fruiting plants. Maintain an EC 1.0 to 1.6 during the vegetative stage. Electrical conductivity measures the dissolved salts in your water. If the number climbs too high, the roots struggle to absorb moisture and the plant will decline if left uncorrected. Use the hydroponic pH and nutrient calculator to determine your exact doses for your jar volume. For how arugula’s EC needs compare to other leafy greens and herbs you might grow alongside it, the EC and nutrient strength guide for apartment herbs and lettuce covers every common variety.
Good nutrient management requires a few specific habits:
- Testing the reservoir strength every three days with a calibrated EC meter
- Topping off daily with plain pH-adjusted water, never with nutrient solution
- Committing to a full reservoir change every 2 weeks
🧪 Mixing Two-Part Nutrients
Liquid nutrients for hydroponic systems come in a two-part format. These bottles contain separate minerals that react poorly if mixed while undiluted. Follow a specific sequence when adding them to your jar. If you pour them together without water, they form solid flakes the plant can’t absorb.
Follow these steps to mix your food safely:
- Fill your pitcher with room-temperature tap water.
- Add the recommended dose of Part A and stir for thirty seconds until clear.
- Add the recommended dose of Part B and stir again.
- Test the final liquid to confirm you hit an EC 1.0 to 1.6 target.
- Adjust pH to 5.5 to 6.5 before pouring into the jar.
💧 Why pH Drift Happens In Small Jars
The acidity of your water determines how well the roots absorb food. Your target range is pH 5.5 to 6.5 for optimum health. When the level rises above 6.5, the plant can’t access essential trace minerals like iron. As your plant drinks water, the pH naturally shifts. It’s normal to see hydroponic pH drifting in small volume containers — that guide explains exactly why it happens and how to stabilize it.
Adjusting the pH requires a delicate touch:
- Always test the baseline water before adding any chemicals
- Add pH Down in single-drop increments only
- Stir the jar contents for a full minute before retesting the reading
→ Purdue Extension: Guide To Home Hydroponics For Leafy Greens
🩴 The Routine Water Change
Old water accumulates unbalanced minerals over time. If you only top off the jar, the remaining salts will eventually reach toxic levels. Top off daily with plain pH-adjusted water and perform a full reset every two weeks. The guide on how often to change hydroponic water in a small system explains why the biweekly rule holds even when EC looks fine. If you want to know what to do with the old liquid rather than pour it down the drain, the guide on reusing hydroponic nutrient solution covers safe disposal and recycling options.
🩴 Managing Temperature And Environment In Tiny Kitchens
Your apartment climate plays a massive role in your growing success. Arugula hates hot weather and stagnant air. You’ll need to monitor the space around your jars closely. It’s often the missing piece when beginner setups fail.
🌊 Keeping The Reservoir Cool
Hydroponic arugula prefers an optimal root zone of 65 to 72°F (18 to 22°C). If the water gets warmer than this range, dissolved oxygen levels plummet. When this happens, pathogens multiply and attack the roots. Measure the water temperature twice a week during summer months. The guide on small hydroponic system temperature problems and apartment fixes covers practical cooling methods that don’t require a chiller.
You can keep a small jar cool by taking these actions:
- Moving the jar away from sunny, south-facing windows
- Dropping a small frozen water bottle into a larger shared reservoir
- Ensuring your grow light driver sits away from the glass wall
⚠️ Avoiding Heat Vents And Drafts
Placing your setup on a convenient shelf seems logical until winter arrives. Heating vents blow dry, hot air directly onto your tender greens. This environmental stress causes the leaves to curl inward and the water to evaporate faster than expected. Scope out a neutral corner of your apartment and observe the airflow patterns in your room before committing to a permanent spot.
Good locations for a jar include:
- A dedicated wire rack in a quiet hallway
- A kitchen island away from the oven
- A sturdy desk near an interior wall
🌿 Providing Gentle Airflow
Indoor plants lack the natural wind resistance found outside. Without a breeze, the stems grow weak and flop over as the plant gets heavier. A tiny USB desk fan provides enough movement to strengthen the stems and prevent mold from forming on the leaves. The guide on why hydroponic herbs taste weak explains how airflow acts as a mild stress trigger that boosts the flavor compounds in leafy greens, not just structure.
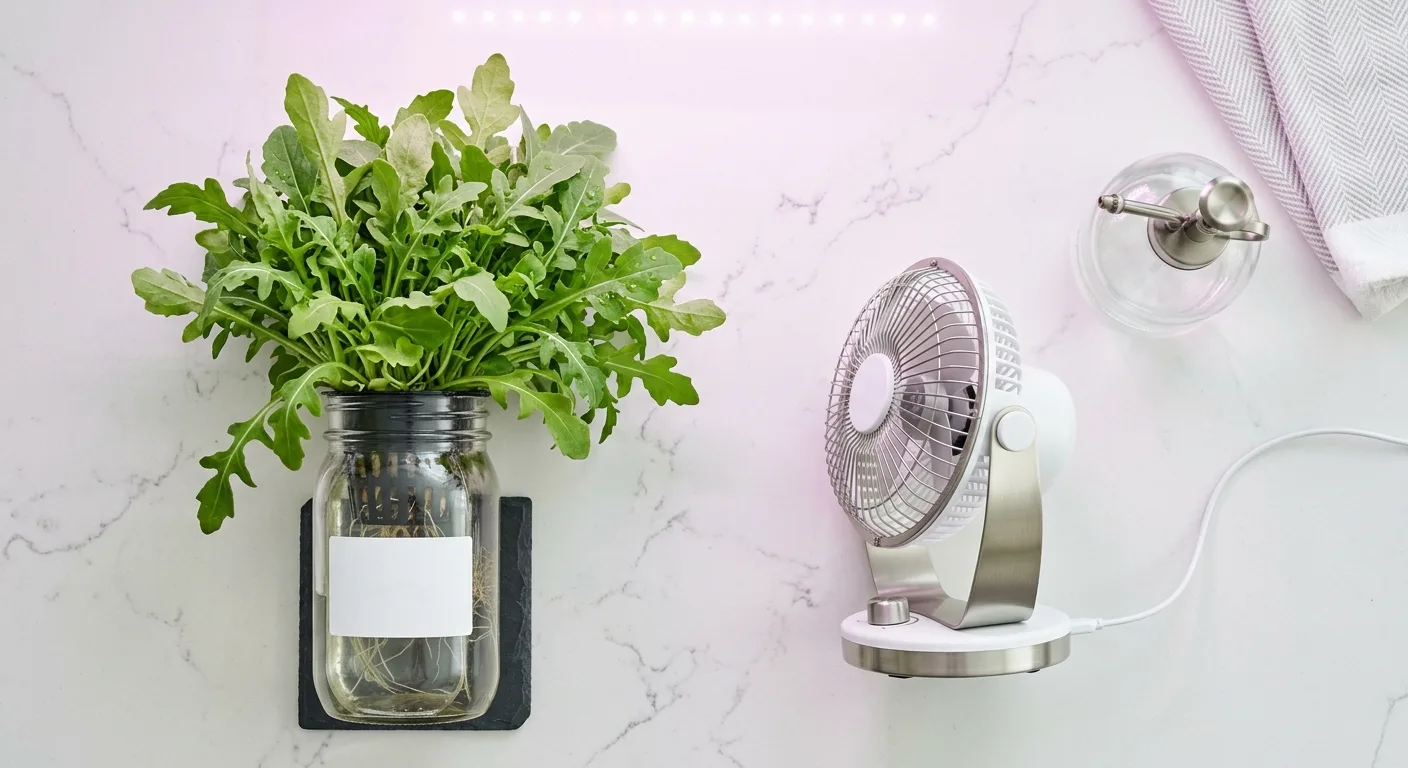
💧 Apartment Humidity Targets
Most apartments suffer from extreme dryness during winter months. Arugula requires a balanced environment to transpire moisture properly. The ideal air temperature sits at 60 to 70°F (15 to 21°C) with an ambient humidity of 40 to 70 percent. If your air falls below this range, the leaf edges will turn crispy and brown even when the water chemistry is perfectly balanced.
💡 Grow Light Setup For Hydroponic Arugula
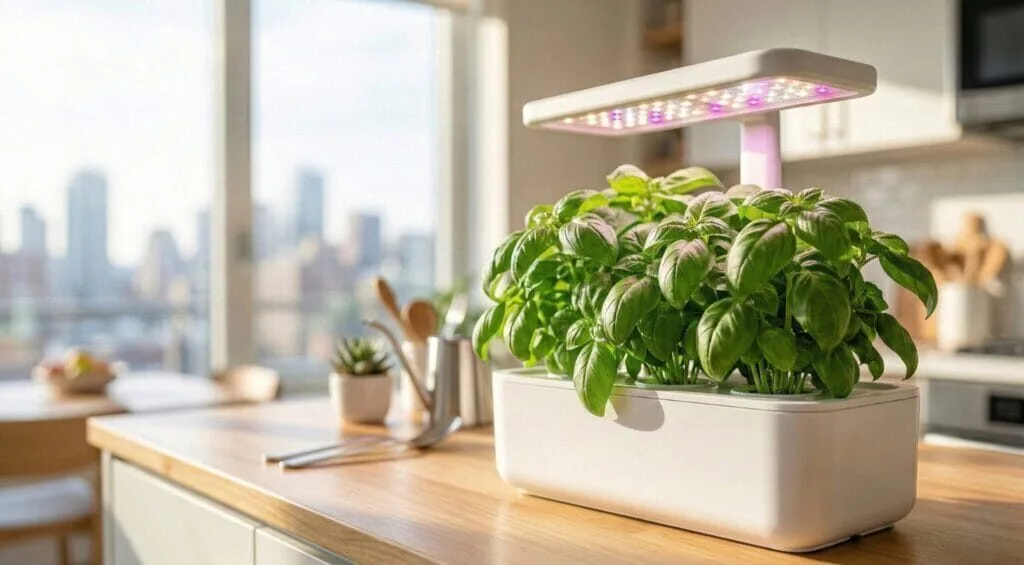
Windowsill sunlight rarely provides enough energy for indoor crops year-round. Without a dedicated light source, you’ll get leggy, weak stems that can’t support the leaf weight. A small LED panel ensures your greens stay compact and vibrant.
☀️ Distance, Intensity, And Daily Hours
Run your panel for 14 hours on, 10 hours off daily. Position the fixture 6 to 8 inches above the canopy. If the light sits too far away, the plant stretches toward it and grows spindly. If it sits too close, you risk grow light burn on the upper leaves. Leafy greens require a moderate PPFD of 200 to 400 µmol/m²/s for optimal growth. Use the free grow light calculator to confirm your fixture wattage matches your shelf footprint.
⏱️ Setting Your Timer
A consistent schedule mimics long summer days. Don’t plug and unplug the power manually — an automatic timer handles the routine while you’re at work. The guide on the best compact timers for apartment grow lights covers the quietest options for studio use. If your schedule shifts and you want to align the light cycle with your workday, the apartment hydroponic light schedule guide for 9-to-5 growers shows the best practical windows.
Setting up your lighting schedule involves a few steps:
- Choosing a smart plug or mechanical timer outlet
- Programming a steady 14-hour daytime cycle
- Ensuring the dark period remains uninterrupted by room lights
🔆 Choosing The Right Fixture
A giant panel will overwhelm a single jar on a narrow shelf. Choose a fixture that matches your footprint without wasting electricity. Full-spectrum LED boards work exceptionally well for small spaces. They run cool and deliver the right wavelengths for leafy growth. If you run arugula alongside other herbs, the guide on running one grow light over multiple plants helps you zone crops with similar light needs on the same shelf efficiently.
Great options for tight apartment spaces include:
- Flexible gooseneck clamp lights for single jars
- Under-cabinet LED strips for kitchen counters
- Small 60-watt quantum boards for wire racks
→ How Far Should Grow Lights Be From Hydroponic Herbs On A Small Shelf
→ Hydroponic Herb Shelf Lighting Layout Guide
🔍 Spotting Light Stress Early
Plants communicate their needs through their physical appearance. A stretched, spindly stem indicates light starvation. A bleached or white leaf tip points to severe overexposure. Inspect your arugula weekly for these signs:
- Internodes stretching more than an inch apart (too far from light)
- Leaves curling downward away from the light source (heat stress)
- Pale yellow discoloration at the very top of the plant (light burn)
🩺 Troubleshooting Hydroponic Arugula Problems
Even well-maintained setups occasionally run into small bumps. Catching issues early makes recovery manageable. Most problems stem from water quality or temperature spikes. Stay calm and follow a logical diagnosis path before changing multiple variables at once.
- Not sure what is wrong yet → check the diagnosis table below
- You know the cause → jump to the relevant section below
🔎 Quick diagnosis table
| What you see | Most likely cause | Check this first |
|---|---|---|
| 🟡 Yellowing leaves | High pH causing nutrient lockout | Test water pH, adjust to 5.5 to 6.5 |
| 🟡 Brown crispy leaf tips | EC too high (nutrient burn) | Dilute reservoir with plain water |
| 🟡 Flower spike forming early | Water temperature above 72°F (22°C) | Measure reservoir temperature immediately |
| 🟡 Leggy stretched stems | Grow light too far from canopy | Lower light to 6 to 8 inches above canopy |
🍃 Yellow Leaves Or Tip Burn
If you spot yellowing lower leaves, check your pH first. Nutrient lockout happens when the water becomes too alkaline. Brown papery edges, on the other hand, mean your fertilizer mix is too strong. The guide on why apartment hydroponic plants turn yellow covers every visual symptom and tells you which issue to address first. The guide on how to top off small hydroponic systems without messing up nutrients explains the daily routine that prevents EC spikes from forming in the first place.
🚨 Early Bolting And Bitter Taste
Arugula prefers cool conditions. If your room sits above 72°F (22°C), the plant assumes summer has arrived and tries to flower. This process, called bolting, ruins the flavor almost immediately. Drop in a small frozen water bottle to cool the reservoir fast. Once bolting starts, the bitterness won’t fade — discard the plant and start a fresh jar with the reservoir temperature under control from day one.
🩹 Slimy Or Brown Roots
Healthy hydroponic roots look white and fuzzy. If you lift the net cup and see brown, slimy strands, you have root rot. It usually happens when the water temperature spikes or light hits the reservoir. Act fast to save the crop.
To clean out an infected root system:
- Remove the affected plant from the jar.
- Rinse the roots under lukewarm tap water.
- Trim away the darkest, mushiest sections with sterilized scissors.
- Sterilize the jar with diluted hydrogen peroxide and rinse completely.
- Refill with fresh pH-balanced water at EC 1.0 and a beneficial bacteria supplement like Hydroguard.
For the full prevention and recovery process, the guide on preventing root rot in small hydroponic systems covers every warning sign before the roots turn slimy.
✂️ Harvesting Hydroponic Arugula For Continuous Yields
The main benefit of growing hydroponic arugula is eating it. A cut-and-come-again approach yields multiple salads from one container. It’s a rewarding cycle that maximizes your small space and keeps fresh greens on your counter for weeks.
⏳ When To Take The First Cut
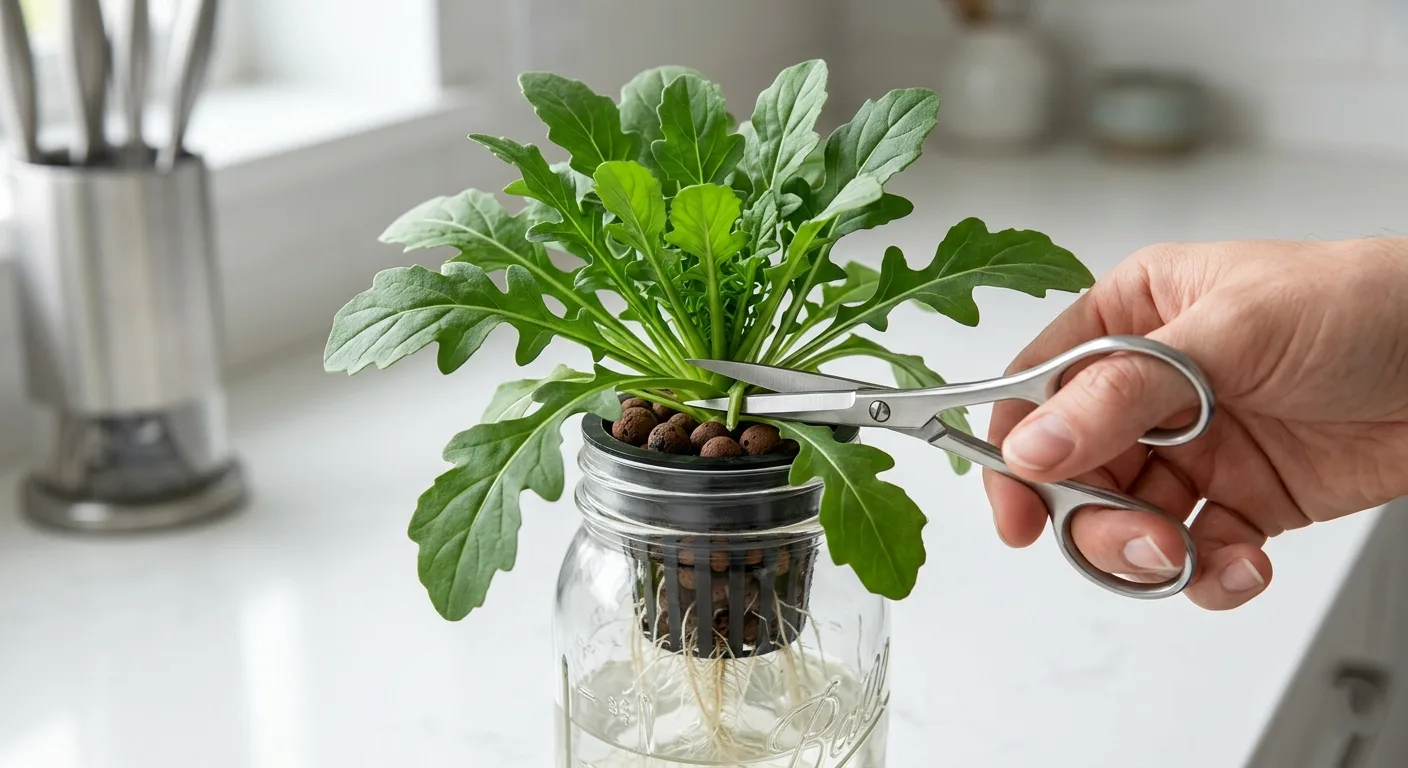
Begin harvesting around day 30. You’ll know it’s time when the outer foliage reaches four inches long. Snip the older, outer greens first while leaving the center intact. Waiting too long makes the leaves tough and they lose their delicate texture.
To harvest without damaging the core:
- Sanitize your scissors with rubbing alcohol or a hydrogen peroxide wipe.
- Locate the largest leaves on the outside of the rosette.
- Cut the stem about one inch above the base.
- Leave at least four small central leaves to power the next growth cycle.
📋 How To Keep The Plant Producing
After your first harvest, the plant needs a fresh nutrient supply to push out new growth. It’s the ideal time to do a full liquid swap to replenish lost minerals. A well-fed plant bounces back vigorously within a week.
When swapping the water after a harvest:
- Drain the old solution down the sink
- Rinse the jar with warm tap water to remove mineral crust
- Refill with a fresh mix at EC 1.4 and pH 5.5 to 6.5
The guide on how to clean a small hydroponic system in an apartment covers the full reservoir hygiene routine so each refill starts from a clean baseline.
🌿 Storing The Harvest
Freshly cut arugula wilts fast if left on the counter. Wash the leaves in cold water and spin them dry. Wrap loosely in a paper towel and store in an airtight container in your fridge. Properly stored, fresh arugula keeps its peppery crunch for three to four days.
🧪 Cleaning And Resetting The Jar For The Next Round
Every crop eventually reaches the end of its life cycle. After three or four harvests, arugula loses its vigor and turns overly bitter. Break down the setup and start fresh. Starting clean ensures your next batch grows without transferring disease from the previous run.
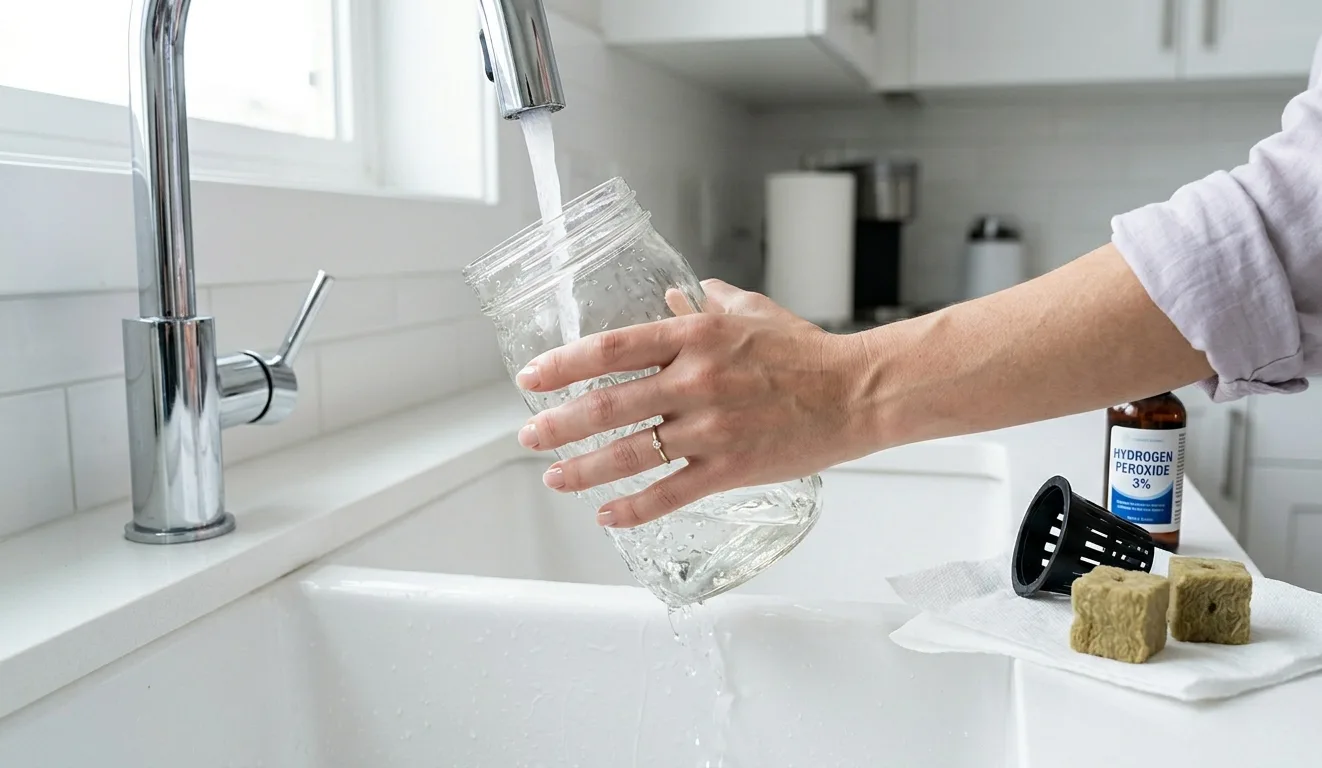
⚗️ Safe Sterilization Between Crops
You don’t need harsh industrial chemicals to clean a mason jar. Use 3 percent hydrogen peroxide instead of bleach. It breaks down into water and oxygen, leaving no toxic residue. It’s an excellent choice for small, enclosed apartment spaces where strong fumes linger.
Follow this routine to sterilize your gear:
- Scrub the jar interior with hot water and dish soap.
- Rinse away all soap bubbles completely.
- Spray the inside with hydrogen peroxide and let it sit for 10 minutes.
- Rinse one final time with warm tap water before refilling.
📌 Discarding Old Rockwool
Rockwool cubes embed themselves into the root mass. You can’t separate the roots from the fiber without making a mess. Throw the used cube away and pull out a fresh one for your next seed. Toss the organic material into your compost bin rather than down the drain.
🛠️ Prepping Net Cups For Reuse
Plastic net cups hold up well over multiple growing cycles. Remove the stubborn roots stuck in the plastic slits with a stiff toothbrush. Once scrubbed clean, soak them in your peroxide solution alongside your jar. Recycling these sturdy little baskets saves money and reduces plastic waste from your indoor garden.
💬 A Word From Sarah
I ran my first batch of hydroponic arugula near a heat vent without thinking about the ambient warmth. The reservoir temperature hit 78°F (25°C) within two days. The plant bolted and sent up a flower spike, while the roots turned brown and slimy. I tossed the entire jar, moved my new setup to a cool kitchen corner, and kept the water at a steady 68°F (20°C). The next batch thrived for six straight weeks, yielding four large harvests without a single flower spike forming. Arugula punishes heat fast and rewards cool temperatures even faster.
❓ Frequently Asked Questions
⏳ How long does hydroponic arugula take to grow?
Hydroponic arugula is one of the fastest crops for apartment growers. Seeds typically sprout in 3 to 5 days and the outer leaves reach harvest size in about 30 to 40 days under a proper grow light. You can speed up germination by keeping the rockwool cubes consistently moist but never sitting in standing water during the first week.
👅 Why is my hydroponic arugula so bitter?
Bitter arugula usually means your reservoir temperature is too high or your nutrient strength is too strong. Keep the water below 72°F (22°C) and ensure your EC stays between 1.0 and 1.6 to maintain a pleasant peppery flavor. If a plant has bolted and flowered, discard it immediately because the bitterness won’t reverse once the flower spike forms.
🩴 Can I grow arugula in a 16-ounce mason jar?
You can start arugula in a 16-ounce jar, but you’ll need to refill it almost daily once the plant matures. A wide-mouth 32-ounce quart jar provides a much better buffer for roots and nutrients. The larger size prevents sudden pH swings and keeps the root zone cooler during warm afternoons when small volumes heat up fast.
🧪 What is the best pH for hydroponic arugula?
The ideal pH for hydroponic arugula is 5.5 to 6.5. Keeping the water slightly acidic ensures the roots can absorb essential minerals like iron and nitrogen without nutrient lockout. Always test your pH after adding fertilizer, as the nutrient salts will naturally shift the baseline acidity of the water.
🌊 Do I need an air pump for hydroponic arugula?
You don’t need an air pump if you use the Kratky method. The plant develops specialized roots that hang in the air gap above the water line, absorbing oxygen naturally. Just ensure you never fill the jar completely to the top when replacing the nutrient solution, as drowning those upper air roots causes root rot within days.
💧 How often should I change the water for hydroponic arugula?
Top off the jar daily with plain pH-adjusted water as the plant drinks. Then perform a full reservoir change every 2 weeks to prevent mineral buildup and keep the roots healthy. This biweekly flush removes unused salts that would otherwise concentrate to toxic levels and burn the delicate root tips over time.
⚗️ Can I use soil fertilizer in my hydroponic arugula jar?
Never use soil fertilizer in a hydroponic system. Soil formulas lack the complete micronutrient profile that plants normally extract from living soil, which leads to deficiencies in a water-based setup. Always use a liquid two-part hydroponic nutrient blend — it dissolves instantly without leaving gritty residue at the bottom of the jar.
✂️ Will hydroponic arugula regrow after I cut it?
Yes, arugula is a cut-and-come-again crop. Harvest the outer leaves and leave the center crown intact, and the plant will push out new growth within a week. You can typically get 3 to 4 harvests from a single plant. Use sanitized scissors for every cut to prevent bacteria from entering the open stems and causing rot at the base.
Happy growing! 🌿
— Sarah, Urban Hydro Space

Sarah is the founder of Urban Hydro Space and an indoor gardening enthusiast dedicated to helping apartment dwellers grow fresh herbs and vegetables in small spaces. With hands-on experience testing hydroponic systems, she shares practical tips and honest product reviews to make indoor gardening accessible for beginners.