⏳ 12 min read · Last updated: April 2026
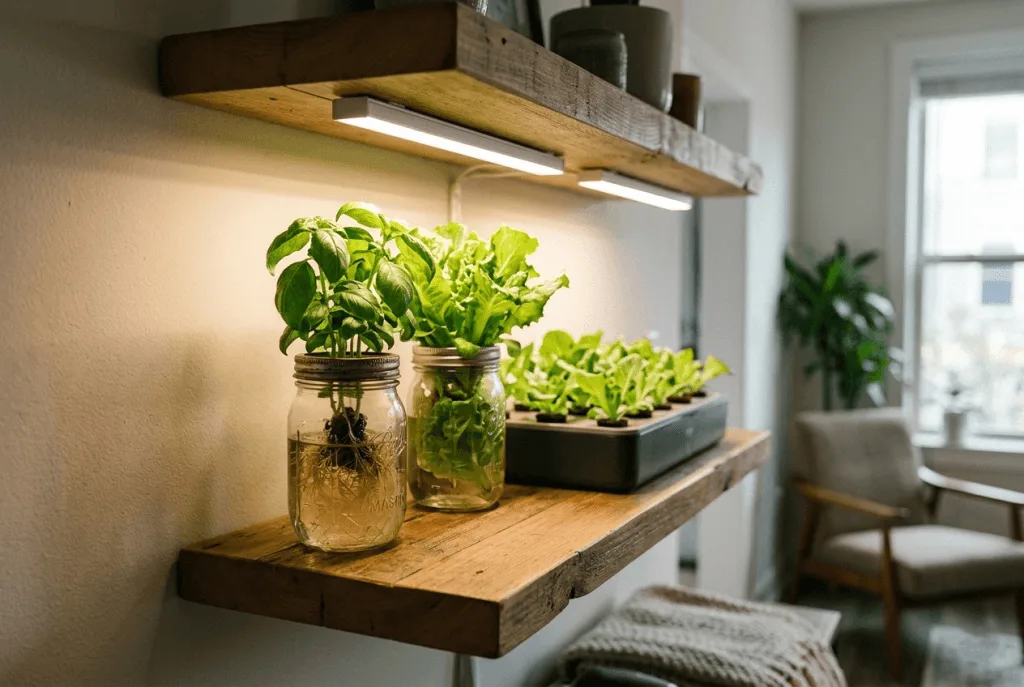
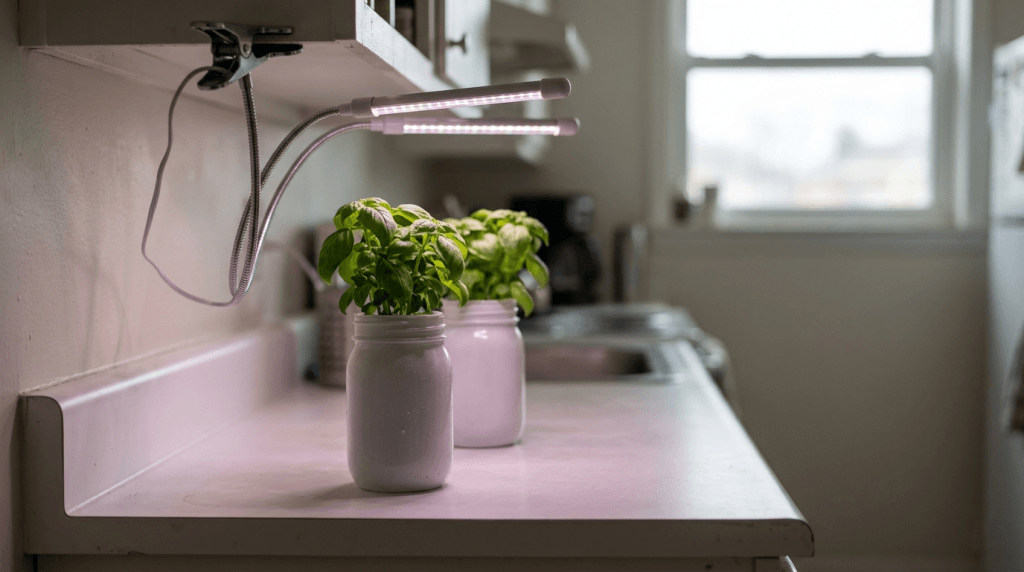
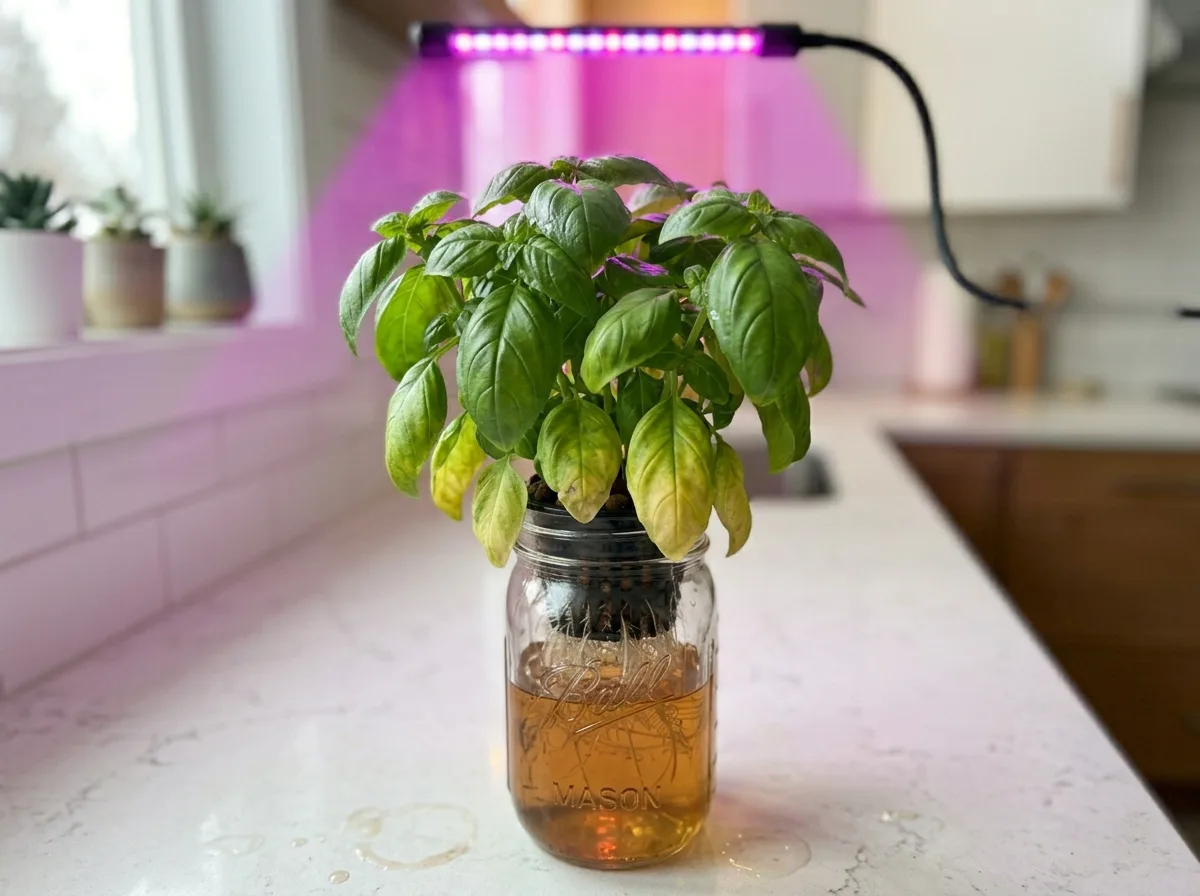
A clip on grow light hydroponic herbs setup feels like the ultimate apartment hack. You clamp a flexible lamp to your kitchen shelf, place a jar underneath, and expect a lush indoor garden. I tried this exact method when I first started growing indoors. I bought a cheap two-head purple light, clipped it to my bookshelf, and stuck a jar of basil right underneath it.
For the first week, I felt like a genius. Then the stems stretched sideways, the leaves turned pale, and the whole plant collapsed under its own weight. I blamed the hydroponic nutrients. I blamed the water. It took me a month to realize my flexible clip-on light was positioned too high and spreading its weak beam too thin. Setting up a clip on grow light hydroponic herbs system works well, but you need to understand its limitations.
- Keep the light heads exactly 4 to 6 inches above your plant canopy.
- Run the flexible lights for 14 to 16 hours every day.
- Focus on one or two small jars per light fixture to maximize intensity.
- Top off daily with plain water, full reservoir change every 2 weeks.
- You want fast results and bold flavor → start with Basil
- You have lower ambient temperatures → start with Chives
- You want a crop that bounces back fast → start with Mint
- How a Clip On Grow Light Works for Hydroponic Herbs
- Choosing the Best Herbs for Clamp Lights
- Clip On Grow Light Placement for Small Apartment Spaces
- Managing Nutrition When Light is Weak
- Water and Reservoir Maintenance
- Pruning for Bushy Countertop Growth
- Troubleshooting Your Clip On Grow Light
- Daily Five-Minute Maintenance Routine
- A Word From Sarah
- Frequently Asked Questions
🔆 How a Clip On Grow Light Works for Hydroponic Herbs
Many apartment growers start their journey with a clip on grow light hydroponic herbs station because it requires zero drilling. You don’t need a heavy wire rack or ceiling hooks. However, understanding how these flexible wands emit photons is vital to your success. Cheap LED diodes lack the penetrating power of professional quantum boards.
Most commercial clamp lights boast numbers like “80 watts” on the box. In truth, they draw 10 to 20 real watts from the wall. So you need to position them closer to your foliage than you might expect. When you optimize the placement, a basic clip-on fixture provides plenty of energy for soft-stemmed plants.
💡 Understanding PPFD and Light Spread
Photosynthetic Photon Flux Density (PPFD) measures how much usable light hits your plant’s surface. Flexible clip lights have narrow beam angles. Directly under the bulb, the intensity is strong enough for vigorous growth. Move an inch to the left or right, and the energy drops sharply. Use the free grow light calculator to estimate how much usable light your fixture actually delivers at different heights.
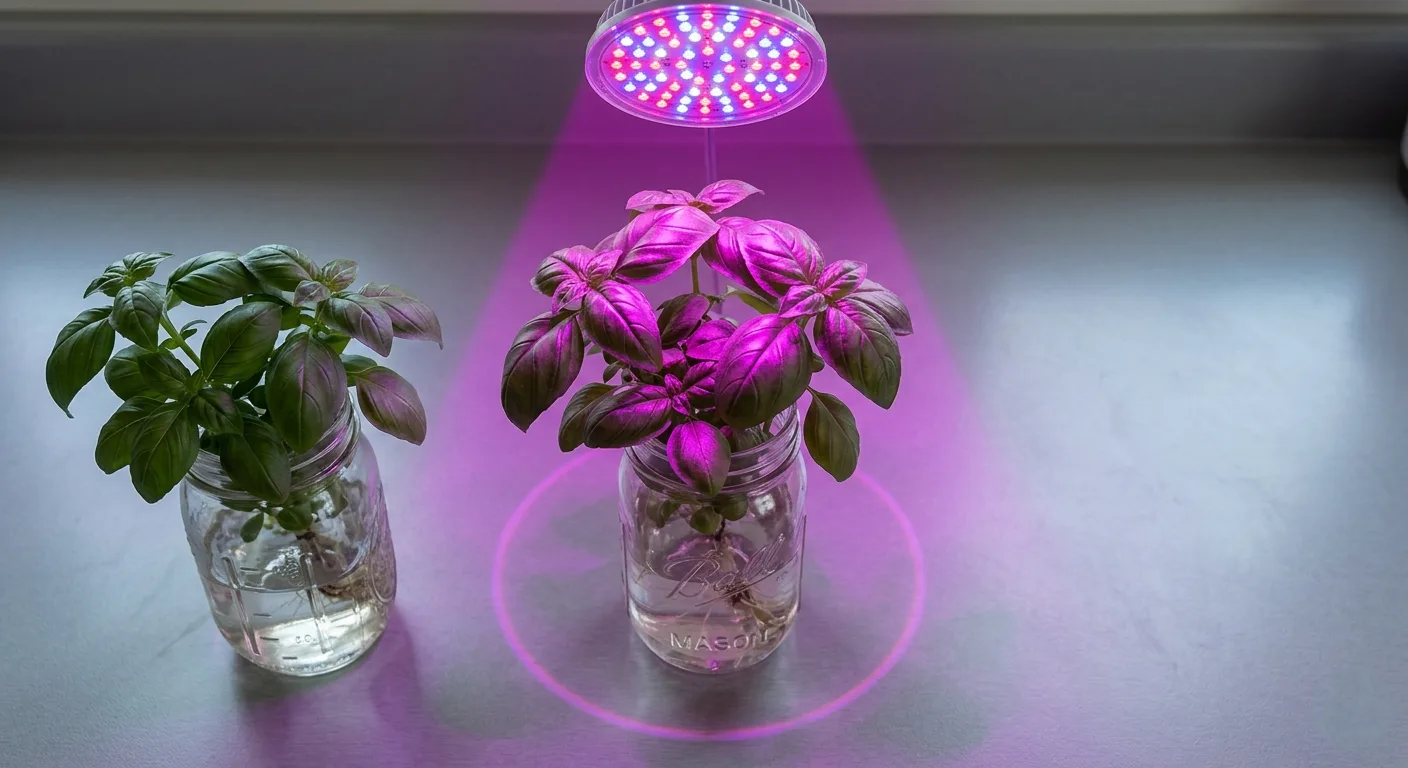
Because of this narrow spread, you can’t illuminate a massive tray of jars with a single clamp light. You need to group your containers tightly. If you notice the plants on the edges leaning inward, they’re reaching for better positioning.
Signs your plants are suffering from weak spread include:
- Stems bending sharply toward the center diode
- Lower leaves dropping off due to shading
- Pale green foliage on the outer edges of the canopy
- Internodes stretching longer than 2 to 3 inches
⚠️ What to Do When the Light Fails
Sometimes, a flexible neck loses its stiffness and droops over time. When this happens, the bulb shifts away from your intended target. Alternatively, the built-in timer might glitch, leaving your plants in darkness while you work your shift.
If you suspect the fixture isn’t performing, check the actual wattage draw with a plug-in meter. If the flexible arms refuse to stay put, wrap a small piece of electrical tape around the base joints to add friction. It isn’t pretty, but it keeps the beam focused.
🌿 Choosing the Best Herbs for Clamp Lights
Not every plant will thrive under a clip on grow light hydroponic herbs system. Tomatoes and peppers demand intense, full-spectrum energy that flexible wands can’t provide. You need to focus on crops that naturally tolerate partial shade in the wild.
Soft-stemmed leafy greens are your best bet. They don’t need to produce flowers or heavy fruit, which saves massive amounts of energy. When you stick to the right varieties, you’ll see a steady harvest even with limited wattage.
Great options for your setup include:
- Genovese basil for tall, rapid growth
- Peppermint or spearmint for quick recovery
- Loose-leaf lettuce for continuous snacking
🍃 Why Basil and Mint Win
Basil is a powerhouse. It absorbs ambient light well and responds well to regular pruning. Mint is even more forgiving. If you accidentally neglect a mint jar, it bounces back the moment you restore proper conditions.
Lettuce is another excellent choice because it prefers cooler temperatures. A clip-on light won’t roast the delicate leaves the way a massive high-pressure sodium bulb would. That said, you should still monitor the jar to ensure it stays below 75°F (24°C).
| Crop | Germination Time | Time to First Harvest |
|---|---|---|
| Basil | 5 to 10 days | 4 to 6 weeks |
| Mint | 10 to 15 days | 5 to 7 weeks |
| Lettuce | 3 to 7 days | 3 to 5 weeks |
❌ What to Avoid Growing
Woody herbs like rosemary and thyme struggle under weak clamp lights. Their thick stems require intense solar energy to push new growth. If you attempt them in this setup, they often stall and produce sparse, flavorless foliage.
Root vegetables are also off the table. A radish or carrot needs deep, powerful light penetration to swell the root mass underground. Stick to surface-level leafy greens to guarantee your success.
→ Beginner Guide To Growing Hydroponic Mint In A Countertop System
→ Apartment Hydroponics: The Complete Beginner’s Guide
🛠️ Clip On Grow Light Placement for Small Apartment Spaces
Your clip on grow light hydroponic herbs project lives or dies by its placement. The relationship between the clamp, the flexible wands, and the top of the canopy dictates your harvest speed. Small kitchen countertops don’t offer much room for error.
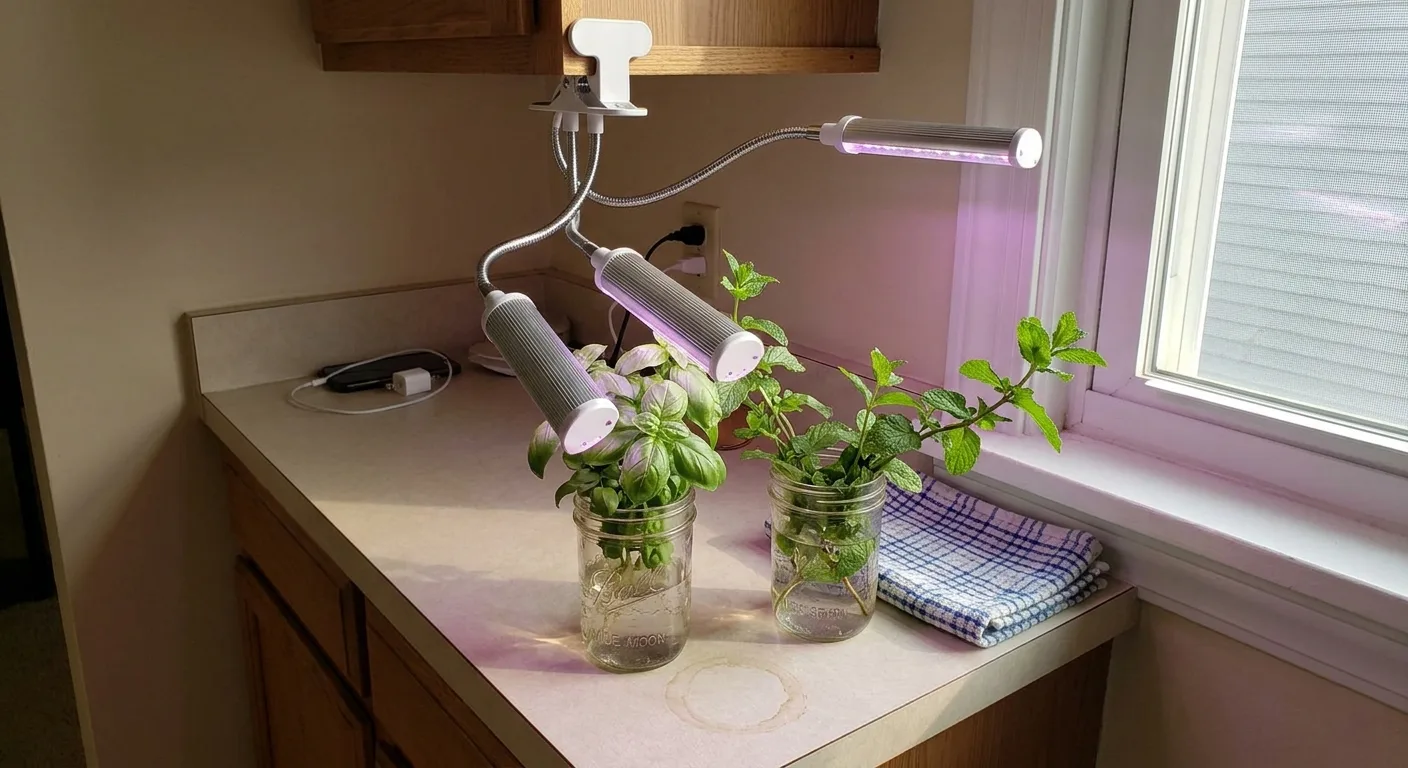
Anchoring the fixture is the first hurdle. The clamp needs a thick, flat surface to bite into. If you clip it to a thin metal wire shelf, the weight of the LED heads will pull it forward. Finding a stable base prevents your light from crashing into your nutrient reservoirs.
Good surfaces for anchoring the clamp include:
- Bookshelves with a solid top edge
- Kitchen islands with a lip or overhang
- Sturdy wooden desks with a thick frame
→ How Far Should Grow Lights Be From Hydroponic Herbs On A Small Shelf
⏱️ Dialing in the Exact Distance
You want the LED heads resting 4 to 6 inches above the tallest leaves. Any further, and the inverse square law takes over, robbing your plants of vital photons. Get too close, and the residual heat might singe the delicate leaf tips.
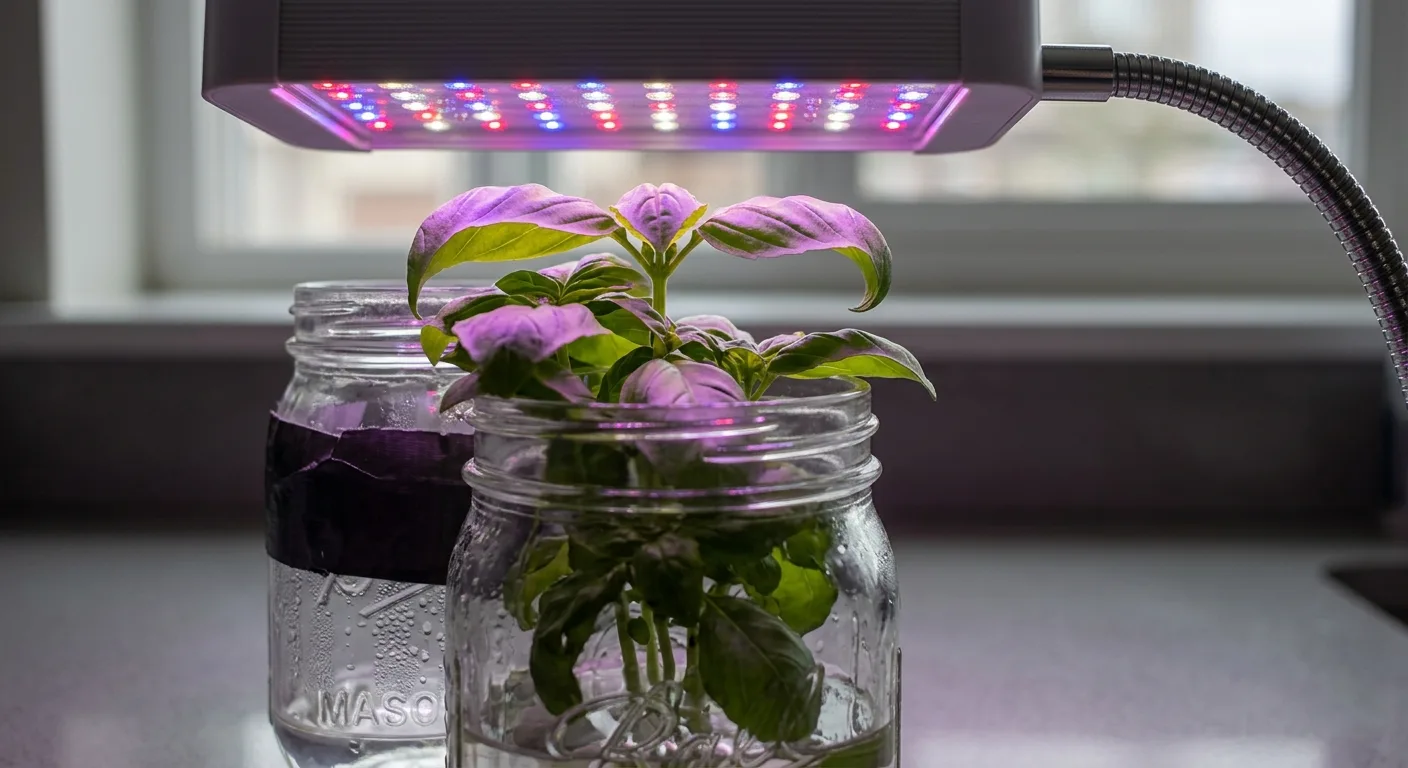
Because herbs grow upward, you’ll need to adjust the flexible wands every few days. Push the wands back slightly rather than pulling them straight up. This angled approach maintains good coverage while accommodating the new vertical growth.
If you fail to adjust the height, your plants will suffer grow light burn as they press against the warm diodes.
🔥 Preventing Localized Light Burn
A common mistake with a clip on grow light hydroponic herbs arrangement is letting the bulb physically touch the plant. The diodes generate a small amount of heat. Over an eight-hour stretch, that contact causes severe localized tissue damage.
To check for potential burn hazards:
- Turn the light fixture on to its highest setting.
- Place your hand flush against the top leaves of your plant.
- Wait thirty seconds. If your hand feels uncomfortably warm, the light is too close.
- Bend the neck upward slightly until the heat dissipates but the brightness remains.
⚗️ Managing Nutrition When Light is Weak
When you rely on a clip on grow light hydroponic herbs system, your plants process nutrients slower than they would under a massive commercial panel. They aren’t sweating as much. They aren’t photosynthesizing at maximum capacity. So you need to adjust your feeding strategy accordingly.
If you push high levels of fertilizer into a low-light system, the plant can’t utilize the minerals. The excess salts build up in the reservoir. This leads to tip burn, nutrient lockout, and an exasperating cycle of yellowing leaves that confuses beginners.
Top off daily with plain water, full reservoir change every 2 weeks. This prevents toxic buildup in the small jars common to countertop setups.
| Crop | Target pH | Low-Light EC Range |
|---|---|---|
| Basil | pH 5.5 to 6.5 | EC 1.2 to 1.6 |
| Mint | pH 5.5 to 6.0 | EC 1.4 to 1.8 |
| Lettuce | pH 5.5 to 6.0 | EC 0.8 to 1.2 |
🧪 Lowering EC for Apartment Growing
I killed my first mint batch keeping EC at 2.4 under a weak clip light. The plant couldn’t process the nutrients fast enough without intense sun. The leaves turned brown at the edges and curled inward. Dropping to EC 1.8 fixed it within a week.

For most apartment herbs grown under low wattage, keep your nutrient strength moderate. If the leaves turn dark green and claw downward, dial the strength back further. A good starting point for clip-on setups is EC 1.2 to 1.5 until the plants establish strong root growth. Use the free pH and nutrient calculator to find the exact mix ratio for your reservoir volume.
🌾 What to Do When Leaves Curl
When you see the edges of your basil leaves curling inward like a taco shell, the plant is stressed. In a low-light environment, this usually points to nitrogen toxicity. The plant absorbed more nitrogen than it could burn off through photosynthesis.
To fix nitrogen toxicity:
- Dump the current nutrient solution down the drain.
- Rinse the jar with warm tap water.
- Refill the container with pure water for 24 to 48 hours to flush the roots.
- Reintroduce nutrients at half the previous strength.
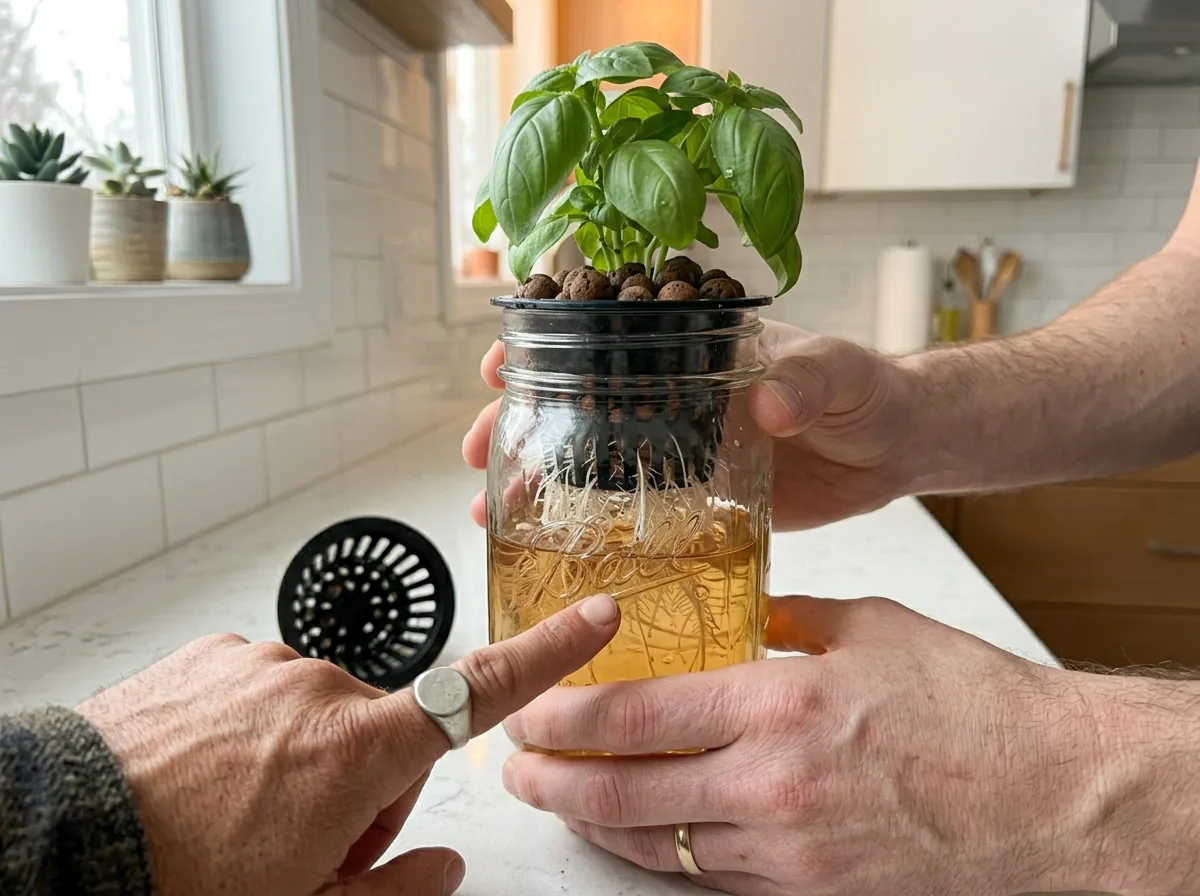
💧 Water and Reservoir Maintenance
Running a clip on grow light hydroponic herbs system means you’re likely using small glass jars or recycled plastic containers. These tiny reservoirs hold very little water. When the ambient temperature fluctuates in your apartment, the water temperature swings with it.
Warm water holds less dissolved oxygen than cold water. When the liquid gets too warm, the roots suffocate. Monitor the environment to keep the liquid between 65 to 72°F (18 to 22°C). This ensures the root zone remains healthy and active.
Always top off daily with plain water, full reservoir change every 2 weeks. This prevents mineral spikes as the water level drops.
🌊 What to Do When Algae Blooms
Algae thrives when light penetrates your clear jars and interacts with the fertilizer. While a clip-on light isn’t a miniature sun, it still provides enough ambient scatter to fuel algae growth. This green slime competes with your plant for oxygen and nutrients.
To clean out an infected reservoir:
- Remove the affected plant from the jar and place it in an empty cup.
- Rinse the roots gently under lukewarm tap water at 68 to 72°F (20 to 22°C).
- Sterilize the reservoir with diluted hydrogen peroxide. (Diluted bleach works too, but hydrogen peroxide leaves no toxic residue and degrades cleanly in light.)
- Refill with fresh pH-balanced nutrient solution.
- Wrap the exterior of the jar in aluminum foil or opaque tape.
→ Why Algae Keeps Growing In Hydroponic Jars And How To Stop It
🩴 Checking Root Health Weekly
Your roots tell the true story of your setup. Every time you change the water, lift the net cup and inspect the root mass. Healthy roots appear white or light tan and smell like fresh rain.
If the roots look brown, slimy, or smell like a swamp, you have a problem. Preventing root rot in small hydroponic systems requires diligence. Cut away the dead tissue with sterilized scissors, flush the system with hydrogen peroxide, and ensure your water temperature isn’t creeping too high.
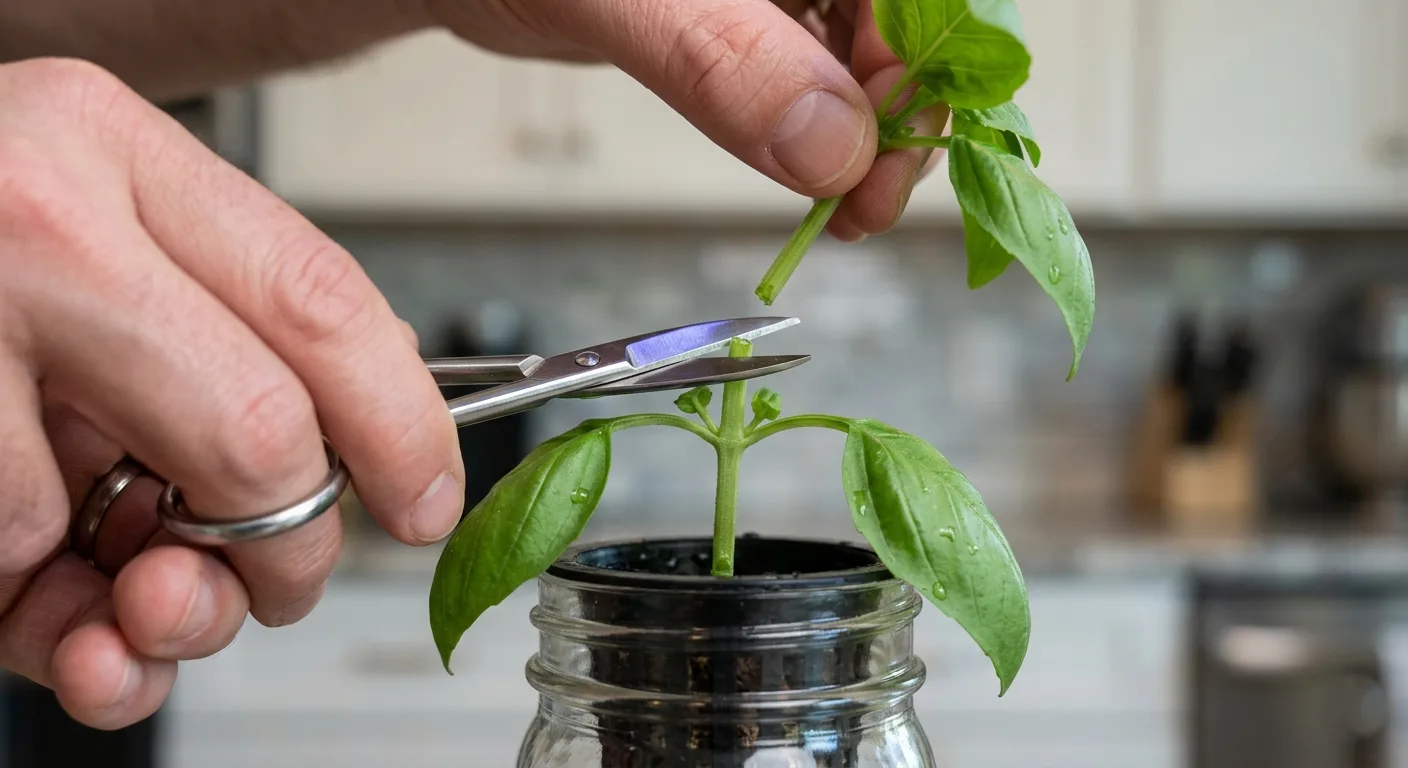
✂️ Pruning for Bushy Countertop Growth
With a clip on grow light hydroponic herbs system, vertical space is your enemy. If your basil shoots straight up, it hits the light bulb and burns. You want lateral, bushy growth that spreads out underneath the beam. Pruning forces the plant to adapt to your small apartment footprint.
Every time you cut a main stem, the plant redirects energy to the two dormant nodes below the cut. Those nodes sprout into two new branches. This geometric multiplication creates a dense canopy that maximizes the narrow light spread.
To get this right, you need to push past the instinct to leave your plant untouched. Snipping the top off a thriving seedling feels wrong, but it yields excellent results later.
🩹 The Micro-Steps of Early Pruning
Don’t wait until the plant is towering over your jar. Begin shaping the structure early, as soon as the plant has settled into its growth rhythm. The Seed to Harvest Countdown helps you track exactly when your herbs enter their active vegetative phase.
To prune effectively:
- Wait until the seedling develops three sets of true leaves.
- Locate the central node just above the second set of leaves.
- Use sterilized scissors to snip the main stem at a 45-degree angle.
- Leave about a quarter inch of stem above the node to prevent infection.
🔍 Fixing Leggy Seedlings
Sometimes, seeds stretch during germination before you manage to position the clip light correctly. You end up with a fragile, skinny stem that flops over. This happens often if you delay turning the lights on.
If your seedlings are leggy, lower the light fixture right away to halt the stretching. For basil, you can bury the stem deeper into your rockwool or clay pebbles, as they’ll sprout adventitious roots along the buried section. If the stem snaps, start over with a fresh seed.
🚨 Troubleshooting Your Clip On Grow Light
Even careful growers face hurdles. A clip on grow light hydroponic herbs system introduces unique challenges, primarily related to coverage and stability. If your plants look unhappy, the culprit usually lies in the intersection of light distance and nutrient concentration.
When issues arise, check the simple physical factors first. Did the light timer fail? Did the clamp slide down the shelf? Is the water temperature sitting comfortably at 65 to 72°F (18 to 22°C)?
- Not sure what is wrong yet → start with Diagnosing the Signs
- You know the cause → jump to the relevant section below
🩺 Quick Diagnosis Table
🔎 Quick diagnosis table
| What you see | Most likely cause | Check this first |
|---|---|---|
| 🟡 Long, thin, weak stems | Light is too far away | Lower fixture to 4 inches |
| 🟡 Crispy brown leaf tips | Nutrient burn / EC too high | Dilute reservoir with fresh water |
| 🟡 Lower leaves turning yellow | Shading / lack of light penetration | Prune upper leaves to let light in |
☀️ Fixing Yellow Leaves Under Clamp Lights
Yellowing leaves frustrate every beginner. When running a clip on grow light hydroponic herbs system, yellowing usually points to nitrogen deficiency or shading. If only the bottom leaves are turning pale, the dense upper canopy is blocking the weak LED beams.
To resolve shading issues:
- Thin out the top layer by harvesting the largest fan leaves.
- Adjust one of the flexible wands to angle light into the sides of the plant.
- Verify your pH is resting between pH 5.5 to 6.5 to rule out nutrient lockout.
If the entire plant is yellowing, the guide on why apartment hydroponic plants turn yellow covers deeper troubleshooting steps.
🛠️ Managing Heat Stress in Small Jars
While LEDs run cool, a countertop sitting near an apartment window can heat up fast. Warm water holds less dissolved oxygen. When temperatures rise above 75°F (24°C), the root system struggles to breathe.
If your roots turn brown and slimy, the plant is suffocating. Clean the jar, trim the dead roots with sterilized scissors, and move the setup away from the ambient heat source. Always top off daily with plain water, full reservoir change every 2 weeks to keep oxygen levels fresh.
⏳ Daily Five-Minute Maintenance Routine
You don’t need to spend hours managing a clip on grow light hydroponic herbs station. The beauty of this small setup is the minimal time investment required. Establishing a daily five-minute routine keeps everything on track.
I check my plants every morning while the coffee brews. This habit prevents minor issues from snowballing into massive failures. When you spot a drooping leaf early, you can correct the water level before the plant suffers permanent damage.
My morning routine includes:
- Tapping the light timer to ensure the cycle engaged properly.
- Peeking at the water level to see if it dropped below the net cup.
- Adjusting the flexible wands upward by a millimeter if the canopy grew overnight.
📋 Topping Off the Water Correctly
Because these jars are tiny, the water level drops fast once the root mass matures. A thirsty basil plant will drain a pint jar in two days. If you forget to check it, the roots will dry out and die.
Keep a pitcher of plain, dechlorinated water next to your setup. Every morning, pour a splash into the jar until the water touches the bottom third of the root mass. You must leave an air gap at the top so the roots can breathe.
✅ Checking the Timer Settings
Power outages or accidental bumps can reset your mechanical timers. If your lights turn off halfway through the day, the plants lose vital growing hours. They need 14 to 16 hours of continuous illumination.
Verify the timer dial matches the current time of day. If you use a smart plug, open the app on your phone once a week to ensure the schedule hasn’t drifted. Consistent lighting is the foundation of your apartment harvest.
💬 A Word From Sarah
My three-head gooseneck light seemed sturdy enough when I clamped it to my kitchen shelf. The flexible arms held their position all week. Then, the ambient room temperature spiked to 78°F (25°C) while I was at work. The plastic joints softened, one of the heavy LED heads drooped forward, and it came to rest directly against a wet, thriving basil leaf for five solid hours. It scorched a perfect black circle into the tissue and sent the plant into shock. Ever since that afternoon, I wrap a thin strip of textured grip tape around the base joints of my clip lights. It isn’t gorgeous, but I haven’t burned a leaf since.
❓ Frequently Asked Questions
💡 Can I use a regular desk lamp instead of a clip on grow light?
Standard desk lamps lack the proper spectrum and intensity for healthy plant growth. A dedicated clip on grow light provides the blue and red wavelengths that prevent herbs from becoming weak, leggy, and pale over time. Investing in a full-spectrum LED ensures your plants receive the correct energy for dense foliage and strong flavor.
⏱️ How many hours should I leave my clip on grow light on?
Run your clip on grow light for 14 to 16 hours every day. Because these lights have lower wattage than professional panels, plants need longer exposure to absorb enough energy for strong foliage production. Set a simple outlet timer to maintain this consistent cycle automatically without thinking about it each morning.
🌿 Why are my hydroponic herbs stretching toward the light?
Herbs stretch when the light source is too weak or too far away. Lower your clip on grow light to within 4 to 6 inches of the canopy. This ensures the plants receive enough intensity to grow bushy rather than tall. Rotating each jar a quarter turn every three days also helps even out the stretch.
☀️ Do I need a special timer for my clip on grow light?
Many modern clip on grow lights feature built-in timers. If yours lacks one, a basic smart plug or mechanical outlet timer works well. Automating the schedule ensures your herbs get consistent light even when you’re away. Check the timer settings weekly to confirm they haven’t drifted off schedule after a power interruption.
🩴 Can one clip on grow light support multiple herb jars?
Most flexible clip lights only emit enough intense light for one or two small jars. If you spread the heads too far apart to cover multiple plants, the intensity drops below the threshold needed for vigorous growth. Keep your containers clustered tightly together directly under the main beams for best results.
💧 What water temperature should I keep in a clip on grow light hydroponic setup?
Keep your nutrient solution between 65 to 72°F (18 to 22°C). Clip-on lights add minimal heat directly to the water, but warm apartment conditions or nearby windows can push temperatures above that range. Warm water holds less dissolved oxygen, which stresses roots. Add a frozen water bottle temporarily if needed during summer months.
🛠️ How do I clean a dusty clip on grow light?
Unplug the fixture and wipe the LED diodes with a dry or slightly damp microfiber cloth. Dust blocks light transmission and reduces the energy reaching your plants. Avoid harsh chemical sprays on the plastic housing. A quick wipe-down every month keeps the light output at maximum efficiency with minimal effort.
🔆 Will a clip on grow light use a lot of electricity?
No. Most clip on LED grow lights draw between 10 and 20 real watts from the wall. Even running for 16 hours a day, the monthly electricity cost is typically less than a single cup of coffee. This makes them a budget-friendly option for anyone starting out with indoor apartment gardening.
Happy growing! 🌿
— Sarah, Urban Hydro Space
Sarah is the founder of Urban Hydro Space and an indoor gardening enthusiast dedicated to helping apartment dwellers grow fresh herbs and vegetables in small spaces. With hands-on experience testing hydroponic systems, she shares practical tips and honest product reviews to make indoor gardening accessible for beginners.