⏳ 18 min read · Last updated: March 2026
My first basil plant grew tall, reached the grow light, burned its top leaves, and shaded everything else in the system. I had never learned how to prune hydroponic basil, so I kept waiting for it to look ready while it raced upward toward the diodes. When the top leaves turned crispy and brown, I tipped the whole jar into the compost and assumed I had made some fundamental mistake with the water chemistry. The real problem was a lot simpler: I had not made a single cut.
Pruning feels counterintuitive at first. Cutting a plant to make it grow more sounds like bad logic. However, once you understand what is driving vertical growth, the technique makes immediate sense. This guide covers the core node-cutting method for basil, the correct approach for six other common apartment herbs, and how to adjust your nutrient solution after each harvest so the plant bounces back fast.
- Always cut just above a node to force the plant to branch outward instead of growing straight up.
- Start trimming when herbs reach 6 to 8 inches in height.
- Drop EC to 1.2 to 1.5 temporarily after a heavy harvest to avoid burning stressed roots.
- Keep grow lights 6 to 8 inches above the canopy after cuts so new side branches get enough light.
- Top off with plain pH-adjusted water daily. Do a full water change every 2 weeks.
- South-facing window → Sweet Basil
- Low light corner → Peppermint or Chives
- Fastest first harvest → Sweet Basil and Chives together
- Why Learning How to Prune Hydroponic Basil Matters in Small Spaces
- The Core Technique: How to Prune Hydroponic Basil Correctly
- Managing Your Nutrient Solution After a Major Harvest
- Pruning Other Common Apartment Herbs
- Lighting and Spacing for Bushier Herbs
- What to Do With Your Hydroponic Basil Cuttings
- Identifying Plant Stress After Pruning
- A Word From Sarah
- Frequently Asked Questions
🌿 Why Learning How to Prune Hydroponic Basil Matters in Small Spaces
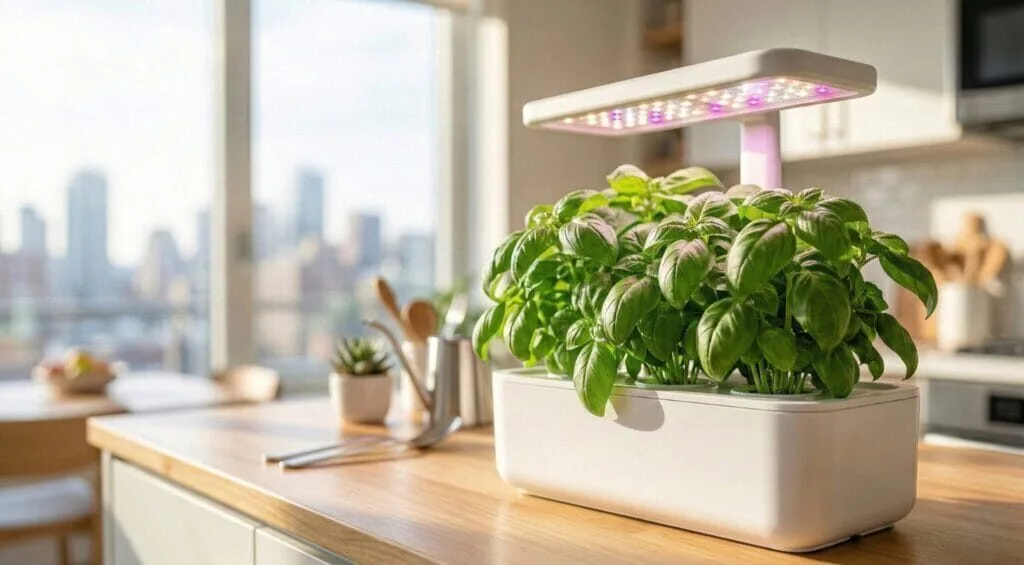
In a small apartment, vertical space is your scarcest resource. Most countertop setups and windowsill jars offer a foot or two of clearance between the water surface and the grow light. If a basil plant races upward unchecked, it burns against the diodes, shades smaller plants below it, and becomes structurally unstable from the weight of its own canopy.
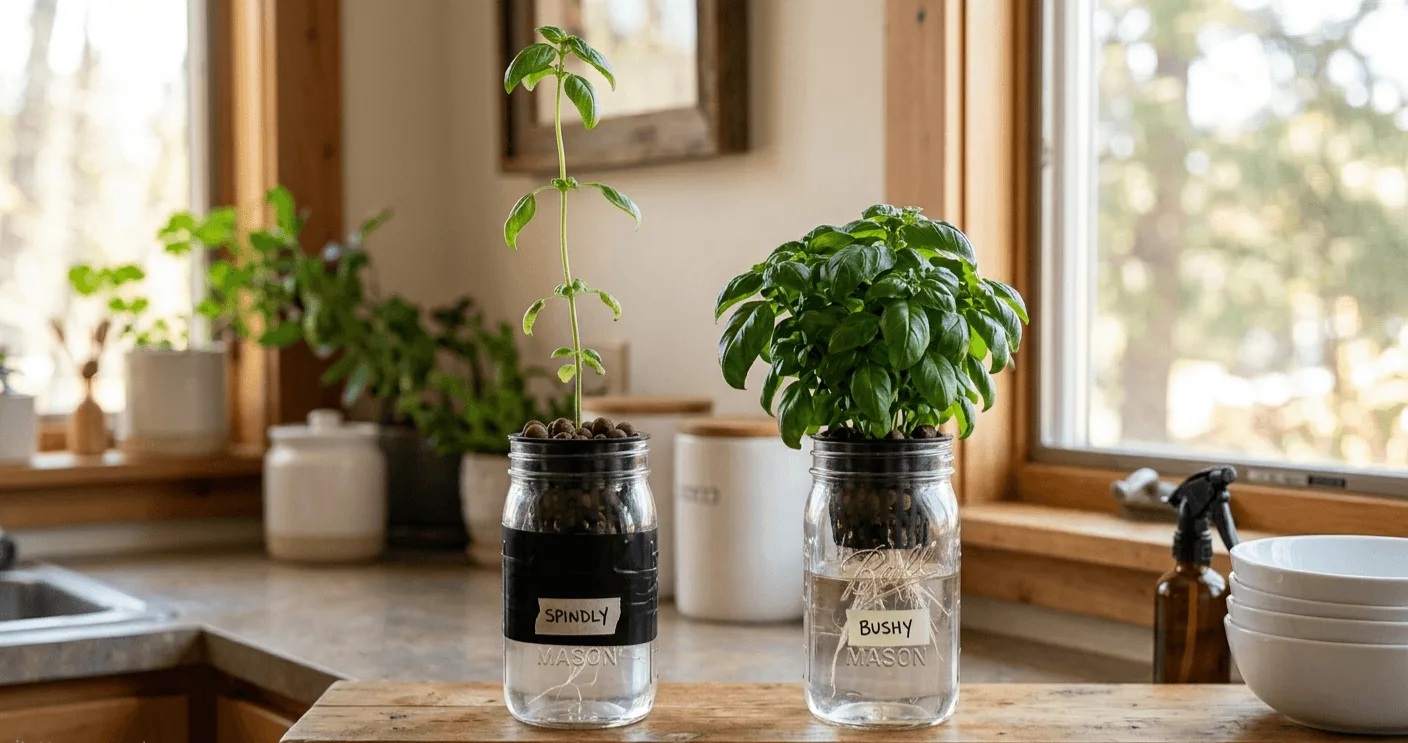
An unpruned herb also focuses all its energy on a single stalk. Gardeners call this leggy growth: wide gaps between leaves, sparse foliage, and a weak center stem. When you cut the top, the plant redirects that energy into the side branches. One stem becomes two. Prune those two branches a few weeks later, and you get four leaders. That is how you build a dense, productive canopy in a jar that fits on a shelf.
👑 The Apical Dominance Concept
Every basil plant has a main central stem governed by apical dominance. The highest growing tip produces hormones called auxins, which travel down the stem and suppress the side buds from activating. As a result, the plant keeps climbing rather than branching.
Removing that top tip eliminates the source of those suppressing hormones. The dormant side buds along the stem respond within a few days, pushing outward into new branches. One stem becomes two. This is not a side effect of pruning. It is the intended outcome, and understanding this mechanism makes it easier to prune hydroponic basil with confidence rather than hesitation.
📏 Keeping Plants Away from the Grow Lights
LED panels emit localized heat at close range, even if they feel cool from a distance. Leaves that touch the diodes show light burn within a few hours: crispy, bleached patches that ruin both flavor and appearance. Regular trimming keeps the canopy in the optimal zone.
The standard distance for leafy herbs is 6 to 8 inches between the canopy and the light panel. If your system has a fixed hood that cannot be raised, pruning is the only way to maintain that gap. After each cut session, measure the distance from the new highest leaf to the diodes and adjust the light accordingly. The free grow light calculator gives you exact hang heights and PPFD targets for your specific setup.
⚖️ Preventing Top-Heavy Tipping in Lightweight Setups
A tall, unpruned herb in a Kratky jar on a sunny windowsill acts like a sail near an open window or a circulating fan. It catches the breeze, rocks, and can tip the jar. A spilled reservoir on hardwood floors is a frustrating cleanup and a complete loss of nutrients.
Keeping growth low and compact keeps the center of gravity close to the base. A wide, bushy plant in a standard mason jar is more stable than a tall, spindly one in the same container. That stability matters even more in studio apartments where jars sit on narrow ledges or floating shelves.
✂️ The Core Technique: How to Prune Hydroponic Basil Correctly
Knowing how to prune hydroponic basil starts with understanding basic plant anatomy. You cannot cut at a random point on the stem and expect good results. The location of the cut determines whether the plant branches or stalls, so identifying the right spot before touching the shears is worth thirty seconds of inspection every time.
Tool choice matters too. Dull scissors crush stem tissue rather than cutting it cleanly. Crushed tissue heals slowly and invites bacterial infection. Dedicate a small pair of bypass pruning shears to your indoor garden and keep them sharp. If your countertop hydroponic system included basic clippers, they will work fine to start, but upgrading to micro-snips makes a real difference once you are pruning regularly.
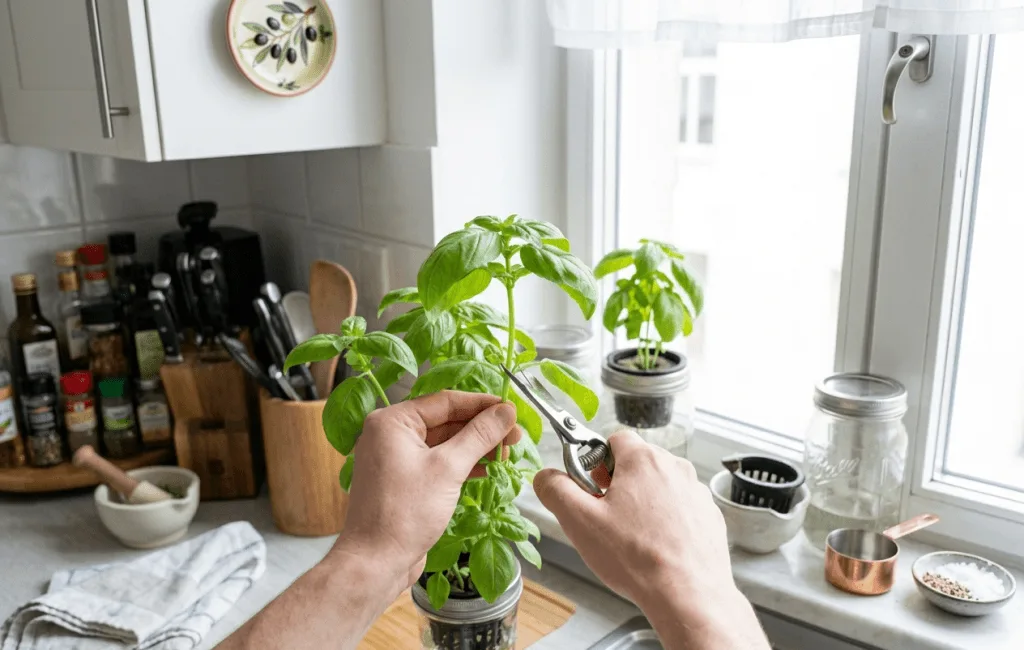
🔍 Finding the Correct Leaf Node
Before making any cuts, inspect the main stem closely. You will notice points along the stem where large leaves branch off. These are the nodes. At the base of each leaf, where it meets the central stem, two tiny leaflets sit dormant. These are the axillary buds that will become your new main branches after the cut.
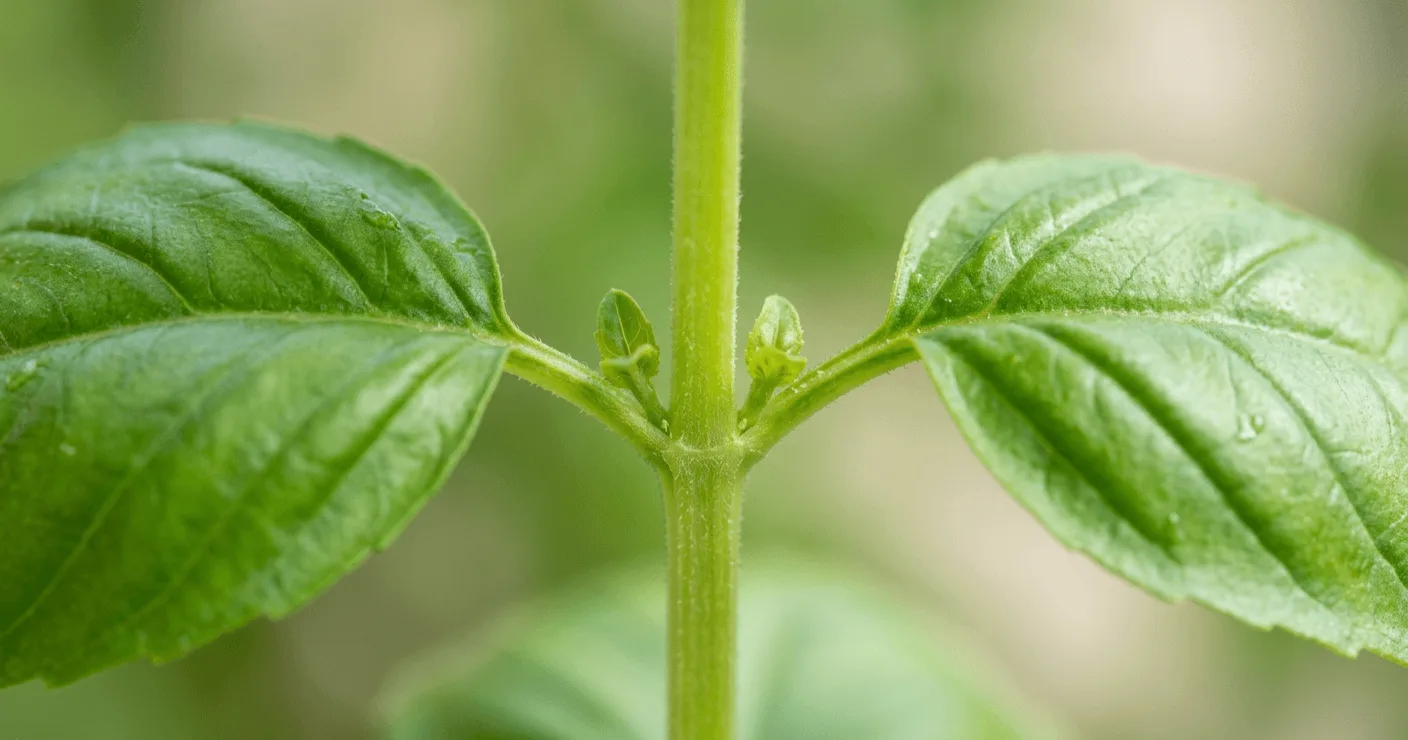
Your target is to cut just above a node, roughly a quarter-inch above those tiny leaves. If you cut in the middle of bare stem between nodes, the stump below the cut will turn brown and rot. Find a healthy node about one-third down from the top of the plant and mark that as your cut point.
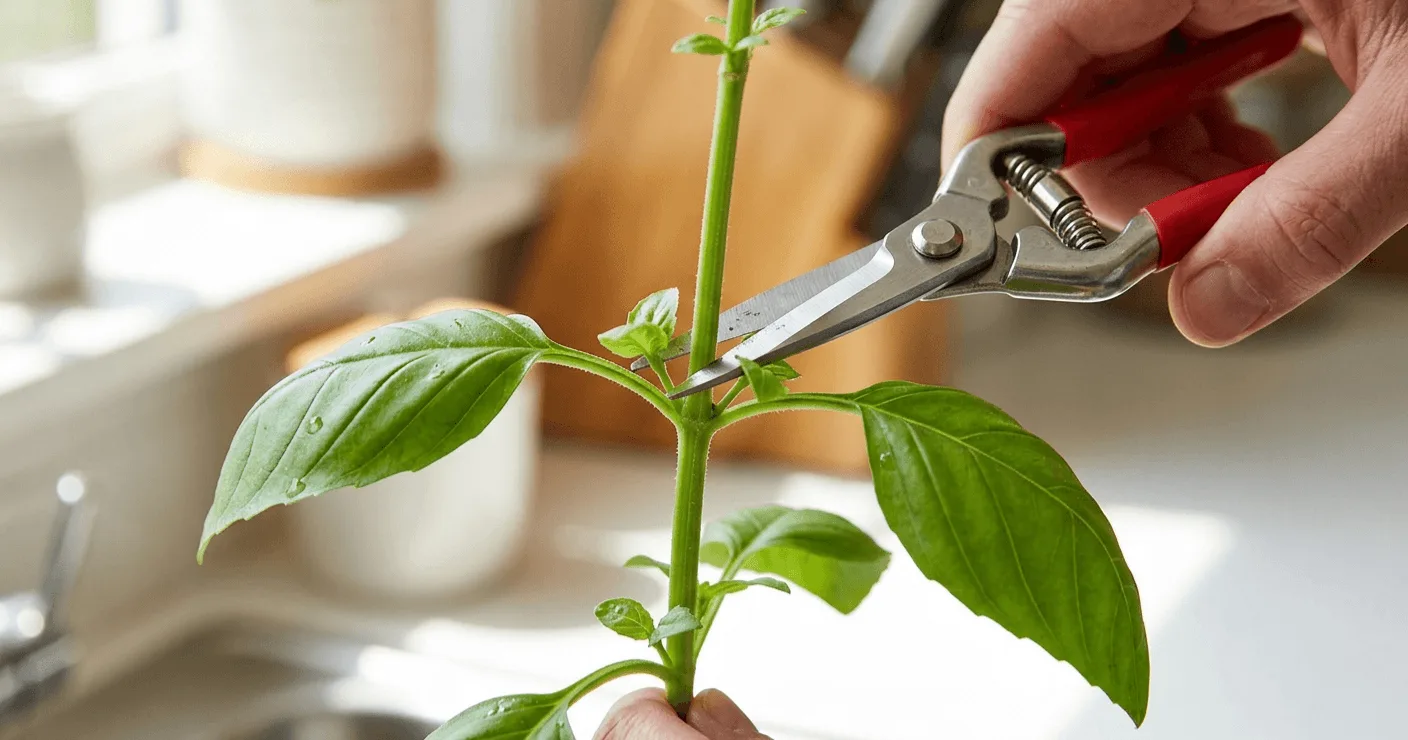
📐 Making a Clean Angled Cut
Position your shears a quarter-inch above the selected node and tilt the blade slightly to create an angled cut across the stem. The angle serves a practical purpose: water droplets from misting or humidity will slide off a slanted surface rather than pooling on top of the wound. Pooled water on a flat cut is one of the faster routes to stem rot in a humid indoor environment.
Squeeze the shears with one firm motion. The goal is a single clean slice, not a sawing motion. After the cut, you will see those two tiny axillary buds sitting just below the cut site. Those buds will grow into your next two main leaders within a week.
🧽 Sterilizing Your Shears
Clean blades before every session. You can wipe them down with isopropyl alcohol or a mild hydrogen peroxide solution. Both work well, though frequent alcohol use can degrade the coating on cheaper blades over time. A safer daily habit is washing the shears with hot soapy water to remove plant sap and bacteria, then drying them before storage. Dry shears do not rust, and they are ready to use without additional prep next time.
🩹 What to Do If You Prune Too Much
If you accidentally strip most of the canopy preparing a large batch for cooking, the plant will struggle to photosynthesize. Roots become stressed when the foliage above drops suddenly, and the plant can decline fast if left under full-strength nutrients and bright light. Do not panic, but act fast:
- Move the plant to a slightly dimmer spot to reduce immediate light stress.
- Dilute the nutrient reservoir by adding 30% plain pH-adjusted water to drop the EC.
- Check the root mass for any foul smell or slimy texture.
- Wait 3 to 5 days for new axillary buds to swell before returning the light to full intensity.
💧 Managing Your Nutrient Solution After a Major Harvest
When you remove a significant portion of the canopy, the plant’s metabolic rate drops. Fewer leaves means less transpiration, which means less water uptake, which means less nutrient absorption. If you leave the fertilizer concentration at peak levels after a heavy prune, the roots will take up more dissolved salts than the plant can use. The result is tip burn and leaf curl on the new growth coming in.
Understanding how to prune hydroponic basil properly means adjusting the reservoir the same day you make the cuts. This step is easy to skip, but skipping it is one of the more common reasons a post-harvest recovery stalls.
🧪 Adjusting EC After Pruning
Mature basil in active growth thrives at EC 1.8 to 2.2. Immediately after a heavy harvest, bring that down to EC 1.2 to 1.5 by diluting the reservoir with plain pH-adjusted water. Hold the lower concentration until you see the new axillary branches pushing out full-sized leaves, usually 4 to 7 days. Then raise EC back to your normal target gradually. Use the free pH and nutrient calculator to work out the exact dose adjustments for your reservoir size without recalculating from scratch each time. For a broader look at which nutrient formulas work best in small reservoirs, the best hydroponic nutrients for small apartment systems guide covers the options worth considering.
🚰 Watching for Nutrient Lockout
As a plant recovers from cutting stress, it can alter reservoir pH by absorbing specific ions unevenly. If pH drifts outside 5.5 to 6.5, roots cannot absorb minerals like iron or calcium, even though those minerals are present in the water. The visible sign is new leaves coming in pale yellow with dark green veins — that pattern indicates iron deficiency caused by pH drift, not an actual shortage of iron in the solution.
Check pH daily for the first week after a heavy harvest. A reliable digital meter makes this fast. If you have not picked one up yet, my review of the best pH meter for hydroponics beginners covers the one I use every week. If pH has drifted, replace the reservoir with a fresh, correctly balanced batch rather than trying to adjust the existing water. The guide on fixing yellow leaves in apartment hydroponics walks through this diagnosis step by step.
💧 Keeping the Water Oxygenated
Oxygenated water helps stressed roots recover faster after pruning. In an active DWC setup, your air pump handles this automatically. If the pump vibration is bothering you in a small apartment, place a thick silicone mat or a folded yoga mat under the unit to absorb the noise. There is a full guide on quieting a noisy hydroponic pump in an apartment if the vibration becomes a persistent issue. Do not turn the pump off during recovery. Roots under post-pruning stress need more oxygen, not less.
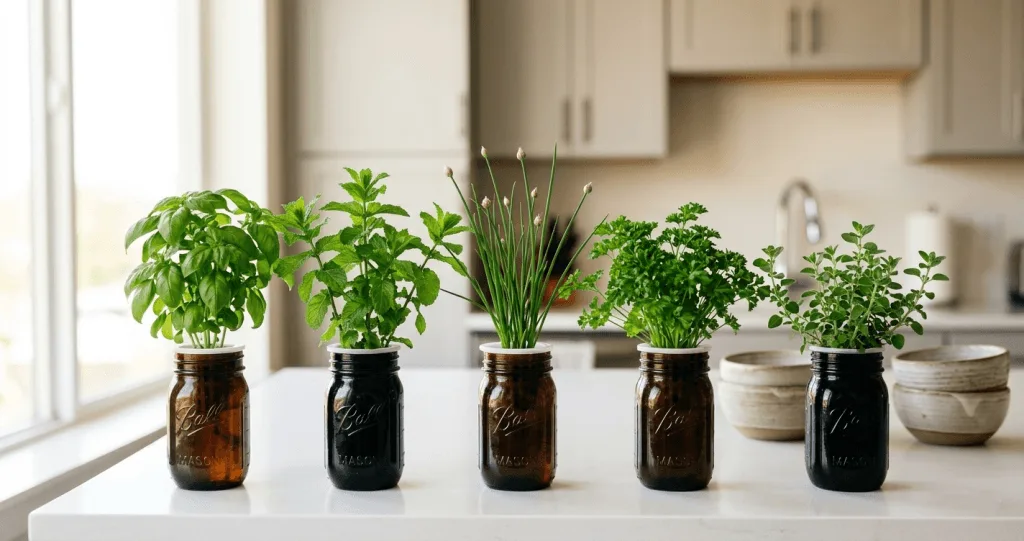
🎴 Pruning Other Common Apartment Herbs
The node-cutting method works well for basil, mint, and sage because they all share a central stem structure with clear apical dominance. Apply the same technique to a rosette-forming herb like cilantro, however, and you will cut out the crown where all new growth originates. Different botanical structures need different approaches, and getting this right makes the difference between a plant that produces for months and one that stops after the first harvest. The breakdown in the guide to the best herbs for small hydroponic setups is useful here because it covers which growth structure each common herb uses.
🌱 Taming Aggressive Mint
Mint sends out horizontal runners that reach toward neighboring net cups and try to root into them. Left unchecked in a small shared reservoir, it crowds out slower-growing herbs within a few weeks. Inspect the base of your mint plant weekly. When you see horizontal stems stretching toward other pots, snip them off at the main root crown. Because mint recovers fast, you can harvest from it often. The main rule: never let the roots dry out while the plant is actively pushing out new foliage. Drying roots while the canopy is growing causes wilting that looks like a nutrient problem but is not.
🔪 Trimming Parsley and Cilantro
Parsley and cilantro grow from a central basal rosette, sending individual leaf stalks up from a tight base cluster rather than from a single woody stem. Cutting the center of the plant destroys the growing crown and stops production. The rule for both herbs is to harvest from the outside in.
Identify the oldest, largest leaves forming the outer ring. Follow each stem down to the base and cut about an inch above the net cup. Leave the inner, younger leaves alone. They need to mature and become the next outer ring you harvest. This method gives a continuous supply rather than one large harvest followed by a long wait.
🌾 Harvesting Chives Without Killing the Crown
Chives grow as a tight cluster of hollow grass-like tubes. Like cilantro, cutting them flush with the growing medium often prevents recovery. The safe method is to grab a small bunch of stems and snip them, leaving 1 to 2 inches of green above the rockwool. That remaining green material continues photosynthesis while the plant regrows from the cut tubes. New growth typically appears within 3 to 4 days under a standard 14-hour light schedule.
🍃 Managing Oregano and Thyme
Oregano and thyme develop woody stems as they mature and tend to trail over the edges of the reservoir rather than growing upright. Pinch the soft green tips of trailing branches regularly to encourage lateral branching. Regular pinching also prevents the inner stems from going bare and leafless, which is hard to reverse once it happens. If you are using a countertop kit, keeping these trailing herbs trimmed prevents them from blocking sensors or touch controls on the unit.
| Herb Category | Examples | Correct Pruning Method |
|---|---|---|
| Central stem (apical) | Basil, Mint, Sage | Cut above a healthy leaf node |
| Rosette-forming | Cilantro, Parsley | Remove outer, older stems at the base |
| Grass-like tuber | Chives, Scallions | Cut leaving 1 to 2 inches above medium |
💡 Lighting and Spacing for Bushier Herbs
Pruning handles the vertical growth problem, but light placement determines whether the new side branches develop well or stretch back upward in search of intensity. If the light is too far away after a cut session, the plant senses low photon levels and reverts to reaching. You have done the work with the shears, but the light position undoes it.
🔆 Dropping the Lights After Cutting
After removing the top few inches of a plant, the canopy is suddenly further from the light panel than it was before. Light intensity drops over short distances with LED panels. Lower the light hood to restore the 6 to 8 inch gap between the new canopy top and the diodes. If you want broader guidance on safe margins for common apartment panels, the guide on grow light distance for hydroponic herbs on a shelf covers the numbers in detail.
⏱️ Light Schedule During Recovery
The site standard of 14 hours on, 10 hours off works well during recovery without any adjustment. A consistent schedule matters more than extending the photoperiod. Plants in recovery do best with reliable, predictable light cycles rather than longer or shorter days. If you want to automate this and stop thinking about it, the guide on the easiest light schedule for apartment hydroponics shows how to set a timer once and leave it alone.
🌬️ Airflow Around Fresh Cuts
When you prune multiple plants on a crowded shelf, the canopy opens up and changes how air moves through the space. Stagnant air around fresh cut sites creates favorable conditions for powdery mildew. A small oscillating clip fan on low aimed at the growing area dries out cut stems within hours and gently strengthens the main stalks over time. This is a small addition with a large return in a warm, humid apartment kitchen.
🪴 What to Do With Your Hydroponic Basil Cuttings
After a pruning session, you will have a pile of healthy green stems on the counter. Throwing them out wastes both the plant’s energy and yours. Basil cuttings are useful in two directions: the kitchen and the propagation jar. Knowing which stems are worth rooting and which are better used for cooking means nothing goes to waste.
💧 Rooting Cuttings for New Plants
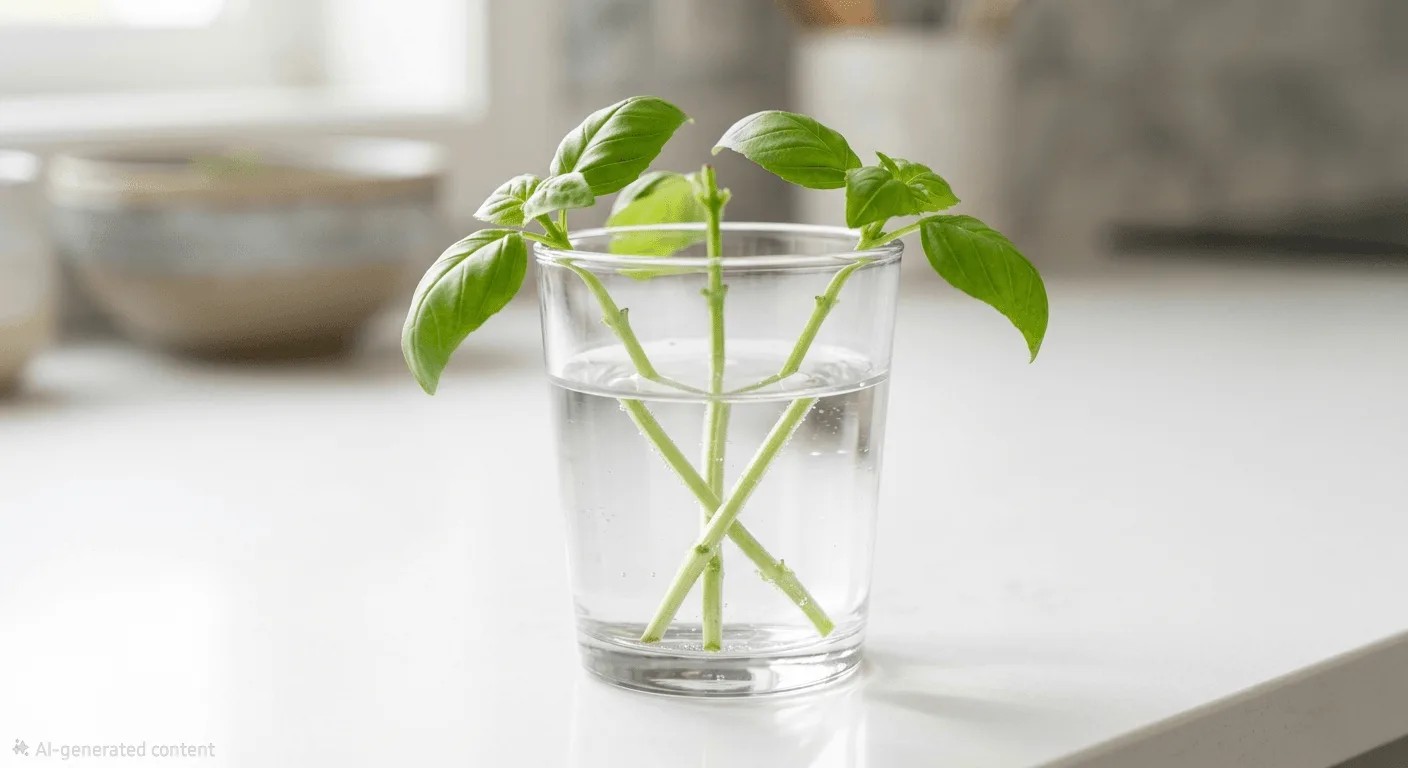
Basil roots in plain water, which means every healthy top cutting is a potential new plant. This skips the germination phase entirely and produces a mature plant faster than starting from seed. To root a fresh cutting:
- Select a strong stem that is 3 to 4 inches long with at least two leaf pairs.
- Strip off the lower leaves so only the top pair remains.
- Place the bare stem in a small glass of plain tap water, out of direct light.
- Change the water every two days to prevent bacterial buildup on the submerged stem.
- After about a week, white roots will appear. Transplant into a DWC or Kratky setup with a correctly mixed nutrient solution at EC 0.8 to 1.0 for the first few days.
❄️ Storing Fresh Basil Leaves for Cooking
Fresh basil turns black in the refrigerator within a day if stored incorrectly. Cold temperatures burst the cell walls and destroy the aromatic oils. The correct method is to wrap the unwashed leaves loosely in a slightly damp paper towel, place the bundle in a partially open zip-top bag, and store it in the warmest section of the refrigerator, usually the crisper drawer. Stored this way, the leaves stay green and fragrant for up to a week.
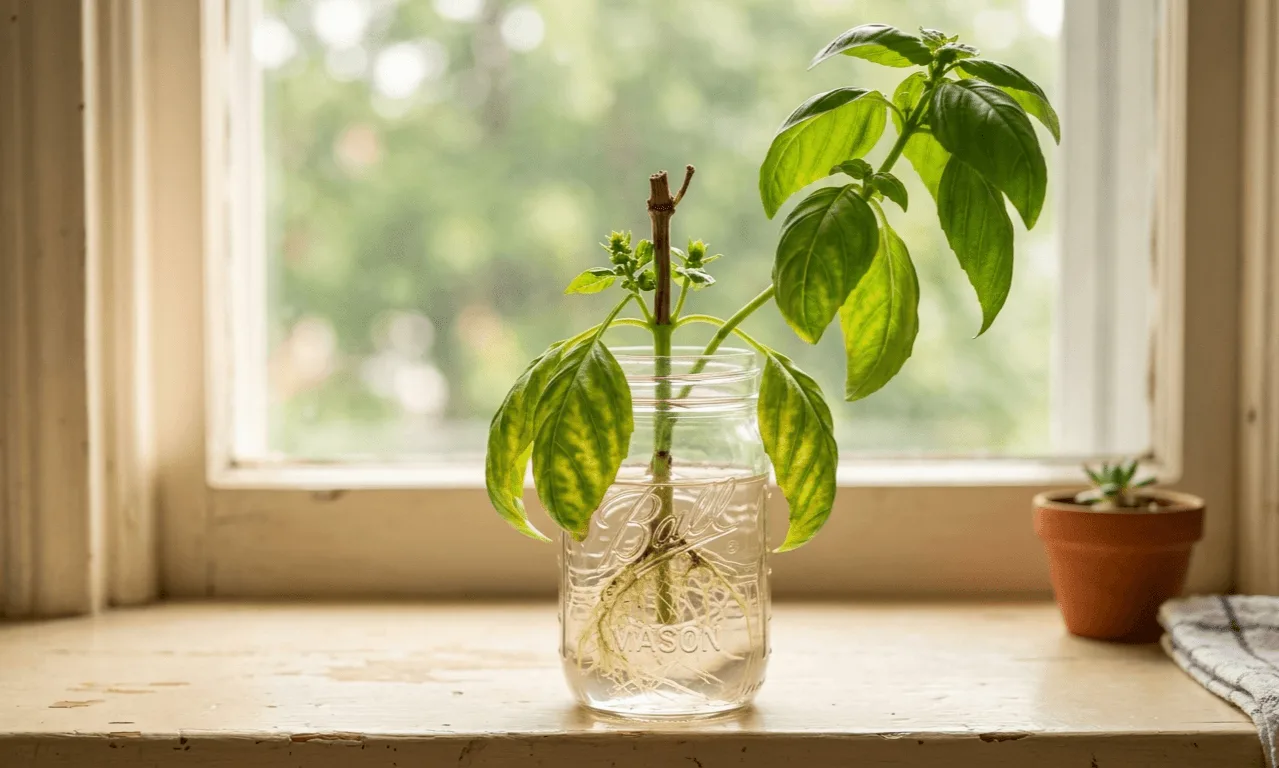
🥀 What to Do If Cuttings Wilt
A cutting placed in water sometimes collapses within 24 hours. The cause is almost always the same: the stem cannot draw moisture fast enough to support the large leaves still attached. The cutting dehydrates despite sitting in water. The fix is to cut half the remaining leaves off, reducing the moisture demand, and change the propagation water every two days to prevent slime forming on the submerged stem. Most cuttings that wilt in the first day will stabilise within 48 hours once the leaf mass is reduced.
🦺 Identifying Plant Stress After Pruning Hydroponic Basil
Even a clean, well-placed cut creates temporary stress. The plant is vulnerable for several days after a heavy harvest, and small imbalances in the reservoir that it would normally shrug off can become visible problems. Knowing what to look for in the first week after a prune lets you intervene before the damage becomes hard to reverse.
🔎 Post-pruning stress: quick diagnosis
| What you see | Most likely cause | Fix first |
|---|---|---|
| 🟤 Brown, soft stump at cut site | Stem rot from dirty shears or flat cut | Sterilize shears, cut to next healthy node |
| 🟡 Yellow lower leaves after pruning | EC too low, plant cannibalising old leaves | Check EC — bring back up to 1.5 if below 1.2 |
| 🔴 Crispy dark tips on new growth | Nutrient burn from excess EC in smaller canopy | Flush reservoir, refill at EC 1.2 for 24 hours |
🧫 Spotting Stem Rot at the Cut Site
If you cut at a flat angle or used dirty shears, the exposed stump may begin to turn brown and soft. This soft tissue is early-stage stem rot. Left alone, it travels down the main stalk toward the roots. The fix is to sterilize your shears, cut down to the next healthy node below the rotting section, and make a clean angled cut this time. Catching this in the first two days prevents it from reaching the root system. A broader approach to keeping the root zone healthy is covered in the guide on preventing root rot in small hydroponic systems.
🍂 Fixing Yellow Leaves After a Heavy Prune
If the older, lower leaves turn pale yellow a few days after pruning, the plant is likely pulling nitrogen from those leaves to fuel new branch growth. This happens when the reservoir EC is too low after dilution. The plant does not have enough nitrogen in the water, so it cannibalises the oldest leaves instead. Check EC first. If it is below 1.2, bring it back up to 1.5 with fresh solution. The yellowing should stop within a few days as the new feeding resumes.
🛑 Addressing Curled or Blackened Leaf Tips
Crispy, dark tips on new growth after pruning point in the opposite direction: nutrient burn. The reduced canopy is absorbing more dissolved salts than it can process, and the excess concentrates at the leaf tips. Flush the reservoir by draining it, refilling with plain pH-adjusted water for 24 hours, then reintroducing a mild nutrient mix at EC 1.2.
→ University of Minnesota Extension: Introduction to Home Hydroponics
→ University of Maryland Extension: Hydroponics for Home Gardeners
💬 A Word From Sarah
The mistake that taught me the most about pruning was not cutting too much or too little. It was timing. I used to wait until the plant looked crowded before making any cuts, which meant I was always reacting to a problem rather than preventing one. The first time I pruned a basil plant at exactly 6 inches, before it showed any real signs of leggy growth, the result was different from anything I had seen before. The two branches that came in were thicker than the original stem, and the plant was producing usable harvests every ten days instead of every three weeks. Pruning early, before the plant needs it, is a much better strategy than waiting for a visible reason to cut.
❓ Frequently Asked Questions
🌱 Which herb should I start with as a beginner?
Sweet basil is the best starting point. It grows fast, has visible and clearly spaced nodes, and recovers from minor cutting mistakes. New axillary buds appear within 2 to 3 days of a correct cut. If you over-prune it, it usually recovers within a week with a diluted reservoir and slightly reduced light.
📆 How often should I prune hydroponic basil?
Inspect your plants weekly and prune every 2 to 3 weeks once the plant reaches 6 inches tall. Small, regular cuts produce better results than one large removal. Once the plant matures and two main leaders are established, you will find yourself harvesting from it on a consistent rotation without any single cut being dramatic.
🪴 Can I root the cuttings I just took?
Yes. A healthy top cutting 3 to 4 inches long with the lower leaves removed will develop white roots in plain tap water within 7 to 10 days. Change the water every two days to prevent bacterial buildup on the submerged stem. Once roots are visible and at least half an inch long, transfer to a net cup with nutrient solution.
🔍 Why are the new leaves on my pruned plant coming in small?
Small new leaves after pruning usually mean the light is too far from the canopy or EC has dropped too low. After a cut, lower the light to restore the 6 to 8 inch gap from the new canopy top. Also check that EC is still in the 1.2 to 1.5 range during recovery. If it has dropped below 1.0, add fresh nutrient solution to bring it back up.
🌸 Should I prune if the plant is flowering?
Yes, and do it as soon as you see flower buds forming at the top. Once basil bolts, the surrounding leaves become bitter and the plant shifts energy toward seed production rather than foliage. Pinch the flower buds off at the node immediately. This forces the plant back into vegetative growth and extends the harvest window by several weeks.
⏳ Does pruning delay the final harvest?
No. While you lose the clipped material that day, the two new branches that grow in will produce more total foliage than the single original stem would have. A plant that has been pruned twice will have four active leaders producing harvestable growth at the same time. Total yield over the life of the plant is higher with regular pruning than without it.
🦺 How much can I take in a single harvest?
Never remove more than 30% of the plant’s total foliage at one time. Taking more limits the plant’s ability to photosynthesize during recovery, which stresses the roots and slows regrowth. If you need a large quantity for cooking, harvest from multiple plants rather than stripping one plant down heavily.
Happy growing! 🌿
— Sarah, Urban Hydro Space

Sarah is the founder of Urban Hydro Space and an indoor gardening enthusiast dedicated to helping apartment dwellers grow fresh herbs and vegetables in small spaces. With hands-on experience testing hydroponic systems, she shares practical tips and honest product reviews to make indoor gardening accessible for beginners.