⏳ 14 min read · Last updated: March 2026
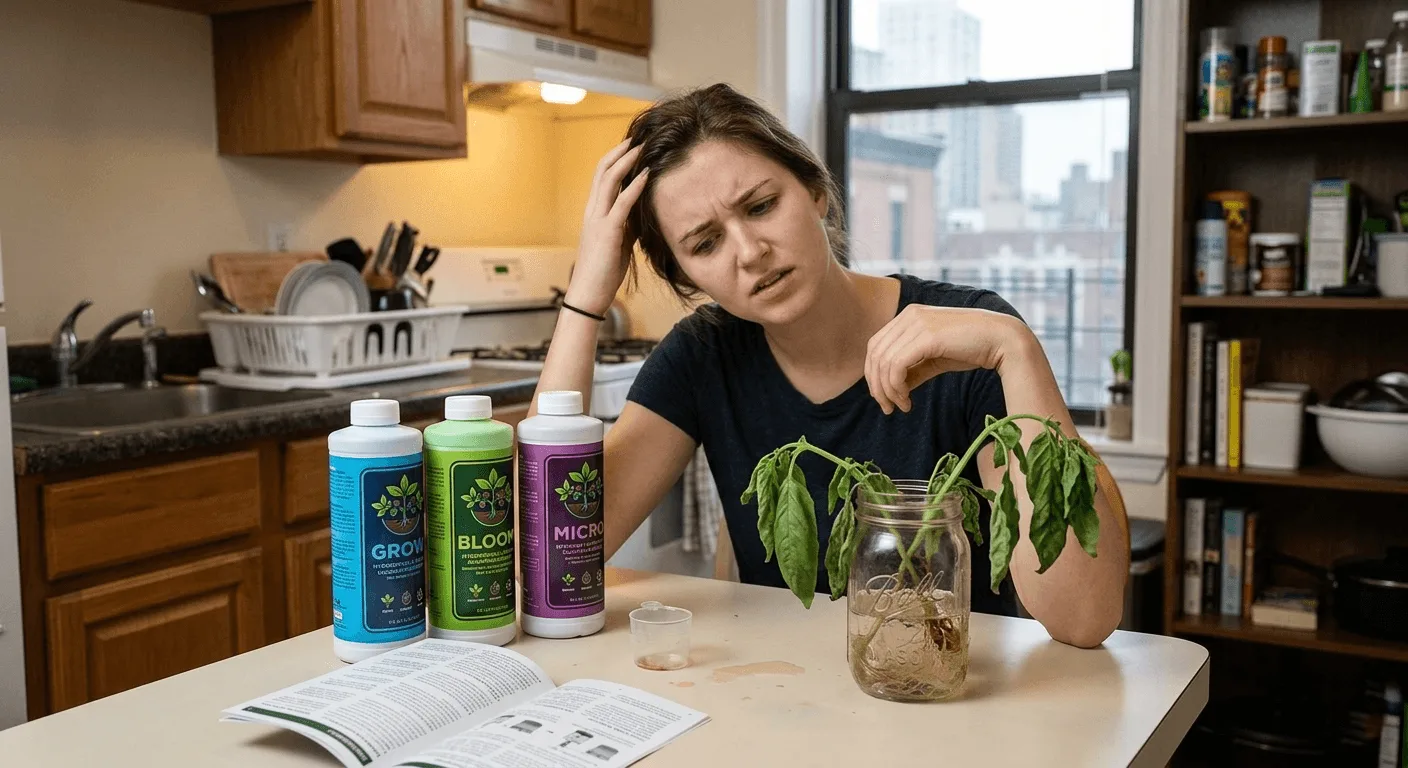
This beginner hydroponic nutrients guide exists because of one number: 7.8. That was the pH of my tap water when I first started growing indoors, and it silently killed every plant I touched for months. I remember staring at three different bottles of liquid fertilizer, completely paralyzed by the chemical ratios on the labels. My first feeding attempt was a disaster. I poured a random splash of generic plant food into my tap water and hoped for the best. Within four days, my basil seedlings turned yellow and collapsed against the sides of their net cups.
I later discovered that high pH had blocked the roots from absorbing anything. Today I grow vibrant cherry tomatoes and crisp lettuce year-round in my one-bedroom apartment, and understanding how to feed them changed everything. This guide will help you master your feeding schedule without needing a chemistry degree, saving you from the frustrating mistakes I made early on.
🤔 Why Nutrients Feel So Confusing at First
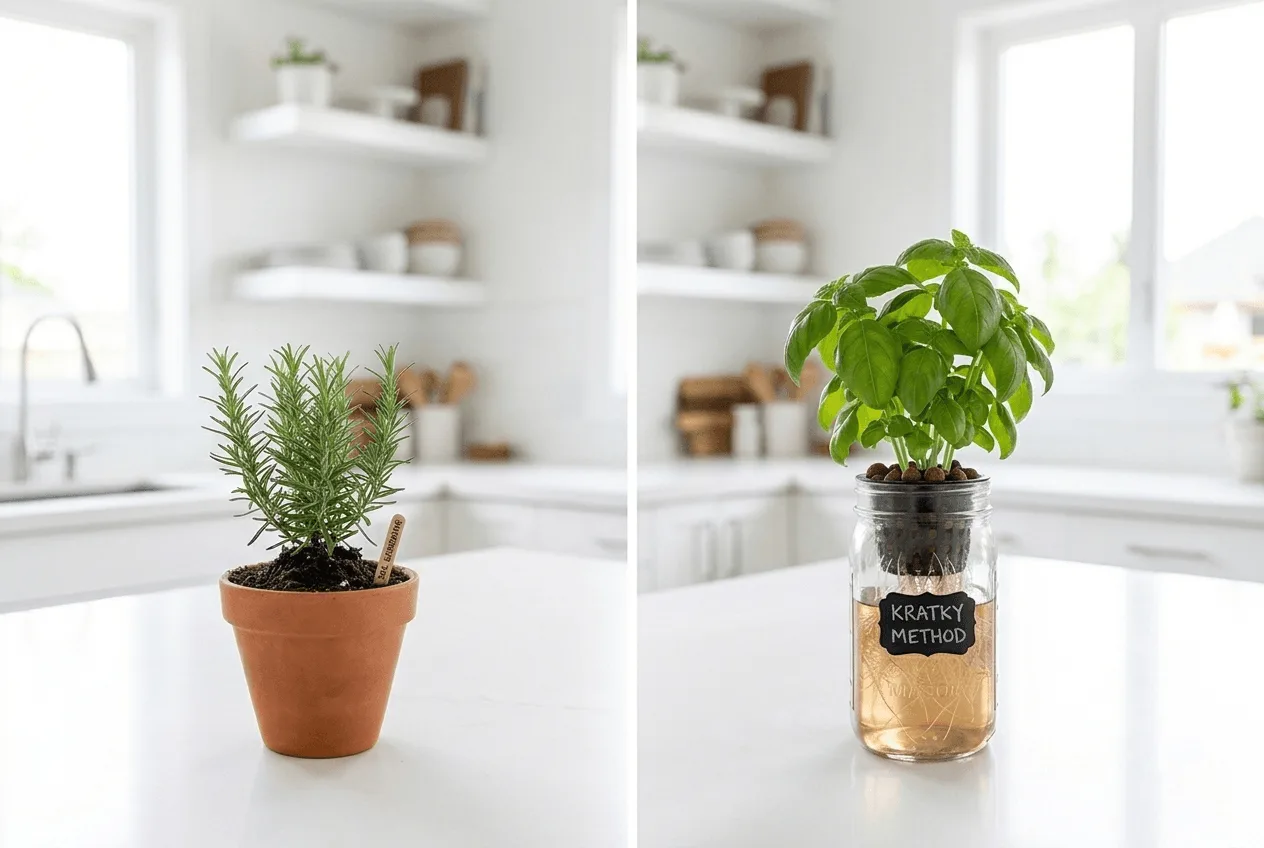
Growing in soil gives you a massive safety net. Dirt acts as a natural buffer, holding onto food and releasing it slowly over time through cation exchange. Soil also contains a complex web of beneficial bacteria and fungi that break down organic matter for your plants. Water culture systems require you to provide everything directly. Your hydroponic nutrients must contain all the essential elements in a readily available, chelated form because the water provides zero nutritional value on its own.
- Keep your nutrient solution pH strictly between 5.5 and 6.5 for optimal mineral absorption.
- Change your reservoir water every 10 to 14 days to prevent toxic salt buildup.
- Start young seedlings at exactly 25% strength of the manufacturer’s recommended dose.
- Maintain water temperatures between 65 to 72°F (18 to 22°C) to avoid root rot and nutrient lockout.
- Just starting out with no prior experience → read from the top in order
- Already feeding but plants are yellowing or burning → jump to Recognizing Common Nutrient Problems
- Have a specific system (Kratky, DWC, AeroGarden) → skip to System-Specific Nutrient Tips
- Why Nutrients Feel So Confusing at First
- Understanding the Core Hydroponic Nutrients
- Liquid vs Dry Hydroponic Nutrients
- The Holy Trinity: pH, EC, and PPM
- Step-by-Step Apartment Feeding Schedule
- How to Mix Hydroponic Nutrients Correctly
- Recognizing Common Nutrient Problems
- System-Specific Nutrient Tips
- Essential Tools for Measuring Your Water
- The Role of Water Temperature in Feeding
- Flushing Your System to Prevent Salt Buildup
- A Word From Sarah
- Frequently Asked Questions
🌱 The Difference Between Soil and Water Feeding
You become the sole provider of your plant’s diet in hydroponics. If you make a mistake, the plant feels it immediately. Adding too much nitrogen will burn the leaves overnight, while providing too little will stunt the plant for weeks. Think of hydroponics like an intravenous drip for your vegetables. The food goes straight into their system, which causes explosive growth but leaves no room for sloppy measurements.
⚠️ My Early Mistakes With Liquid Fertilizers
I initially bought standard houseplant fertilizer for my Kratky mason jars. That was a terrible idea. Soil fertilizers rely heavily on soil microbes to break down raw ingredients into usable forms. Those microbes do not exist in a sterile indoor water reservoir. I thought I was saving money, but I was actually starving my plants while polluting their water.
The organic fertilizer just sat at the bottom of my jar, turning the water a cloudy, thick brown. Within 48 hours, the smell was unbearable. The roots turned to brown mush and the plants died shortly after. You must buy mineral-based formulas specifically designed for water-based systems. Standard potting soil food will ruin your indoor garden very quickly.
🧪 Understanding the Core Hydroponic Nutrients
🌿 Macronutrients Your Plants Crave
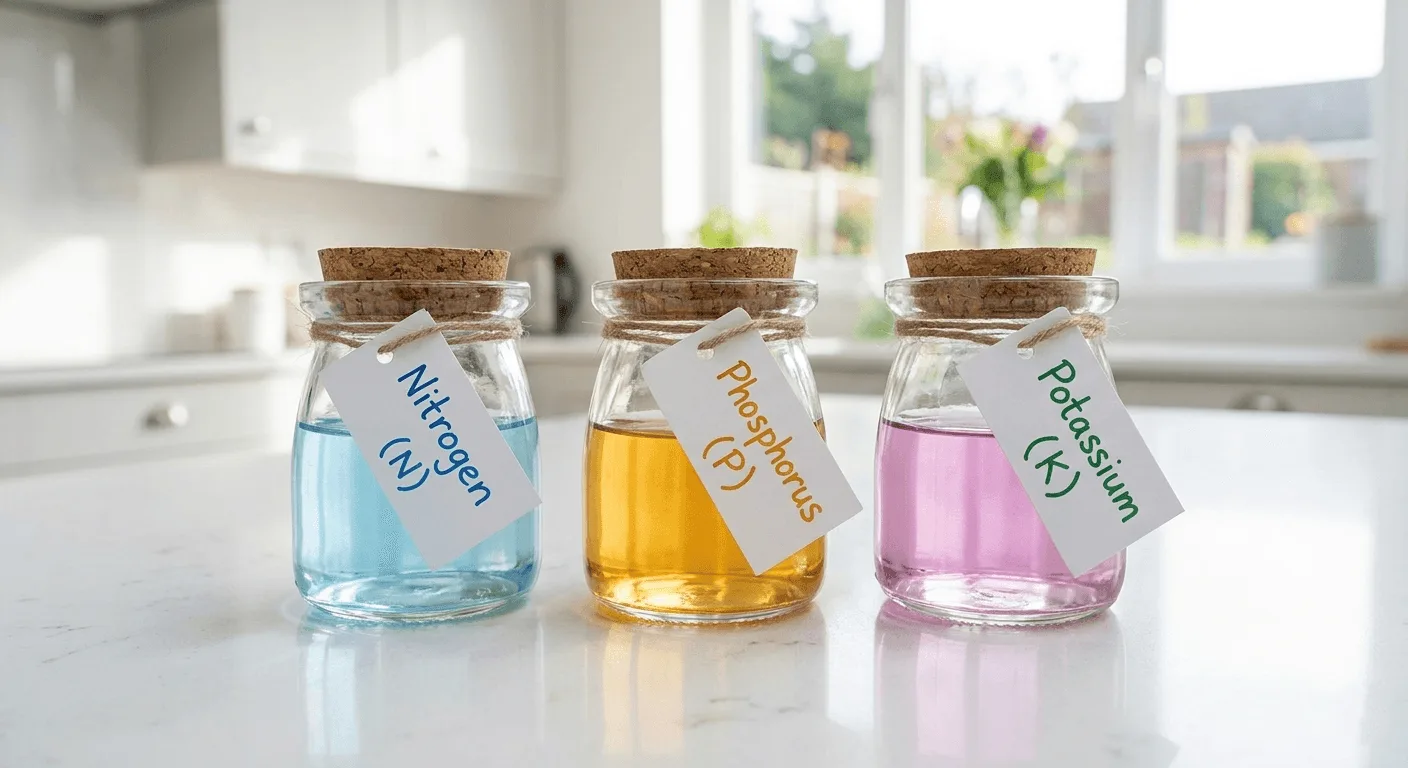
Plants consume three main elements in massive quantities: nitrogen, phosphorus, and potassium. You will see these listed as N-P-K on every bottle of fertilizer you buy. Nitrogen fuels leafy green growth and gives plants their rich color. Phosphorus develops strong, branching roots and helps flowers bloom. Potassium regulates the plant’s immune system, manages water uptake, and ensures overall structural health.
My spinach plants require high nitrogen levels during their first three weeks of life. Without it, the leaves stay tiny, pale, and brittle. Conversely, if I feed that same high-nitrogen diet to my cherry tomatoes, they will grow into massive, leafy bushes that refuse to produce a single tomato. You have to provide these macronutrients in the correct ratios constantly to maintain vigorous, targeted growth.
🔬 Micronutrients That Prevent Deficiencies
Your plants also need trace elements to survive. These include calcium, magnesium, iron, zinc, copper, and boron. Even though plants only need microscopic amounts of these minerals, a deficiency will halt growth completely. Calcium builds strong cell walls, acting like the cement in a brick building. Magnesium is the central atom in the chlorophyll molecule, which is exactly what makes your leaves green and allows them to absorb light.
I once ignored calcium in my Deep Water Culture setup. As a result, my cherry tomatoes developed dark, sunken, leathery spots on the bottom of the fruit. This condition is called blossom end rot, and it ruined exactly 14 tomatoes before I figured out how to fix it. Indoor plants grown under strong LED lights process calcium very quickly. Always ensure your food contains these vital trace minerals, or supplement with a dedicated Cal-Mag product.
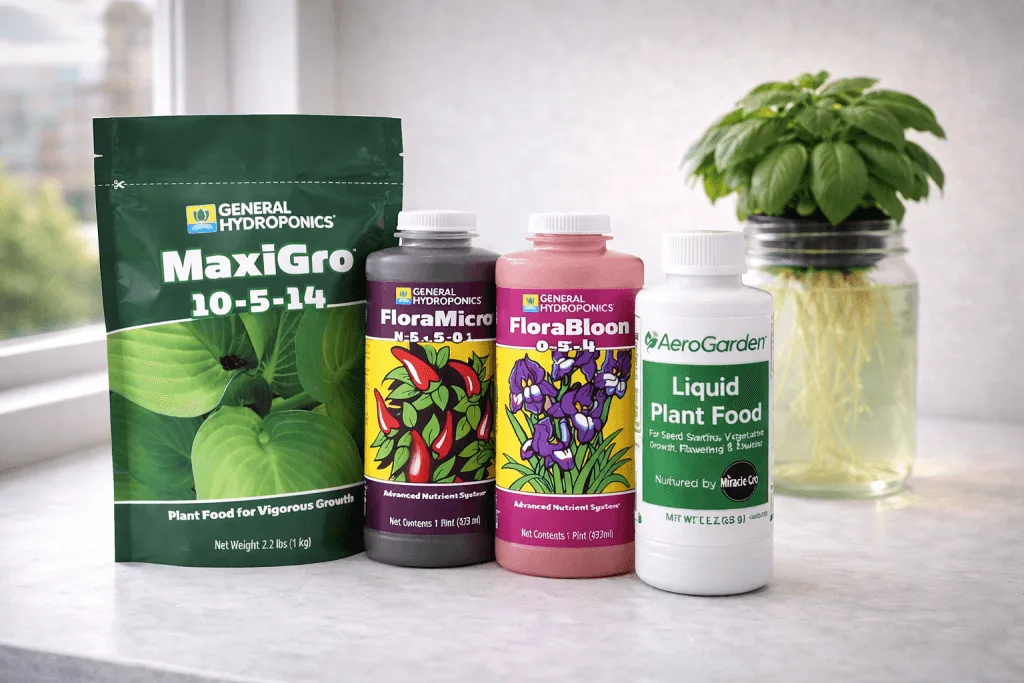
⚖️ Liquid vs Dry Hydroponic Nutrients
💧 Pros and Cons of Liquid Options
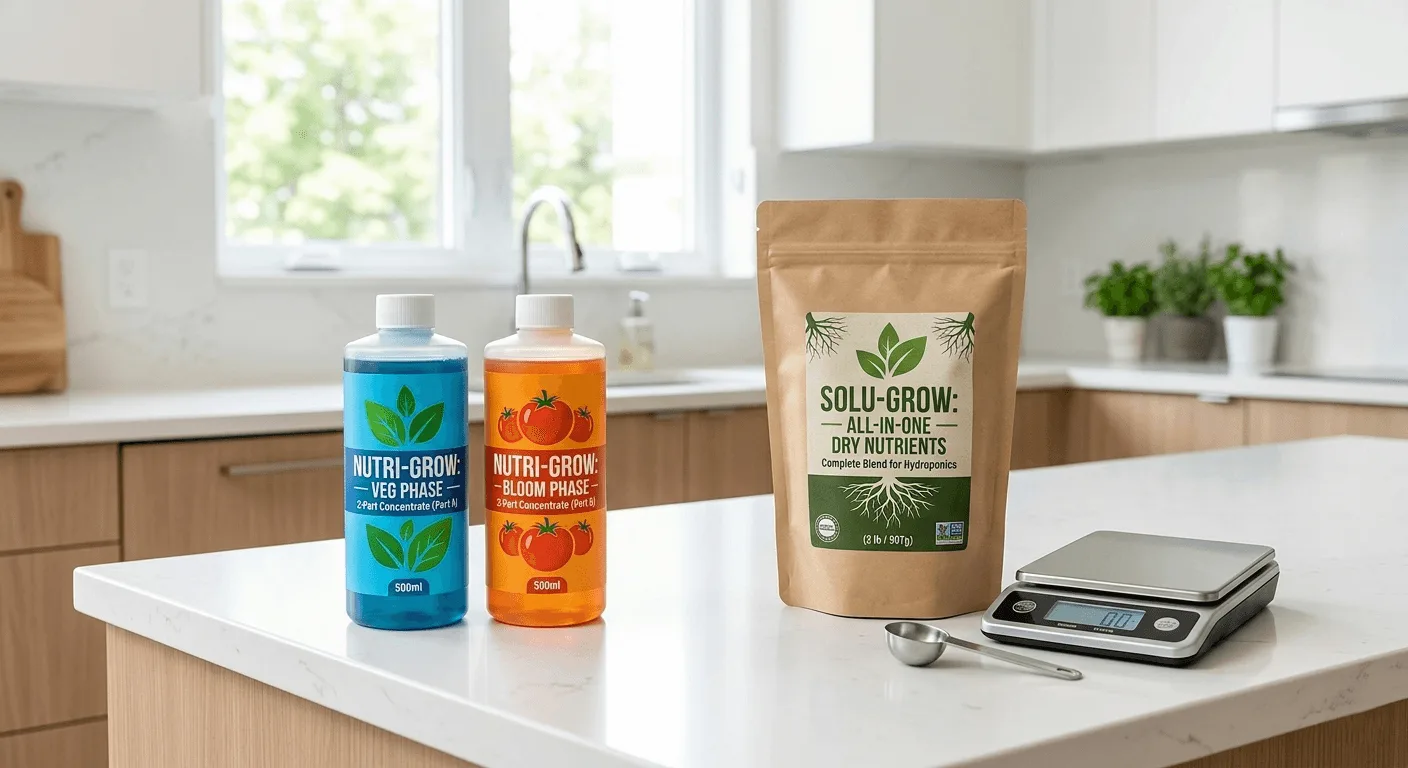
Liquid formulas are incredibly popular for beginners. They mix into water instantly and require very little effort. You simply measure the liquid with a plastic syringe and squirt it directly into your reservoir. They usually come in two-part or three-part sets, allowing you to adjust the ratios easily as the plant grows. The downside is that you are paying mostly for water weight. Shipping heavy plastic bottles is expensive, and that cost gets passed directly on to you.
Liquid formulas can degrade faster if stored in a warm room. Keep your bottles in a dark cabinet at 65 to 70°F (18 to 21°C) to preserve their shelf life. If they get too cold, the minerals can crystallize and fall out of the solution. I started with liquids because they removed all the guesswork from my daily routine, and I still recommend them for anyone running a small countertop system.
💰 Why Dry Powders Save Money
Dry powders are highly concentrated and incredibly cost-effective. A single two-pound bag of dry nutrients can easily last an entire year of continuous growing. Many experienced growers switch to dry options eventually to keep their hobby affordable. You do have to spend extra time dissolving the powder in a small cup of warm water before adding it to your main system, but the financial savings are massive.
I currently use dry powders for my large tomato and pepper plants. It saves me roughly $45 every six months compared to buying liquid gallons. When mixing dry nutrients, you must use a digital kitchen scale to measure the exact grams required. If you are growing on a budget or running multiple large totes, dry powders are the smartest financial choice for your indoor garden.
📊 The Holy Trinity: pH, EC, and PPM
🌡️ Why pH Matters More Than Food
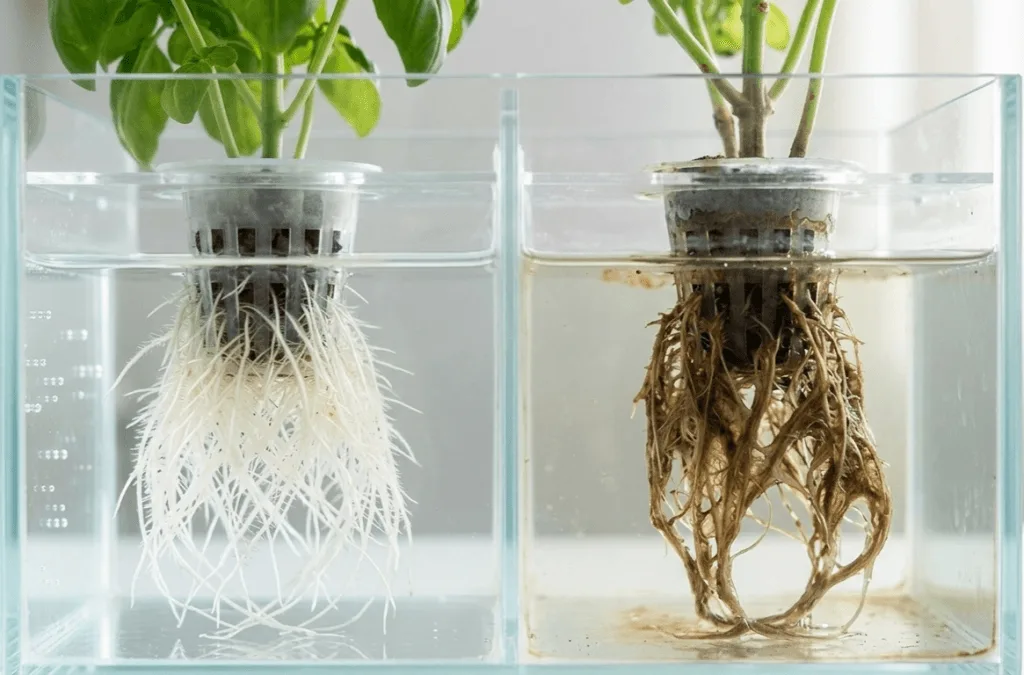
You can buy the most expensive hydroponic nutrients on the market, but they are completely useless if your pH is wrong. The pH scale measures how acidic or alkaline your water is. Plants can only absorb food within a very specific, narrow window. If the water falls outside this range, the minerals chemically lock together and become impossible for the roots to drink.
You must keep your pH between 5.5 and 6.5. If the water hits 7.0, iron and manganese become completely unavailable to the roots, causing the new leaves to turn bright yellow. I test my reservoir pH every single morning to prevent sudden spikes. The pH will naturally drift as the plants consume water and food, so daily monitoring is non-negotiable.
⚡ Measuring Electrical Conductivity (EC)
Electrical Conductivity tells you exactly how much food is currently dissolved in your water. Pure, distilled water does not conduct electricity. When you add mineral salts, the conductivity rises. Measuring the EC tells you the exact strength of your solution, ensuring you never accidentally starve or burn your plants.
Seedlings need a very low EC of around 0.5 to 0.8. Mature fruiting plants, like heavy-feeding tomatoes, might need an EC of 2.0 to 2.5. After running my iDOO system for four weeks, I noticed that an EC above 2.0 caused severe tip burn on my butterhead lettuce. By checking the EC daily, you can see exactly how much your plants are eating and adjust accordingly.
🔢 Understanding PPM and Why EC Is More Reliable
PPM stands for Parts Per Million. It attempts to estimate the actual physical weight of dissolved minerals in your water, expressed as milligrams per liter. You will see PPM readings on most TDS pens and on many popular nutrient brand feeding charts, so it is worth understanding even if you do not rely on it daily.
The problem is that different meter manufacturers use different conversion factors to calculate PPM from the raw EC reading. Some use the 500 scale, others use the 700 scale. This means the same water can show 750 PPM on one meter and 1050 PPM on another, causing serious confusion when following online feeding charts. For that reason, I track everything using EC exclusively. It is a universal measurement that stays consistent regardless of which brand of meter you own.
📅 Step-by-Step Apartment Feeding Schedule
🪴 Seedling Stage Requirements
Seeds contain their own energy reserves for the first few days of life. Never feed them immediately after they sprout. Wait until the first set of true leaves appears, which look like miniature versions of the adult plant leaves. This usually happens around day 10 to 14 depending on the variety you are growing.
At this point, mix your hydroponic nutrients at exactly 25% strength of the label’s recommendation. A full dose will instantly shock the fragile roots and stunt the plant permanently. I use a plastic syringe to measure exactly 2.5 milliliters per gallon for my baby hydroponic basil plants. This gentle introduction gives the roots time to adapt to the mineral salts.
🌿 Vegetative Growth Phase
Once your plants have three or four sets of true leaves, they enter the vegetative phase. They are now actively building thick stems and broad foliage to catch as much light as possible. You can safely increase the food to 50% strength. Monitor the leaf tips closely over the next few days.
If the leaves stay dark green and point upward toward the light, the plant is happy. If the tips turn brown or curl downward like a claw, you have added too much food. During this rapid growth phase, I change the reservoir water completely every 10 to 14 days to keep the mineral balance perfect and prevent any single nutrient from building up to toxic levels.
🍅 Flowering and Fruiting Adjustments
Growing tomatoes, cucumbers, or peppers requires a major diet change halfway through their life cycle. When the first tiny flower buds appear, the plant needs less nitrogen and much more phosphorus and potassium. If you keep feeding a high-nitrogen vegetative formula, you will get massive, beautiful green bushes with zero fruit.
I switch my cherry tomatoes to a dedicated bloom formula as soon as I spot the first yellow flower. I also increase the overall strength to 100% of the recommended dose, aiming for an EC of 2.4. I also add a dedicated Cal-Mag supplement during this phase to support the rapid development of the fruit.
🥄 How to Mix Hydroponic Nutrients Correctly
🔄 The Right Order of Operations
Mixing your food requires a very specific sequence. You cannot just dump everything into a bucket at once and stir. If you mix concentrated calcium and concentrated phosphorus together, they will bind chemically and form a solid white cloud that falls to the bottom of the bucket. This is called nutrient precipitation, and those bound minerals are completely useless to your plants.
Always fill your bucket with fresh water first. Next, add your liquid silica if you use it, and wait a few minutes. Then, add your calcium-magnesium supplement. Finally, add your base hydroponic nutrients one part at a time. Stir the water vigorously for exactly 60 seconds between each addition to ensure everything is fully diluted before the next chemical hits the water.

📦 Storing Your Mixed Solutions
Sometimes you mix more food than your system needs, especially if you are just topping off a small Kratky jar. You can store the leftover solution, but you must do it properly to prevent contamination. Keep the mixed water in a dark, completely opaque container. Light exposure will trigger rapid algae growth within 48 hours, turning your expensive nutrients into green slime.
Store the container in a cool spot, ideally between 60 to 68°F (15 to 20°C). I keep a spare gallon jug tucked safely under my kitchen sink. Use this stored mixture within seven days for the best results. Old mixtures lose their potency quickly, and the pH will naturally drift over time, requiring you to re-test and adjust it before pouring it into your system.
🔍 Recognizing Common Nutrient Problems
🔥 Signs of Nutrient Burn
Giving your plants too much food is a very common beginner mistake. We all want our plants to grow faster, but overfeeding has the opposite effect. The first sign of nutrient burn always appears at the very tips of the leaves. They will turn bright yellow and then crispy, copper brown. If you ignore this warning, the browning will spread rapidly down the edges of the leaf.
When I see burnt tips, I immediately remove exactly 50% of the reservoir water. I replace it with plain, pH-balanced water to dilute the concentration. I also check my EC meter to confirm the spike. This fast action usually saves the plant from permanent damage, though the burnt tips will never turn green again.

🛑 Fixing Nutrient Lockout
Nutrient lockout happens when the food is present in the reservoir, but the plant cannot physically absorb it. This is almost always caused by a bad pH level. The leaves might turn pale yellow, or the veins might stay dark green while the rest of the leaf fades to white. Knowing why your apartment hydroponic plants turn yellow helps you diagnose and fix this issue quickly.
The first time I tested my tap water and saw a pH of 7.8 on the meter, I finally understood why my plants were starving despite being fed daily. To fix lockout, completely drain your system. Rinse the roots gently with plain water, and refill the reservoir with a fresh, correctly balanced batch of nutrients at a pH of 6.0.
📌 System-Specific Nutrient Tips
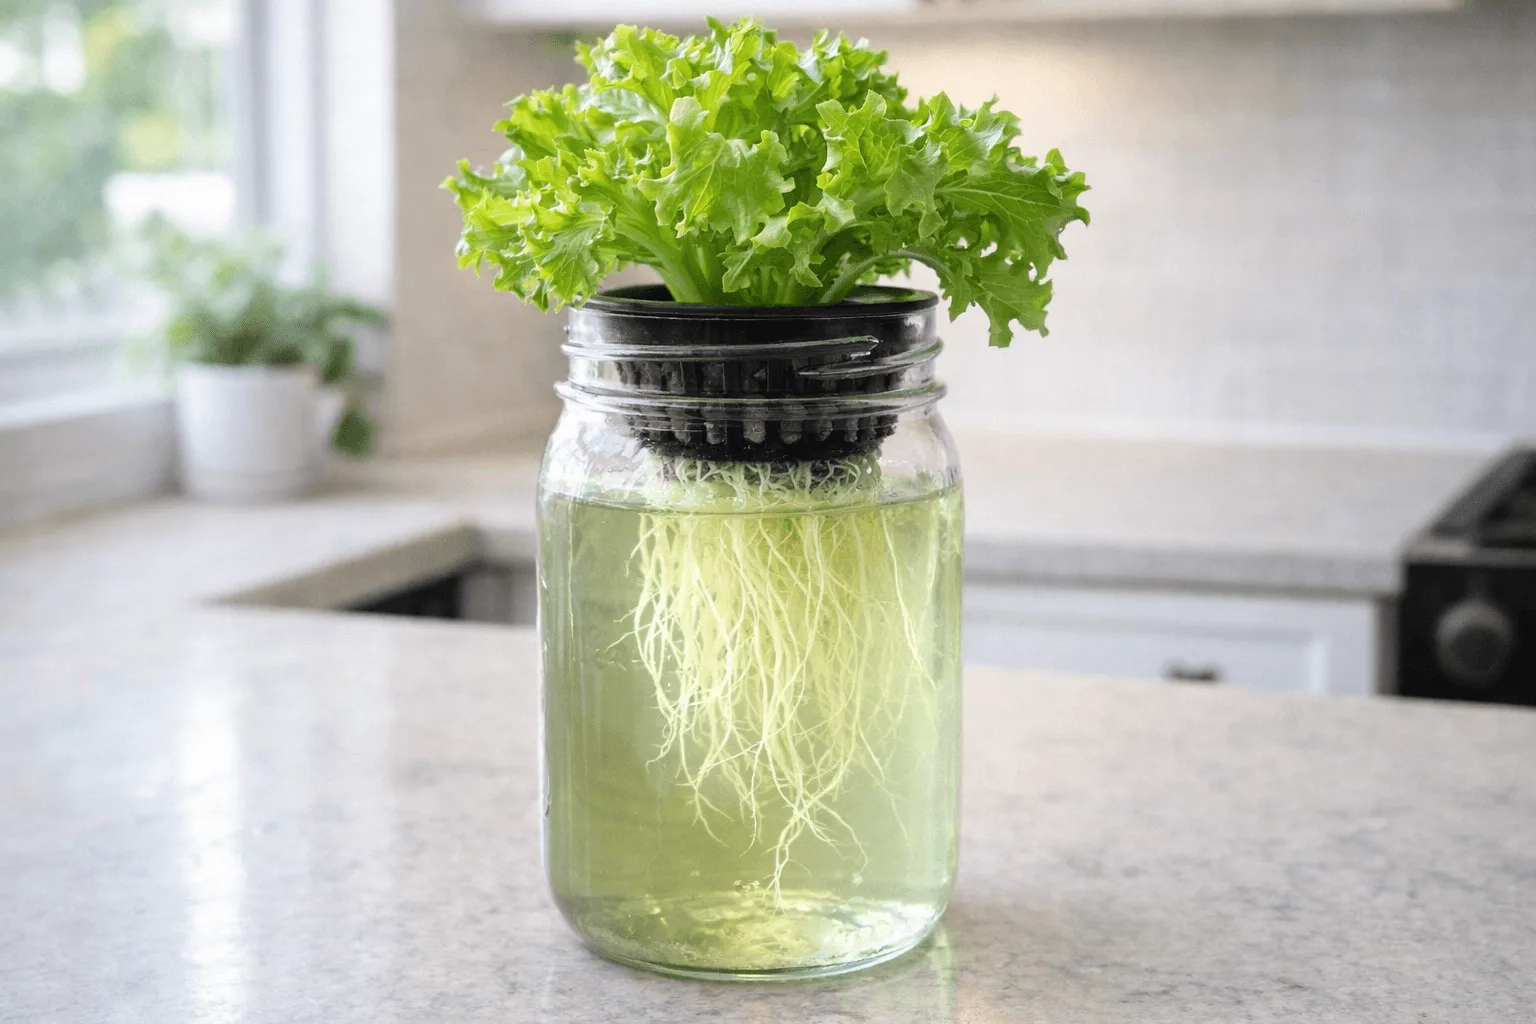
🫙 Feeding Your Kratky Jars
The Kratky method is wonderfully simple, especially for a Kratky lettuce jar on a sunny windowsill, but it requires careful feeding habits. Since there is no water pump or air stone, the heavy minerals can settle at the bottom of the jar over time. I gently swirl my mason jars every three days to keep the food suspended evenly in the water.
You must never fill the jar all the way to the top once the plant has grown. As the water level drops, the plant develops specialized air roots that absorb oxygen from the humid gap in the jar. Leave at least two inches of air space when refilling. Drowning those air roots will suffocate the plant and kill it very quickly.
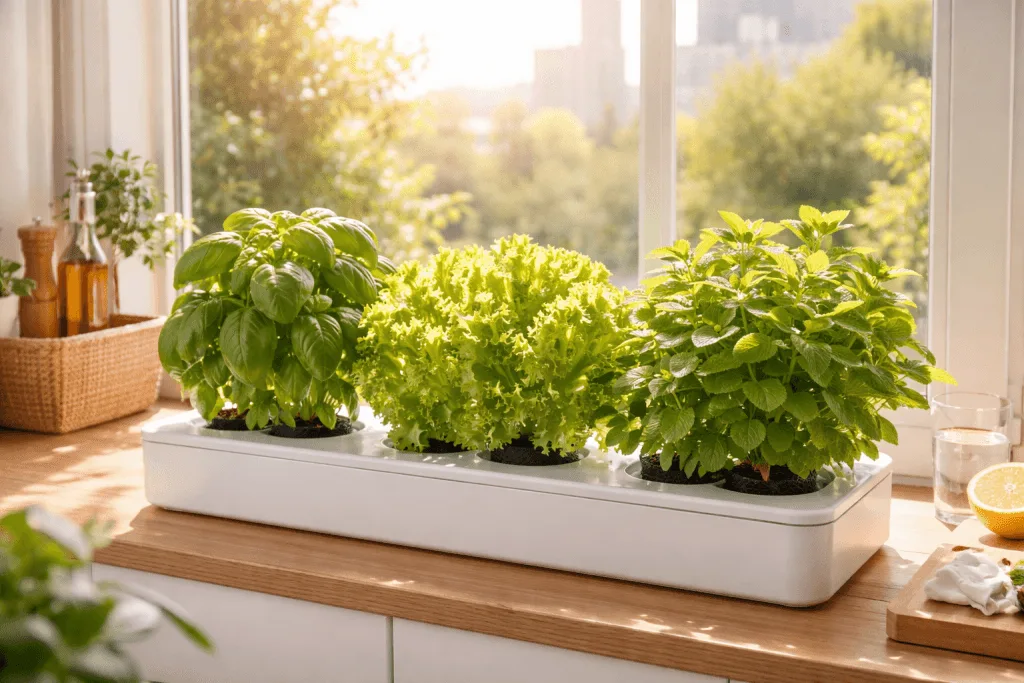
💡 Managing AeroGarden and iDOO Reservoirs
Countertop systems like the AeroGarden or iDOO make feeding very easy. They usually come with their own proprietary liquid food and a reminder light. However, these small reservoirs evaporate water incredibly fast in a warm apartment. As the water level drops, the nutrient concentration spikes dangerously high. For a deeper look at managing these units, see the guide to countertop hydroponic systems for apartment beginners.
You must top off the reservoir with plain, pH-adjusted water every two to three days to keep the concentration stable. Only add more liquid food when you do a complete water change every 14 days. Blindly adding food every time the water gets low will cause toxic salt buildup and severely burn your delicate herbs.
🪣 Managing a Deep Water Culture Tote
DWC is the system I use most in my apartment, and it rewards consistent feeding habits more than any other method. If you are still deciding between DWC and a passive setup, the DWC vs Kratky comparison for apartment beginners breaks down exactly which one suits your situation. Because the roots sit directly in the nutrient solution at all times, any spike in EC or pH hits them immediately with no buffering at all. Check both values every single evening without exception.
I run a 5-gallon tote for my cherry tomatoes and do a full reservoir change every 10 days rather than the standard 14, because fruiting plants eat aggressively and throw the mineral balance off faster than leafy greens. Always keep your air pump running 24 hours a day in a DWC setup. Without constant oxygenation, the stagnant nutrient solution will suffocate the roots overnight.
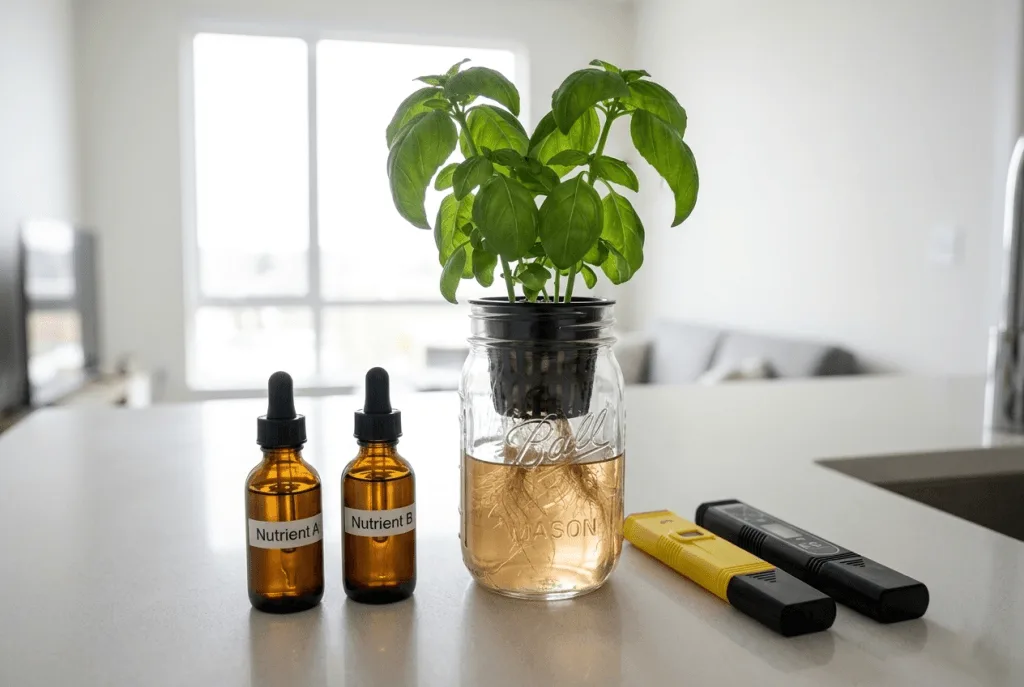
🛠️ Essential Tools for Measuring Your Water
✒️ Why You Need a Digital pH Pen
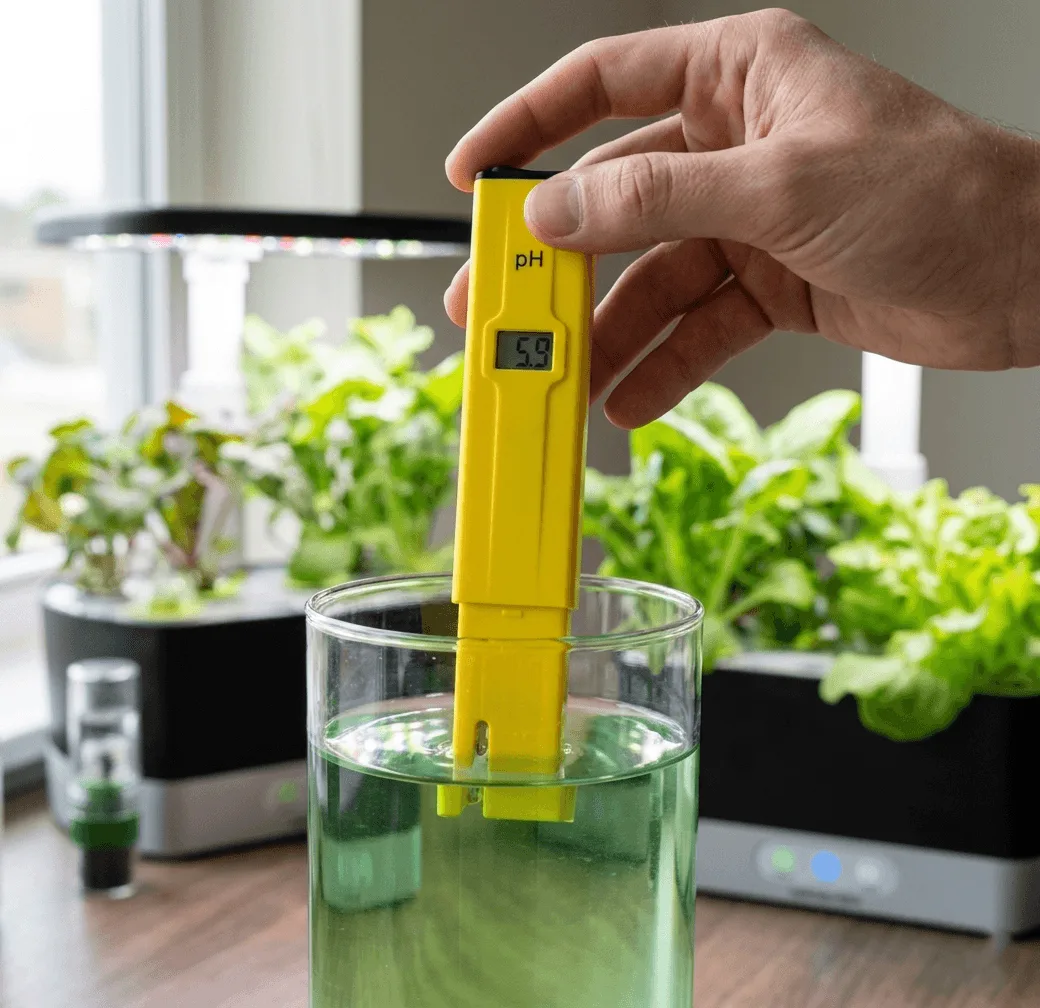
Relying on paper test strips or liquid drop kits is a recipe for frustration. The colors are incredibly hard to read, especially if your hydroponic nutrients naturally dye the water a dark brown color. A digital pH pen gives you an exact numerical reading instantly, removing all the guesswork from your daily routine.
I struggled with test strips for my first six months, constantly second-guessing whether the strip was yellow or light green. Once I switched to a quality digital pH pen, keeping my pH at exactly 5.9 made my basil visibly more vibrant within three days. It is the single most important tool you can own for indoor gardening. Always store the glass probe in proper KCL storage solution to keep it accurate long-term.
📏 Using an EC Meter Effectively
An EC meter is just as critical as your pH pen. It measures the exact concentration of dissolved mineral solids in your water. Without it, you are flying completely blind. You might think you mixed the food correctly on day one, but daily evaporation changes the concentration constantly.
I check my EC meter every single evening before turning off the grow lights. If the reading jumps from 1.5 to 2.0, I know the plants are drinking more water than food, leaving the salts behind. I then add plain water to balance the reservoir back out. If the EC drops, I know they are eating heavily and need a stronger mix.
🌡️ The Role of Water Temperature in Feeding
🧊 How Heat Destroys Dissolved Oxygen
Water temperature directly impacts how well your plants eat and breathe. Warm water physically holds significantly less dissolved oxygen than cold water. Roots need high levels of oxygen to process the hydroponic nutrients you provide. If the water gets too warm, the roots suffocate, become stressed, and begin to rot. Taking steps to prevent root rot in small hydroponic systems is non-negotiable during the warmer summer months.
I try to keep my reservoir temperatures strictly between 65 to 72°F (18 to 22°C). When my apartment hit 85°F (29°C) last summer, my healthy white lettuce roots turned brown and slimy within 72 hours due to a Pythium outbreak. Temperature control is vital for long-term success, as hot water breeds destructive bacteria rapidly.
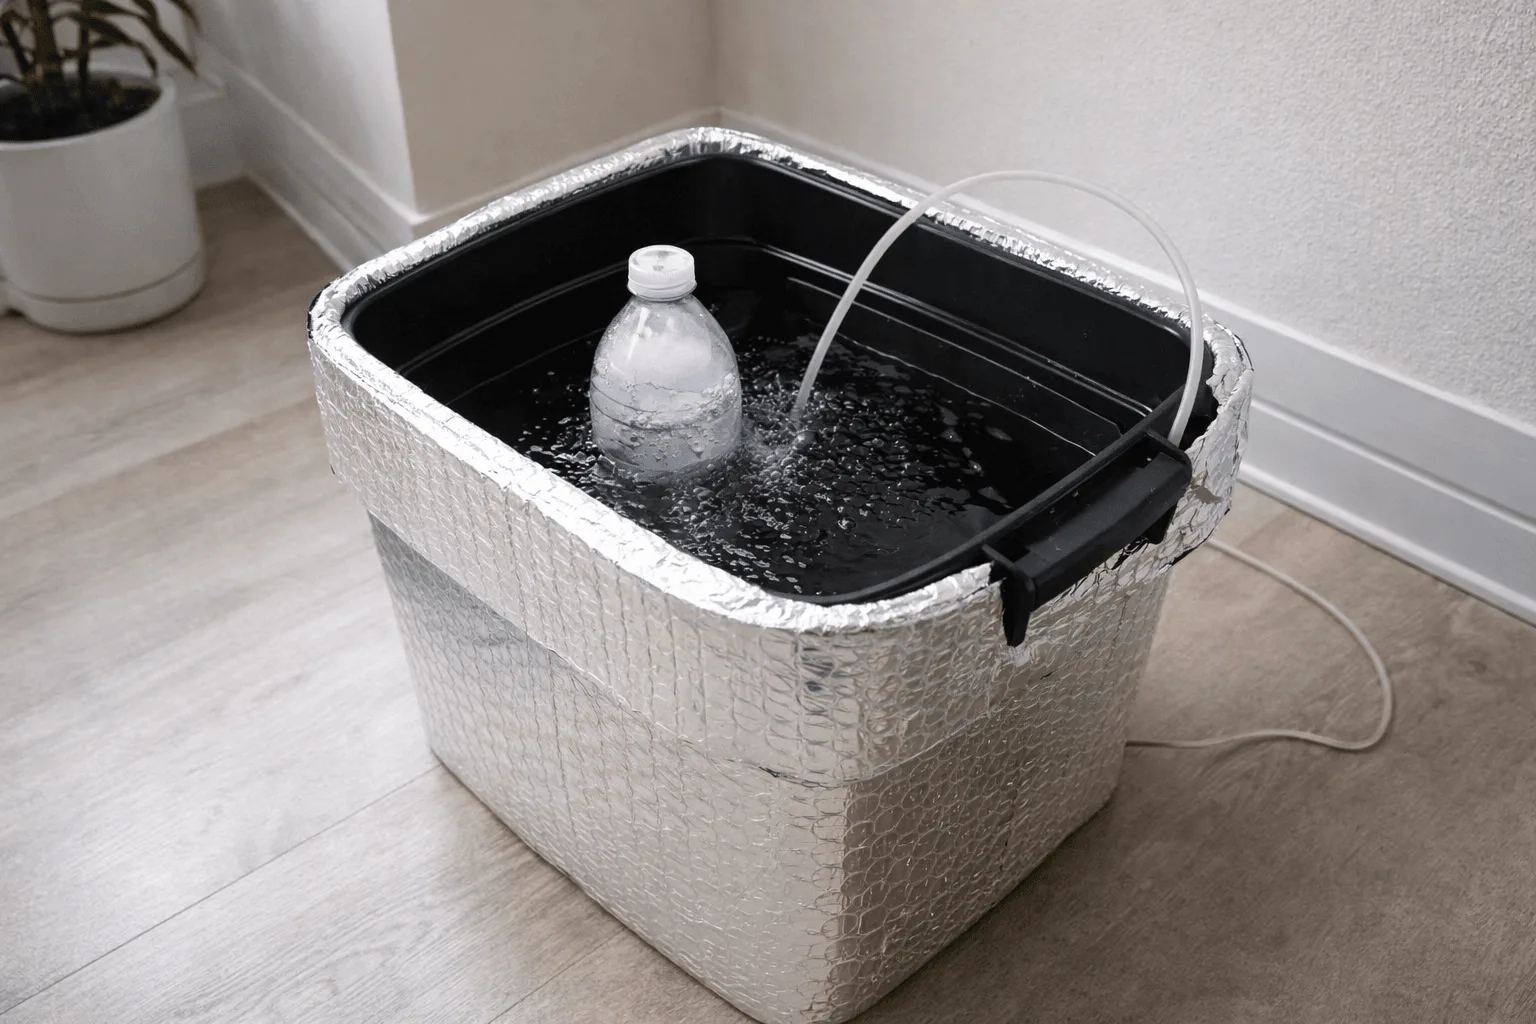
❄️ Keeping Small Reservoirs Cool
Maintaining cool water in a small apartment can be challenging. Small reservoirs, like those in countertop systems or single mason jars, heat up very quickly because they lack thermal mass. The powerful LED grow lights sitting just inches above the water certainly do not help the situation, radiating heat directly into your nutrient solution.
To combat this, I wrap my Kratky jars in reflective foil or paint them flat black to block light and heat. For my larger Deep Water Culture tote, I occasionally drop in a frozen plastic water bottle during peak summer heat. This simple trick drops the temperature by exactly 4 degrees in just ten minutes without diluting the nutrient mixture.
🚿 Flushing Your System to Prevent Salt Buildup
🧼 What Is a Hydroponic Flush?
Over time, plants leave behind certain mineral salts they do not need at that specific stage of growth. These unused salts accumulate on the roots, the air stones, and the sides of your plastic reservoir. Eventually, this crusty white buildup becomes toxic, altering the pH drastically and preventing the plant from absorbing fresh food.
Flushing is the simple process of clearing out these old, stubborn salts. You run plain, pH-balanced water through your system for a short period. This acts like a reset button for your plant’s root zone, washing away the toxic buildup and allowing the roots to breathe and eat normally again. It is a critical maintenance step for any long-term fruiting plant.
🔄 How to Perform a Routine Flush
I recommend flushing your system every three to four weeks. First, dump out all the old nutrient solution and scrub the sides of the reservoir. Next, refill the container with plain water adjusted to a pH of 6.0. Let the system run normally with the air pump on for exactly 24 hours.
The plants will drink the clean water and shed the excess salts trapped in their root tissue. Finally, dump the flush water down the drain and refill the system with a fresh, perfectly balanced batch of hydroponic nutrients. My indoor spinach yields increased by roughly 30% after I started doing this regularly.
→ How to prevent root rot in small hydroponic systems
→ DWC vs Kratky for apartment beginners
→ All nutrients and water guides
→ All hydroponic growing guides
💬 A Word From Sarah
Nutrients were the thing that almost made me quit altogether. I had the jars, the seeds, the grow light. I thought I was doing everything right. But I was using the wrong food, in the wrong water, at the wrong pH, and nothing was working. Everything I grew just slowly died and I had no idea why.
The day I finally tested my tap water and saw 7.8 on the screen, it all clicked. That one number explained every plant I had ever killed. I was not doing anything wrong. I just did not know to check that one thing.
You do not need expensive nutrients or a complicated setup to grow well. You need to understand what your water is doing before anything else. Get the pH right first. Learn what EC actually means. Everything else becomes much easier once those two numbers make sense to you. Take it one step at a time. Your plants will tell you exactly what they need if you know how to read the signs.
❓ Frequently Asked Questions
🌱 What nutrients do beginners need to start hydroponics at home?
You need a complete hydroponic-specific formula that includes the three macronutrients (nitrogen, phosphorus, and potassium) plus trace micronutrients like iron, calcium, and magnesium. Standard houseplant fertilizers will not work because they rely on soil microbes to become usable. Always buy a formula labeled specifically for hydroponics or water-based systems, and add a separate Cal-Mag supplement if you use reverse osmosis or distilled water.
🔄 How often should I change the water in a small apartment hydroponic system?
Change your reservoir water completely every 10 to 14 days for leafy greens and herbs. For heavy-feeding fruiting plants like cherry tomatoes, do a full change every 10 days. Between changes, top off with plain, pH-adjusted water only. Never add additional nutrients when topping off, as that will cause the concentration to spike as water evaporates.
🟡 Why are my hydroponic plants turning yellow even though I am feeding them?
Yellow leaves while feeding almost always point to pH lockout, not a lack of nutrients. If your pH is outside the 5.5 to 6.5 range, the food is present in the water but chemically unavailable to the roots. Test your pH first before adding more nutrients. For a full breakdown of causes and fixes, read the guide to yellow leaves in hydroponic plants.
🚿 Can I use tap water for hydroponics, or do I need filtered water?
Tap water works fine for most apartment growers, but you must test it first. High pH tap water (above 7.0) will cause immediate nutrient lockout. High chlorine levels can also damage sensitive roots. If your tap water is heavily chlorinated, let it sit uncovered in a bucket for 24 hours before use, or run it through a basic carbon filter. Always pH-adjust before adding nutrients.
⚗️ What is the correct EC for hydroponic herbs and leafy greens?
Start seedlings at an EC of 0.5 to 0.8 to avoid burning fragile roots. Increase to 1.2 to 1.6 once the plant enters the vegetative stage with three or four sets of true leaves. For mature leafy greens like lettuce and spinach, 1.4 to 1.8 is a solid long-term target. Heavy-feeding fruiting plants like cherry tomatoes can handle 2.0 to 2.5 at full production. Always raise EC gradually rather than jumping to a higher level all at once.
🔥 How do I fix nutrient burn in hydroponics?
As soon as you see crispy brown tips on the leaves, remove 50% of your reservoir water and replace it with plain pH-adjusted water. Check your EC meter to confirm it has dropped before adding anything else. Do not prune the burnt leaves right away, as the plant is still using them. If the EC was well above your target range, do a full reservoir flush with clean water for 24 hours before mixing a fresh, correctly diluted batch of nutrients.
💧 Should I add nutrients every time I top off my reservoir?
No. When you top off with plain water, you are replacing water that evaporated while the nutrients stayed behind. Adding more nutrients on top of that raises the EC dangerously high over time. Top off with plain, pH-adjusted water only. Only add fresh nutrients when you do a complete reservoir change every 10 to 14 days. Use your EC meter to monitor the concentration between changes so you can catch any unexpected spikes early.
Happy growing! 🌿
— Sarah, Urban Hydro Space

Sarah is the founder of Urban Hydro Space and an indoor gardening enthusiast dedicated to helping apartment dwellers grow fresh herbs and vegetables in small spaces. With hands-on experience testing hydroponic systems, she shares practical tips and honest product reviews to make indoor gardening accessible for beginners.