⏳ 11 min read · Last updated: April 2026
Knowing exactly how to top off hydroponic water saved my apartment garden from endless cycles of nutrient burn. I used to pour full-strength nutrient solution into my small jars every time the water level dropped. I assumed my fast-growing basil was eating all the food. Within ten days, the leaf edges turned crispy brown, and the roots looked dark and stressed.
I didn’t realize that plants drink liquid much faster than they consume minerals. The water evaporated into my dry apartment air, leaving a dense soup of concentrated fertilizer behind. By adding more nutrients, I was making the problem worse. Once I started doing top-offs the right way, my plants stabilized, and the crispy leaves vanished. If you’re just getting started, the complete beginner’s guide to apartment hydroponics covers how to set up your first system before diving into maintenance routines like this one.
- Top off daily with plain pH-adjusted water for most small systems.
- Always leave a 1 to 2 inch air gap when refilling Kratky jars so air roots can breathe.
- Perform a full reservoir change every 2 weeks to flush out mineral salt buildup.
- Keep your top-off water between 65 to 72°F (18 to 22°C) to prevent sudden root shock.

- You want zero noise and minimal setup → Start with Kratky Mason Jars for basil
- You have a dark apartment with little sun → Choose Countertop Smart Gardens for lettuce
- You want the fastest growth possible → Build a Small Storage Tote DWC for mint
- Why We Top Off Hydroponic Water With Plain Water
- How To Top Off Kratky Jars Without Drowning Roots
- How To Top Off Hydroponic Water In Countertop Smart Gardens
- Topping Off Deep Water Culture (DWC) Systems Safely
- When Should You Add Nutrients During A Top-Off?
- Step-By-Step Process To Top Off Hydroponic Water
- What To Check If Top-Offs Cause Sudden Yellow Leaves
- A Word From Sarah
- Frequently Asked Questions
💧 Why We Top Off Hydroponic Water With Plain Water
Many apartment growers assume they need to keep feeding their plants. It makes sense on the surface. If the tank is half empty, the plant must have eaten half the food. In reality, indoor setups suffer from high evaporation rates.
When you top off hydroponic water, you’re usually replacing moisture that escaped into your dry apartment air. The minerals don’t evaporate. They stay in the jar, meaning the remaining liquid becomes saltier and stronger over time. Adding plain water dilutes those remaining salts back to a safe level.
⚗️ Understanding the evaporation trap
If you start a fresh batch of basil at EC 1.8, the plant will drink the liquid throughout the week. By day five, the water level might drop by half. If you measure the remaining liquid, you’ll often see the concentration has spiked above EC 2.4. To fix this concentration spike, you need to add plain water back into the system. The foolproof guide to growing hydroponic basil in an apartment covers the full setup and EC management strategy for basil specifically.
If you pour more fertilizer into that jar, you risk pushing the concentration past the point where roots can function. When a plant drinks, it relies on a delicate balance of internal and external pressure. The water inside the roots must be less salty than the water in the reservoir. As evaporation steals pure water from your jar, the remaining liquid grows dense with leftover minerals, flipping the osmotic pressure backward.
The salty reservoir water begins pulling moisture out of the plant roots to equalize the environment. You’ll notice your basil stems drooping even though they sit in a full cup of liquid. Adding plain water dilutes the reservoir and restores the proper flow of moisture into the plant. That said, it’s worth checking the pH of your plain water before pouring it in. Use the free pH and nutrient calculator to find the exact target ranges for your specific herbs.
🧪 Plain water versus tap water
When I say plain water, I don’t mean you can turn on your sink and spray it directly into your reservoir. Tap water contains chlorine and chloramines that can stress young roots. You’ll want to prepare your top-off water ahead of time to keep your plants healthy.
Good ways to prep your top-off water include:
- Filling a gallon jug and leaving it uncapped for 24 hours so chlorine dissipates
- Running tap water through a standard carbon filter pitcher
- Using distilled water for very small, sensitive setups

Even when using plain water, you still need to balance the acidity. Most general herbs require a range of pH 5.5 to 6.5 to absorb minerals properly. I use diluted phosphoric acid as a pH Down, but if you prefer a chemical-free alternative, food-grade citric acid works. Just know that citric acid is less stable and the pH will drift upward faster, requiring more frequent testing.
→ How Often Should You Change Water In A Small Hydroponic System
→ Best pH Meter for Hydroponics Beginners (Honest Apartment Review)
🩴 How To Top Off Kratky Jars Without Drowning Roots
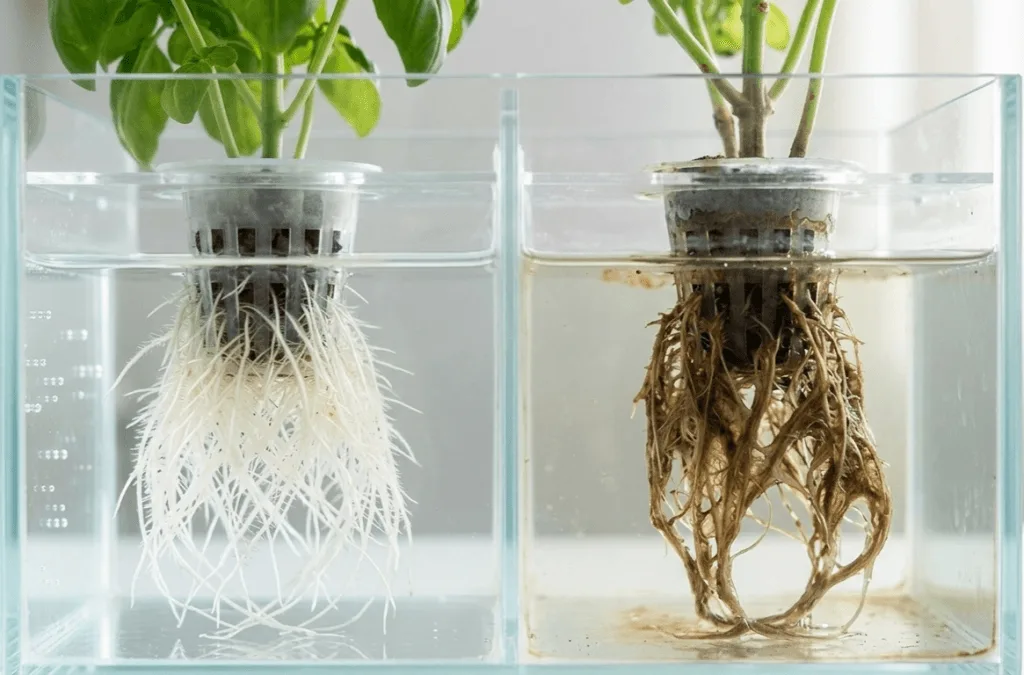
The Kratky method is fantastic for apartment beginners because it requires no pumps and makes no noise. You just set a plant in a jar of nutrient water and let it grow. As the water level drops, the plant grows specialized air roots in the empty space to breathe oxygen.
When you top off hydroponic water in a Kratky jar, you have to protect those delicate air roots. If you fill the jar all the way back to the net cup, you’ll drown the plant. The roots become stressed and the plant will decline if left uncorrected.
⏱️ Finding the perfect air gap
Once your plant is established, you must respect the air root zone. I like to let the water drop until the jar is only one-third full before I add any liquid. When I do pour, I follow strict limits to keep the oxygen flowing.
Rules for maintaining the Kratky air gap:
- Never fill the jar higher than the halfway mark for mature plants.
- Ensure at least 1 to 2 inches of roots remain exposed to the air above the waterline.
- Always top off by pouring down the side of the glass, avoiding direct splashing on the upper roots.
If you’re growing something like lettuce, it drinks fast. The guide to growing hydroponic lettuce on your countertop has the full level management breakdown for lettuce-specific Kratky setups. Track your exact harvest date so you know when the plant reaches its peak consumption phase. In the final weeks, you might find yourself adding a few cups of plain water every two days just to keep the bottom roots wet.
🔍 Troubleshooting jar top-offs
Sometimes you add plain water to a Kratky jar and the plant droops the next morning. This usually means you missed a step in preparation. The most common culprit is temperature shock affecting the lower root mass.
If your apartment sits at 70°F (21°C) and you pour in cold tap water straight from the pipes, the roots will shut down. Always let your pitcher sit on the counter until it reaches the optimal root zone temp of 65 to 72°F (18 to 22°C). You’ll also want to verify that light isn’t sneaking in.
If you removed a sock or sleeve to check the water level and forgot to put it back, algae will bloom in the fresh water. Cover all holes tight to keep the reservoir dark. If you catch algae early, you can often fix it by doing a full water change and wiping the inside of the jar with a clean paper towel. The full guide on why algae keeps growing in hydroponic jars and how to stop it covers prevention in more detail.
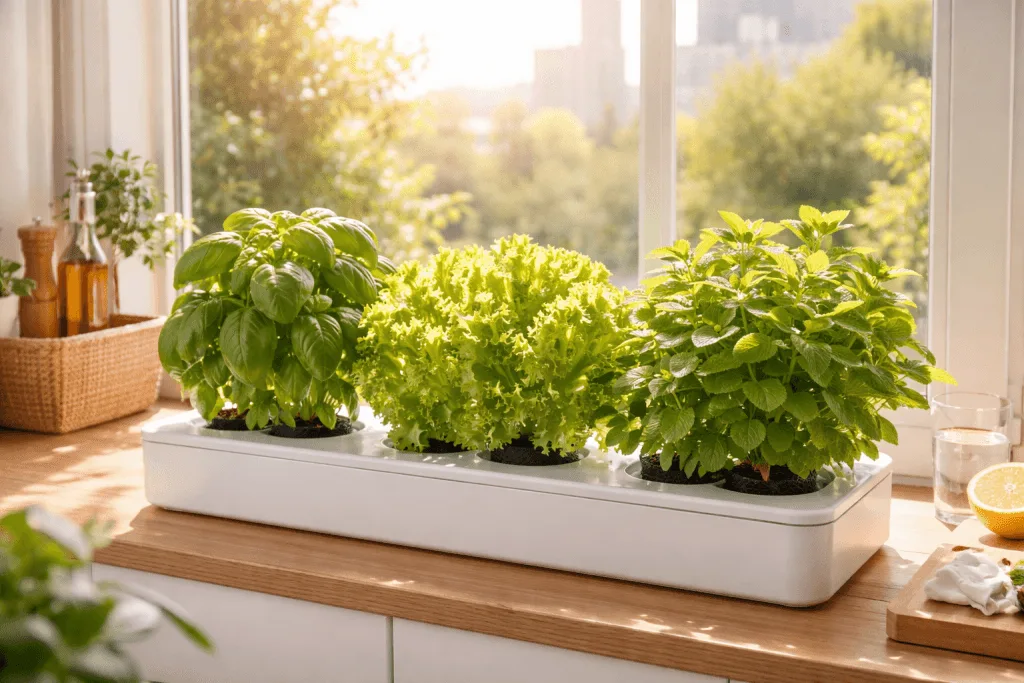
💡 How To Top Off Hydroponic Water In Countertop Smart Gardens
Plug-and-play systems are brilliant for studio apartments because they handle the lighting and water circulation for you. Because they use a small internal pump to move water over the roots, the way you top off hydroponic water is slightly different than a static jar. If you haven’t picked one yet, the 3 best countertop hydroponic systems for apartment beginners breaks down which units handle refilling the most smoothly.
These units hold multiple plants in a very small basin. A typical six-pod system might only hold one gallon of liquid. With six hungry herbs fighting for space, the liquid level drops fast, and the concentration spikes hard.
🚨 Managing the low water alarm
Most smart gardens feature a blinking light or a beeping alarm when the water drops below a certain threshold. I advise against waiting for the alarm to sound. By the time the low-water sensor triggers, the remaining liquid is dense with salts.
Better habits for smart garden maintenance include:
- Lift the watering flap and peek inside every morning when you make coffee.
- Keep a pitcher of plain, pH-balanced water sitting right next to the unit.
- Top off the tank whenever it drops an inch below the fill line.
- Do a full reservoir change every 2 weeks by lifting the entire deck off and dumping the old liquid in the sink.

🔆 Keeping the pump quiet
Countertop systems use small submersible water pumps to spray the roots. When the water level gets low, these pumps start pulling in air alongside the liquid. This creates a loud gurgling or slurping sound that echoes through a small apartment.
If you top off hydroponic water frequently, the pump remains fully submerged and runs silently. Should the pump start rattling even when full, unplug the unit and check the intake grate. Floating roots often get sucked against the plastic grill, starving the pump of water and causing it to vibrate against the plastic basin.
You can use a small pair of scissors to trim stray roots away from the intake slots. Once the intake is clear, the pump will return to a quiet hum. You’ll want to check this area once a week if you grow aggressive rooting plants like mint. Learn more about keeping your equipment silent here.
🌊 Topping Off Deep Water Culture (DWC) Systems Safely
Deep Water Culture totes offer a larger buffer for your plants, making them more forgiving than small jars. Because DWC uses an air pump to blast oxygen bubbles into the liquid, the rules for refilling change slightly. You don’t need a massive air space, but you still can’t fill the tote to the brim.
The continuous bubbling action means the water is aerated. This vigorous movement also splashes water upward, keeping the net cups moist. Understanding how to manage this dynamic environment prevents disaster. For a full side-by-side breakdown of which system suits your apartment, the DWC vs Kratky comparison for apartment beginners is worth reading before you commit to a setup.
📋 Managing the air stone gap
When refilling a DWC tote, you must leave a small gap to protect the plant stems. If the water touches the bottom of the net cup, the growing medium will become soggy. Wet rockwool stems invite rot and mold.
Good practices for DWC water levels:
- Leave a 1 to 2 inch gap between the waterline and the bottom of the net cup.
- Rely on the bursting bubbles to mist the upper roots.
- Check the airline tubing every time you open the lid to ensure it hasn’t slipped off the stone.
If you notice the rockwool cube feels soggy to the touch, your water level is too high. You’ll need to scoop out a few cups of liquid. Once you establish the correct level, the air pump will do the heavy lifting. Keep your system clean to prevent root rot from taking hold.
🍓 Dealing with rapid evaporation in DWC totes
Even though totes hold more liquid, the air pump pushes dry apartment air through the water. This accelerates evaporation compared to a stagnant Kratky setup. You’ll find yourself needing to top off hydroponic water in DWC more often than you might expect.
Check the water level twice a week by peeking through the designated access port. When you pour fresh water in, direct the stream away from the air stone. A heavy cascade of water can detach the tubing, leaving your plants without oxygen. Gently pour the liquid down the inner wall of the plastic tote.
Because the volume is larger, a DWC tote maintains stable EC levels better than small jars. You’ll usually just need plain water to bring the level back up. The robust root mass of a mature mint or basil plant will drink fast, so keep a gallon jug of prepared water nearby at all times.
✂️ When Should You Add Nutrients During A Top-Off?
I spend a lot of time telling beginners to use plain water for top-offs. In most small systems, it’s the safest path. However, there are a few specific scenarios where your plants will legitimately run out of food before the two-week water change.
If you’re growing heavy feeders or keeping a large plant in a tiny jar, plain water might dilute the reservoir too much. If the nutrient concentration drops below EC 1.0 for mature herbs, the lower leaves will start turning pale green or yellow as the plant cannibalizes itself for mobile nutrients like nitrogen.
🌿 The dilution method for heavy feeders
If you measure your remaining tank liquid and find the EC is low, you’ll need to add some food. You don’t want to pour raw fertilizer directly into the basin. The concentrated drops will burn any roots they touch before they disperse.
Instead, mix a weak top-off batch in a separate pitcher. If your target is EC 1.5, mix a fresh batch at EC 1.0. Pouring this mild solution into the reservoir raises the water level while gently nudging the overall nutrient concentration upward. Using the right hydroponic nutrients prevents mineral fallout. For a full breakdown of which nutrients work best at which growth stages, the beginner hydroponic nutrients guide with feeding schedule has exact mixing ratios for small apartment systems.
| Current Tank EC Reading | What To Mix In Your Top-Off Pitcher |
|---|---|
| Above target (e.g., EC 2.2) | Plain pH-balanced water only |
| On target (e.g., EC 1.5) | Plain pH-balanced water only |
| Slightly low (e.g., EC 1.1) | Half-strength nutrient solution |
| Very low (e.g., EC 0.6) | Time for a full reservoir change |

⏳ Reading your EC meter to decide
Your electrical conductivity meter is the only tool that can tell you what’s happening in the water. Without it, you’re just guessing based on leaf color. This is dangerous because nutrient lockout and nutrient deficiency look identical to the naked eye.
When you prepare to top off hydroponic water, dip your meter into the main tank first. Stir it gently to break up any stratified layers of salt near the bottom. If the reading is high, stick to plain water. You’ll want to trust the meter above all other signs.
Even so, don’t chase perfect numbers every day. If your basil sits at EC 1.9 instead of 1.8, let it be. Over-correcting causes more stress than a slightly high reading. Plants adapt well to minor fluctuations, provided the pH remains steady in the safe zone of pH 5.5 to 6.5.
🛠️ Step-By-Step Process To Top Off Hydroponic Water
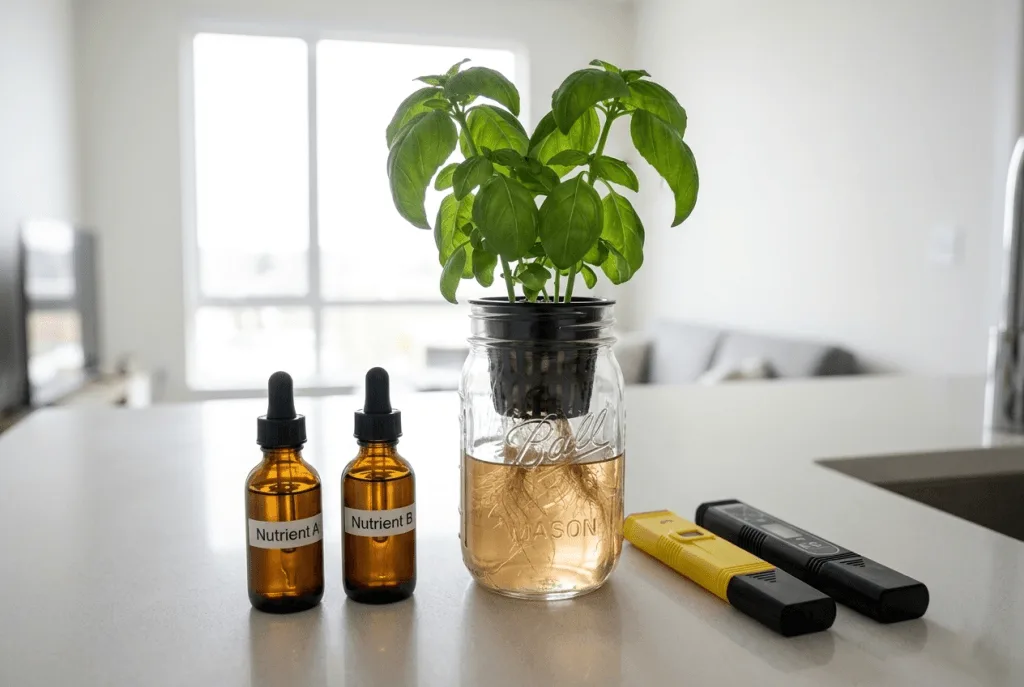
Let’s walk through the exact physical steps. Doing this right takes about five minutes, but it prevents weeks of recovery time for stressed plants. Gather your clean pitcher, your pH testing drops or digital pen, and your pH Up and Down bottles.
Never try to adjust the pH directly inside a small jar. There isn’t enough water volume to buffer the acid, and a single drop of pH Down can crash a quart jar from 6.0 to 4.0 in seconds. Always prepare the liquid in a separate container.
✅ Prepping your top-off pitcher
I keep a dedicated plastic pitcher under my kitchen sink just for my indoor garden. It prevents cross-contamination with dish soap or cooking oils. Having the right tools makes the process feel like less of a chore. Use the shopping list builder to track your supplies.
To prepare your refill water:
- Fill the pitcher with filtered tap water and let it sit until it hits room temperature.
- Test the pH of the plain water. It usually comes out of the tap around 7.0 to 8.0.
- Add one tiny drop of pH Down and stir for ten seconds.
- Test again. Repeat until you reach the pH 5.5 to 6.5 range.
- If your meter showed your tank EC was low, add a few drops of fertilizer now. Otherwise, leave it plain.

🩹 Pouring without disturbing roots
When you’re ready to top off hydroponic water, be gentle. In systems like Deep Water Culture, you’ll have an air stone bubbling at the bottom. The roots form a dense, fragile mat. If you dump a quart of water directly onto the root crown, you can snap the fine white root hairs that absorb nutrients.
Tilt your pitcher at a 45-degree angle and pour slowly down the inside wall of the reservoir. Let the liquid slide into the tank rather than splashing down. Once you finish pouring, check your air pump to ensure the bubbles are still breaking the surface tension.
For Kratky jars, use a narrow-spout watering can if you have one. It provides precise control so you don’t overshoot your target level. Remember to stop pouring as soon as you restore the proper liquid volume. You’ll save your plants from accidental drowning by taking your time.
⚠️ What To Check If Top-Offs Cause Sudden Yellow Leaves
Sometimes you do everything right, you top off hydroponic water with plain pH-balanced liquid, and the next day your basil leaves turn bright yellow. This is exasperating, but it follows a logical pattern. Yellowing after maintenance usually points to shock or a sudden environmental change.
- Not sure what is wrong yet → start with Diagnosing pH Swings
- You suspect temperature issues → jump to Fixing Root Shock
🩺 Diagnosing pH swings
When you pour fresh water into a reservoir with old water, the pH can swing wildly. Older nutrient solution often drifts downward as plants release acidic exudates from their roots. If your tank was sitting at pH 5.0 and you dump in plain tap water at pH 8.0, the sudden collision causes certain minerals to lock out.
Iron lockout is the most common result of a rapid pH swing. It shows up as yellowing on the youngest, top leaves while the veins remain green. To fix this, you must stabilize the tank. Don’t add more chemicals to the stressed system.
Instead, perform a full reservoir change using fresh, correctly balanced nutrient water at a safe EC 1.5. The plant will absorb the fresh iron within a few days. Read more about fixing yellow leaves before they drop off.
🔎 Quick diagnosis table
| What you see | Most likely cause | Check this first |
|---|---|---|
| 🟡 Top leaves turn yellow but veins stay green | Iron lockout from pH swinging too high | Test reservoir pH, adjust to 5.5 to 6.5 |
| 🟡 Bottom older leaves turn pale all over | Nitrogen deficiency from EC dropping too low | Check EC, if below 1.0, add weak nutrients |
| 🟡 Entire plant wilts suddenly after top-off | Root shock or drowned air roots | Ensure a 1 to 2 inch air gap exists in Kratky jars |

🍃 Fixing root shock from cold water
I mentioned temperature earlier, but it bears repeating. Roots are sensitive to sudden thermal drops. If your grow light keeps the canopy warm, but you shock the root zone with 55°F (13°C) tap water, the plant will panic and stop drinking for hours.
The leaves will wilt despite sitting in a full tank of water. If you made this mistake, don’t attempt to warm the reservoir with a heater. Small volumes of water heat up too fast, and you risk pushing the temperature above 72°F (22°C), which depletes oxygen and invites root rot.
Let the ambient room temperature slowly warm the jar over the next few hours. The plant will usually recover its posture by the next morning once the water stabilizes. You’ll learn to leave your pitcher on the counter moving forward.
💬 A Word From Sarah
My pH crashed to 4.6 overnight after I added too much pH Down trying to fix a 7.1 reading during a routine top-off. I was rushing before work and squirted the acid directly into my one-gallon mint reservoir. When I got home, the roots looked grey, and the mint leaves were curled inward like dry paper. I panicked and did a full water change at midnight. The mint recovered, but it took two solid weeks of zero growth before new green shoots appeared. I now add pH Down in tiny single drops to my pitcher, wait ten minutes, and test again before pouring anything into the main tank.
❓ Frequently Asked Questions
🌱 Can I top off hydroponic water with tap water?
You can use tap water if it’s filtered and left out overnight to let the chlorine evaporate. You’ll still need to adjust the pH to sit between 5.5 and 6.5 before adding it to your system. A standard carbon filter pitcher removes chlorine well and works for most small apartment setups without any special equipment.
☀️ How often should I top off hydroponic water in small jars?
Small jars often need topping off every two to three days once the plants mature. Check the water level daily as a habit. When the liquid drops by an inch or more, add fresh plain water to restore the level. Always pour slowly down the side of the glass to avoid splashing the upper air roots and causing shock.
📌 Should I add nutrients every time I top off hydroponic water?
No. Adding nutrients during every top-off will cause the EC to spike dangerously high over time. Plants drink water faster than they consume minerals, so the concentration rises on its own. Top off with plain pH-adjusted water for most routine maintenance and only add fertilizer if your EC meter confirms the concentration has dropped significantly below your target range.
🔗 Why do leaves turn yellow after I top off hydroponic water?
Yellow leaves after refilling usually point to a sudden pH swing or root shock from cold tap water. Always let your top-off water reach room temperature and test the pH before pouring it into your reservoir. If nutrient lockout occurs from the pH swinging, a full water change with freshly balanced solution is the fastest way to fix the imbalance.
🍅 Does topping off replace a full hydroponic water change?
No. You must still perform a full reservoir change every two weeks. Topping off only replaces evaporated liquid but doesn’t remove the mineral buildup or plant waste that accumulates at the bottom of the container. Drain the old water and refill with fresh nutrient solution to reset the balance your roots need for healthy, consistent growth.
🥬 What happens if I top off a Kratky jar too high?
If you fill a Kratky jar to the very top, you drown the oxygen-breathing air roots in the gap zone. The plant will show signs of suffocation within a day, and the roots may turn brown and slimy. Always leave a two-inch air gap between the waterline and the net cup. That dry zone is the plant’s primary source of atmospheric oxygen.
🥦 How do I measure EC before topping off hydroponic water?
Stir your reservoir gently to break up any salt stratification near the bottom, then dip an EC meter into the liquid and wait for the reading to stabilize. If the number is higher than your starting target, you only need plain water to dilute the concentration. Only add a weak nutrient mix if the final reading drops well below your target range.
Happy growing! 🌿
— Sarah, Urban Hydro Space

Sarah is the founder of Urban Hydro Space and an indoor gardening enthusiast dedicated to helping apartment dwellers grow fresh herbs and vegetables in small spaces. With hands-on experience testing hydroponic systems, she shares practical tips and honest product reviews to make indoor gardening accessible for beginners.